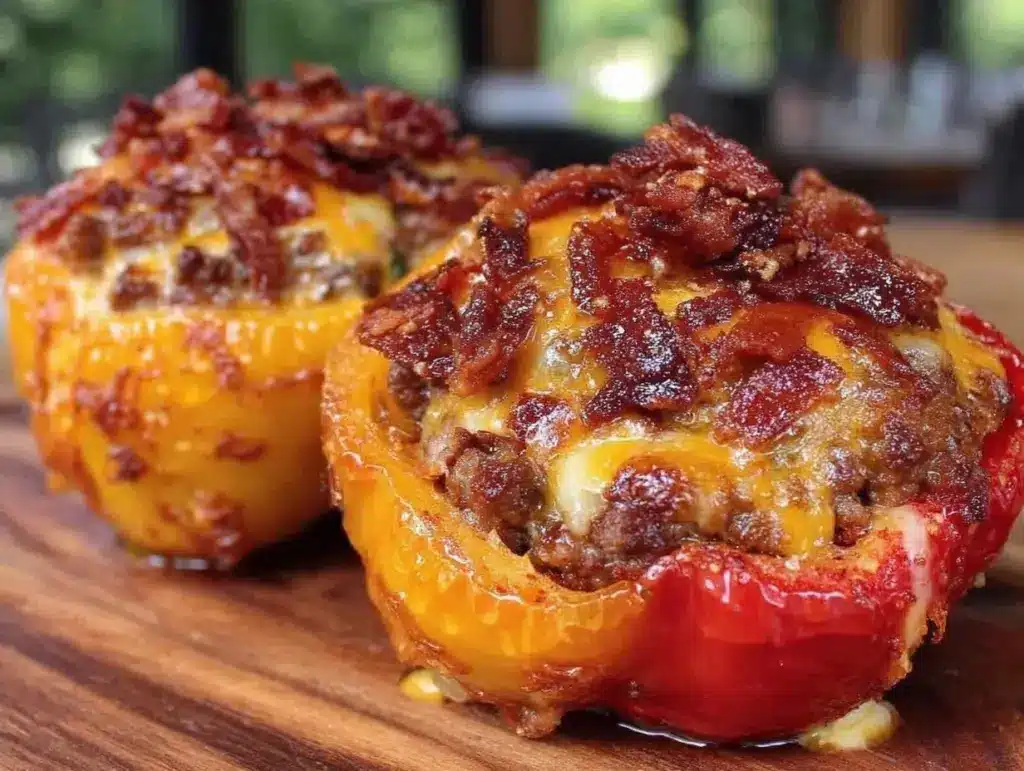
“You know that feeling when you walk into a kitchen, and the smell just pulls you in?” Well, that’s exactly what happened last Friday evening. I was at my friend Jake’s house, and he was casually flipping bacon while telling me about his latest “kitchen experiment.” The sizzle was hypnotic, but honestly, I wasn’t expecting much beyond the usual. Then came the surprise: bacon cheeseburger stuffed bell peppers. I mean, who thinks to stuff a bell pepper with all the goodness of a cheeseburger wrapped in bacon? Not me, that’s for sure.
It was one of those moments where I made a mess trying to snap a quick photo, forgot to set the timer, and almost burned the cheese—but somehow, the whole thing just worked. The juicy, savory filling nestled inside crisp-tender peppers made me rethink what a stuffed pepper could be. Maybe you’ve been there too—skeptical at first but ending up hooked after one bite.
Since that evening, I kept making this recipe over and over. It’s honestly become a go-to comfort meal, especially when I want something satisfying but not a total hassle. Let me tell you, the balance of smoky bacon, melty cheese, and that fresh pepper crunch is something I didn’t know I was missing. It’s not just another stuffed pepper recipe; it’s a little dinner party in every bite, with zero fuss and maximum flavor.
Why You’ll Love This Recipe
After testing this recipe several times (and sharing with friends who gave it two thumbs up), I can confidently say it hits all the right notes. Here’s why it stands out:
- Quick & Easy: Ready in about 40 minutes, perfect for busy weeknights or when you’re craving something hearty but don’t want to slave over the stove.
- Simple Ingredients: No need to hunt down weird groceries. Most of these are pantry staples or things you can find at any grocery store.
- Perfect for Dinner or Casual Gatherings: Whether it’s a laid-back family meal or a small get-together, these peppers impress without the stress.
- Crowd-Pleaser: Bacon and cheeseburger flavors? Need I say more? Even picky eaters tend to ask for seconds.
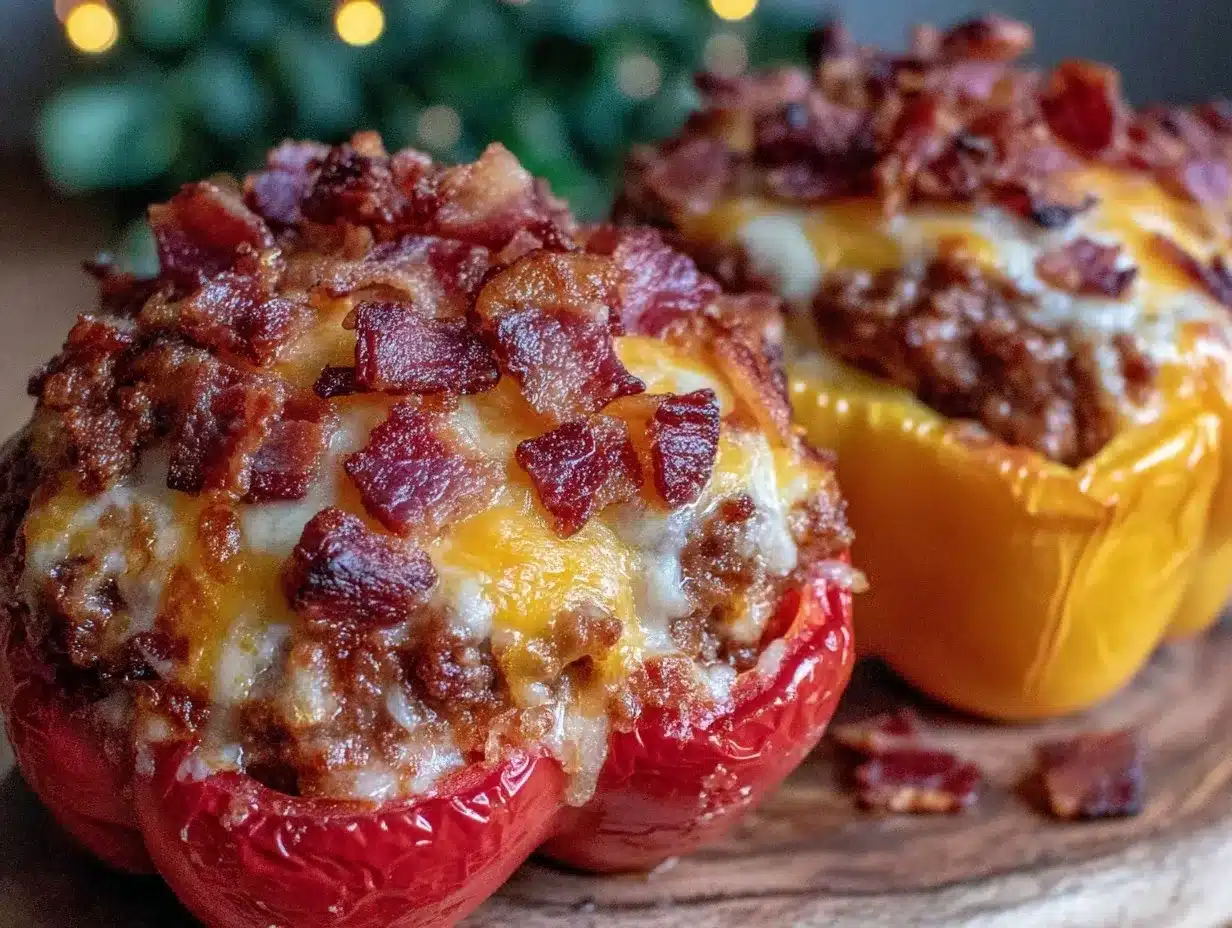
- Unbelievably Delicious: The melty cheese combined with the smoky bacon and juicy beef filling inside a sweet bell pepper shell is next-level comfort food.
What makes this recipe different? Well, it’s the way the bacon is cooked crisp and chopped, mixing with seasoned ground beef and cheddar to create layers of texture and flavor. Plus, the peppers roast just right—still holding their shape with a slight bite. No soggy peppers here! Honestly, it’s the kind of recipe that makes you close your eyes after the first bite and savor the simple pleasure of classic American flavors reinvented.
What Ingredients You Will Need
This recipe uses straightforward, wholesome ingredients to build that bold cheeseburger flavor packed inside fresh bell peppers. Most of these are easy to find, and you can swap a few if needed.
- Bell Peppers (4 large, any color, tops sliced off and seeds removed) – I love using red or yellow for a sweeter touch.
- Bacon (6 slices, chopped) – I go for thick-cut for that perfect crispiness. Oscar Mayer works well if you want a reliable brand.
- Ground Beef (1 lb / 450 g, 80/20 lean-to-fat ratio) – This fat ratio keeps the filling juicy but not greasy.
- Onion (1 small, finely diced) – Adds a subtle sweetness and crunch.
- Garlic (2 cloves, minced) – For that savory punch.
- Cheddar Cheese (1 cup shredded, about 100 g) – Sharp cheddar works best for bold flavor, but you can blend in mozzarella for extra meltiness.
- Ketchup (2 tbsp) – The nostalgic burger tang.
- Mustard (1 tbsp, yellow or Dijon) – Adds a little zip.
- Worcestershire Sauce (1 tsp) – Deepens the beefy flavor.
- Salt and Black Pepper (to taste) – Season well, trust me.
- Olive Oil (1 tbsp) – For sautéing.
Substitution tips: If you want a lighter version, swap ground beef for ground turkey or chicken. For dairy-free, use vegan cheese alternatives. And if you’re avoiding bacon, smoked paprika sprinkled on the beef adds nice smokiness.
Equipment Needed
To make these bacon cheeseburger stuffed bell peppers, you won’t need fancy stuff—just the basics most kitchens have:
- A large skillet or frying pan (I prefer cast iron for even heat and that great sear)
- Baking dish or casserole pan (to hold the stuffed peppers upright while baking)
- Mixing bowl (a medium one for combining beef and seasoning)
- Sharp knife and cutting board for prepping peppers, onion, and bacon
- Measuring spoons and cups for accuracy
- Aluminum foil (optional, to loosely cover the baking dish if the peppers brown too fast)
If you don’t have a cast iron pan, a nonstick skillet works fine. For a budget-friendly option, any oven-safe dish will do—just make sure the peppers fit snugly standing up. I learned the hard way that peppers tend to tip over if the dish is too big, which makes a mess!
Preparation Method
- Preheat your oven to 375°F (190°C). This ensures the peppers roast perfectly without drying out.
- Prepare the bell peppers: Slice the tops off and remove the seeds and membranes. Set aside the pepper tops for later or chop them finely for mixing into the filling.
- Cook the bacon: In your skillet over medium heat, cook chopped bacon until crisp, about 5-7 minutes. Use a slotted spoon to remove the bacon pieces and drain on paper towels, leaving the bacon fat in the pan.
- Sauté the onions and garlic: Add olive oil if needed, then toss in the diced onion and cook over medium heat for 3-4 minutes until translucent. Add minced garlic and cook for another 30 seconds until fragrant.
- Brown the ground beef: Add the ground beef to the skillet with the onions and garlic. Break it up with a spatula and cook until no longer pink, about 6-8 minutes. Drain excess fat if there’s too much.
- Season the beef mixture: Stir in ketchup, mustard, Worcestershire sauce, salt, and black pepper. Mix in the reserved chopped pepper tops and cooked bacon pieces. Cook for another 2 minutes, letting the flavors meld.
- Assemble the peppers: Spoon the beef mixture evenly into each bell pepper cavity. Pack it down gently but don’t overfill to avoid spills.
- Top with shredded cheddar cheese: Sprinkle about 1/4 cup (25 g) cheese on each stuffed pepper.
- Bake: Place the stuffed peppers in your baking dish and bake uncovered for 20-25 minutes, until the peppers are tender but still hold shape and the cheese is bubbly and golden.
- Rest and serve: Let the peppers sit for 5 minutes after removing from the oven. This helps the filling set and makes them easier to handle.
Pro tip: If the cheese starts browning too quickly, tent with foil halfway through baking. Also, if your peppers seem too firm, add a tablespoon of water in the baking dish to create steam and speed tenderizing.
Cooking Tips & Techniques
Cooking stuffed bell peppers might seem straightforward, but a few learned tricks make a big difference:
- Choose fresh, firm peppers: Wrinkly or soft peppers won’t hold up well. I always pick peppers with tight skin and a sturdy base so they stand upright.
- Don’t overcook the filling: Browning the beef just right is key. Overcooked beef can get dry, so keep an eye on the skillet and drain excess fat if it pools.
- Render bacon fat carefully: I learned to cook bacon slowly over medium heat to get crisp pieces without burning. The leftover fat adds flavor to the beef and onions—don’t waste it!
- Balance seasoning: Taste the beef mixture before stuffing. Sometimes a pinch more salt or a dash of Worcestershire sauce can brighten the whole dish.
- Use a timer: I once forgot peppers in the oven and ended up with sad, mushy peppers. Setting a timer makes sure you get that perfect tender-crisp texture every time.
- Prep ahead: You can assemble the peppers and refrigerate them for up to a day before baking. Just add a few extra minutes to the baking time if baking straight from cold.
Variations & Adaptations
This recipe is pretty flexible, so feel free to play around:
- Vegetarian version: Swap ground beef for cooked lentils or plant-based crumbles. Use vegan cheese and omit bacon or add smoked tempeh for a smoky twist.
- Spicy kick: Mix diced jalapeños or a pinch of cayenne into the beef filling for heat. Top with pepper jack cheese instead of cheddar.
- Low-carb option: Use ground turkey or chicken and omit ketchup, replacing it with tomato paste and spices. Serve with a side salad instead of rice or bread.
- Different cheese: Try Swiss, provolone, or a blend for a different melt and flavor profile.
- Personal twist: Once, I added caramelized mushrooms to the mix for an earthier flavor that balanced the bacon beautifully.
Serving & Storage Suggestions
These savory bacon cheeseburger stuffed bell peppers taste best warm, straight from the oven. Serve them with a simple side like a crisp green salad or oven-roasted potatoes for a full meal. A cold beer or sparkling water with lemon pairs nicely with the rich flavors.
To store leftovers, place cooled peppers in an airtight container and refrigerate for up to 3 days. For longer storage, freeze them wrapped tightly in foil or plastic wrap for up to 2 months. When reheating, thaw overnight in the fridge and warm in a 350°F (175°C) oven for 15-20 minutes to revive that fresh-baked texture.
Flavors meld beautifully after a day, so leftovers often taste even better. Just beware the peppers may soften more, so reheat gently to avoid mushiness.
Nutritional Information & Benefits
Each stuffed pepper contains roughly:
| Calories | 450-500 kcal |
|---|---|
| Protein | 30g |
| Fat | 30g |
| Carbohydrates | 12g |
| Fiber | 3g |
The bell peppers provide a healthy dose of vitamin C and antioxidants, while the beef and bacon pack protein and satiating fats. This recipe fits well into low-carb or moderate-carb diets, especially if you watch the cheese and ketchup quantities.
Keep in mind the bacon adds sodium and fat, so adjust based on your dietary needs. Personally, I find this meal balances indulgence with nutrition and keeps me full for hours—perfect for active days or cozy dinners.
Conclusion
Honestly, savory bacon cheeseburger stuffed bell peppers are one of those recipes that feel like a treat but come together without stress. They’re a brilliant way to enjoy classic burger flavors with a fresh twist that’s satisfying and fun to eat. You can tweak the filling, cheese, and spice levels to suit your taste, making it truly your own.
Why do I keep making this recipe? Because it brings comfort and joy in one neat package—plus, it’s a crowd-pleaser every single time. Give it a try, and I’d love to hear how you customize it! Drop a comment or share your twists below.
Here’s to good food and even better company!
FAQs
Can I use other types of peppers for this recipe?
Absolutely! Green, orange, or yellow bell peppers all work well. Just pick ones firm enough to hold the filling.
Is it possible to make this recipe ahead of time?
Yes! You can assemble the peppers and store them in the fridge for up to 24 hours before baking.
How do I keep the peppers from tipping over while baking?
Using a snug baking dish helps. You can also trim a thin slice off the bottom to flatten the base if needed.
Can I freeze these stuffed peppers?
Definitely. Wrap them tightly and freeze for up to 2 months. Thaw overnight before reheating.
What can I substitute if I don’t eat bacon?
Smoked paprika or smoked tempeh can add a nice smoky flavor without bacon. You can also just omit it and add extra seasoning to the beef.
Pin This Recipe!
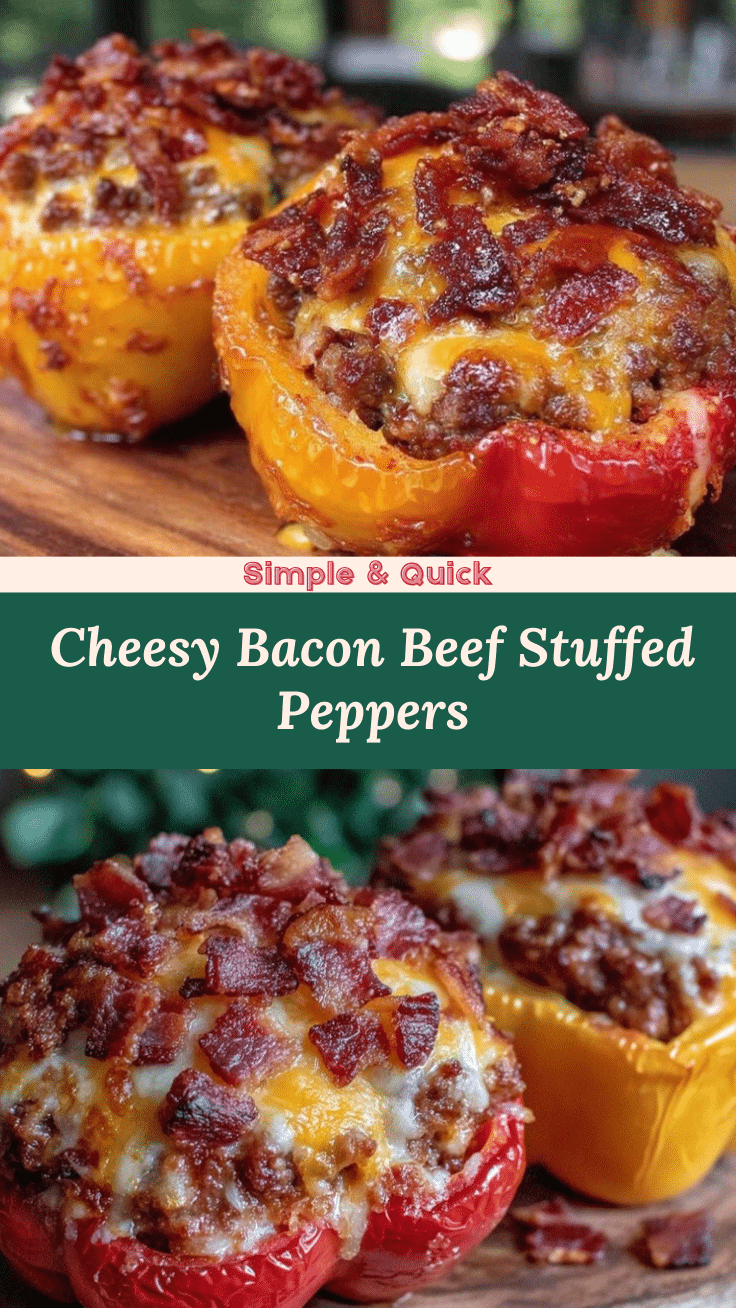
Savory Bacon Cheeseburger Stuffed Bell Peppers

A quick and easy recipe featuring bell peppers stuffed with a savory mixture of crispy bacon, seasoned ground beef, and melted cheddar cheese, perfect for a comforting dinner or casual gatherings.
- Prep Time: 15 minutes
- Cook Time: 25 minutes
- Total Time: 40 minutes
- Yield: 4 servings 1x
- Category: Main Course
- Cuisine: American
Ingredients
- 4 large bell peppers (any color, tops sliced off and seeds removed)
- 6 slices bacon, chopped (thick-cut preferred)
- 1 lb ground beef (80/20 lean-to-fat ratio)
- 1 small onion, finely diced
- 2 cloves garlic, minced
- 1 cup shredded cheddar cheese (about 100 g)
- 2 tbsp ketchup
- 1 tbsp mustard (yellow or Dijon)
- 1 tsp Worcestershire sauce
- Salt and black pepper to taste
- 1 tbsp olive oil
Instructions
- Preheat your oven to 375°F (190°C).
- Prepare the bell peppers by slicing the tops off and removing the seeds and membranes. Set aside the pepper tops for later or chop them finely for mixing into the filling.
- Cook the chopped bacon in a skillet over medium heat until crisp, about 5-7 minutes. Remove bacon pieces with a slotted spoon and drain on paper towels, leaving the bacon fat in the pan.
- Add olive oil if needed, then sauté the diced onion in the skillet over medium heat for 3-4 minutes until translucent. Add minced garlic and cook for another 30 seconds until fragrant.
- Add the ground beef to the skillet with the onions and garlic. Break it up with a spatula and cook until no longer pink, about 6-8 minutes. Drain excess fat if there’s too much.
- Stir in ketchup, mustard, Worcestershire sauce, salt, and black pepper. Mix in the reserved chopped pepper tops and cooked bacon pieces. Cook for another 2 minutes to let the flavors meld.
- Spoon the beef mixture evenly into each bell pepper cavity, packing it down gently but not overfilling.
- Sprinkle about 1/4 cup (25 g) shredded cheddar cheese on top of each stuffed pepper.
- Place the stuffed peppers in a baking dish and bake uncovered for 20-25 minutes, until the peppers are tender but still hold shape and the cheese is bubbly and golden.
- Let the peppers rest for 5 minutes after removing from the oven before serving.
Notes
If cheese browns too quickly, tent with foil halfway through baking. Add a tablespoon of water to the baking dish if peppers seem too firm to create steam and speed tenderizing. Peppers can be assembled ahead and refrigerated for up to 24 hours before baking, adding a few extra minutes to baking time if baking from cold.
Nutrition
- Serving Size: 1 stuffed bell peppe
- Calories: 475
- Sugar: 5
- Sodium: 700
- Fat: 30
- Saturated Fat: 12
- Carbohydrates: 12
- Fiber: 3
- Protein: 30
Keywords: bacon cheeseburger stuffed peppers, stuffed bell peppers, bacon recipes, cheeseburger recipe, easy dinner, comfort food


