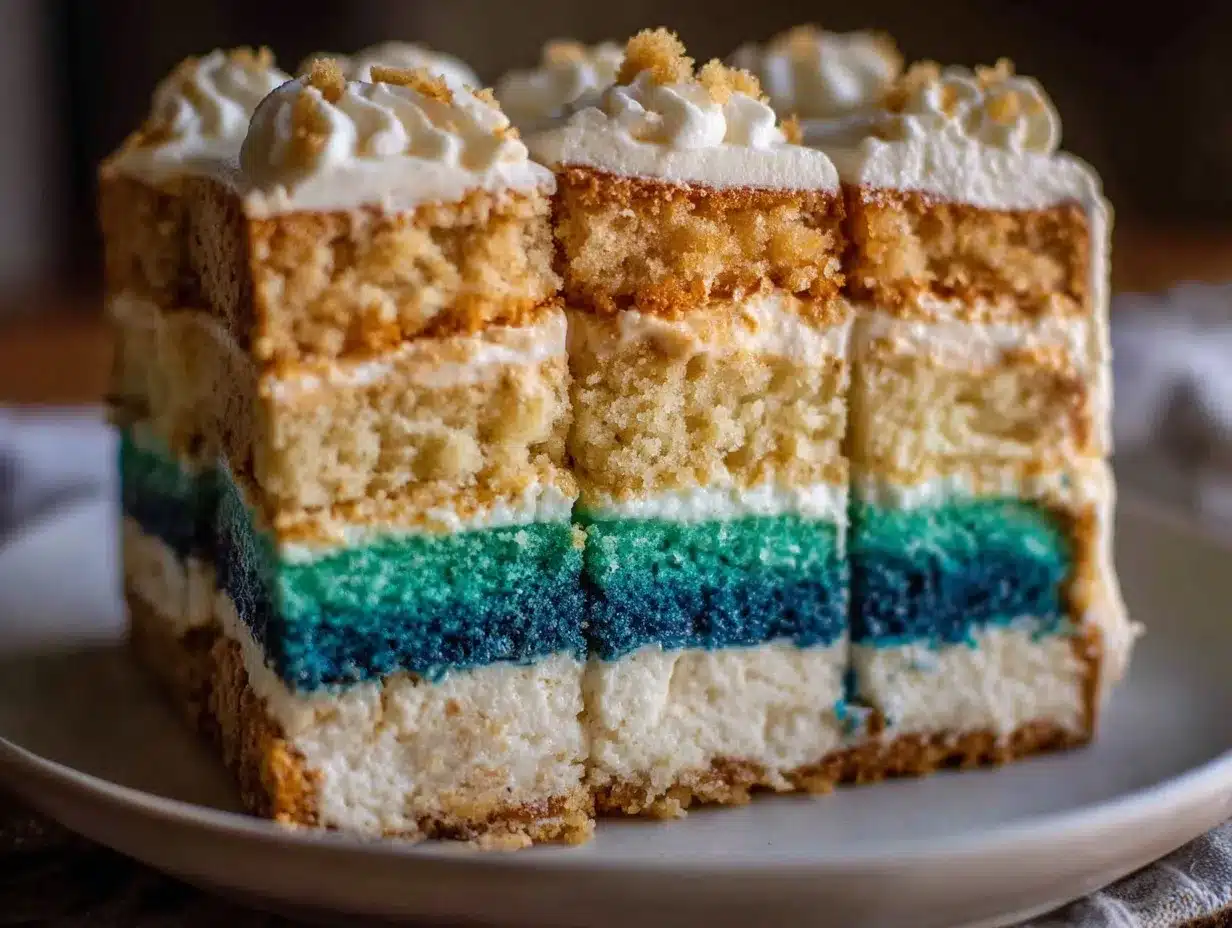
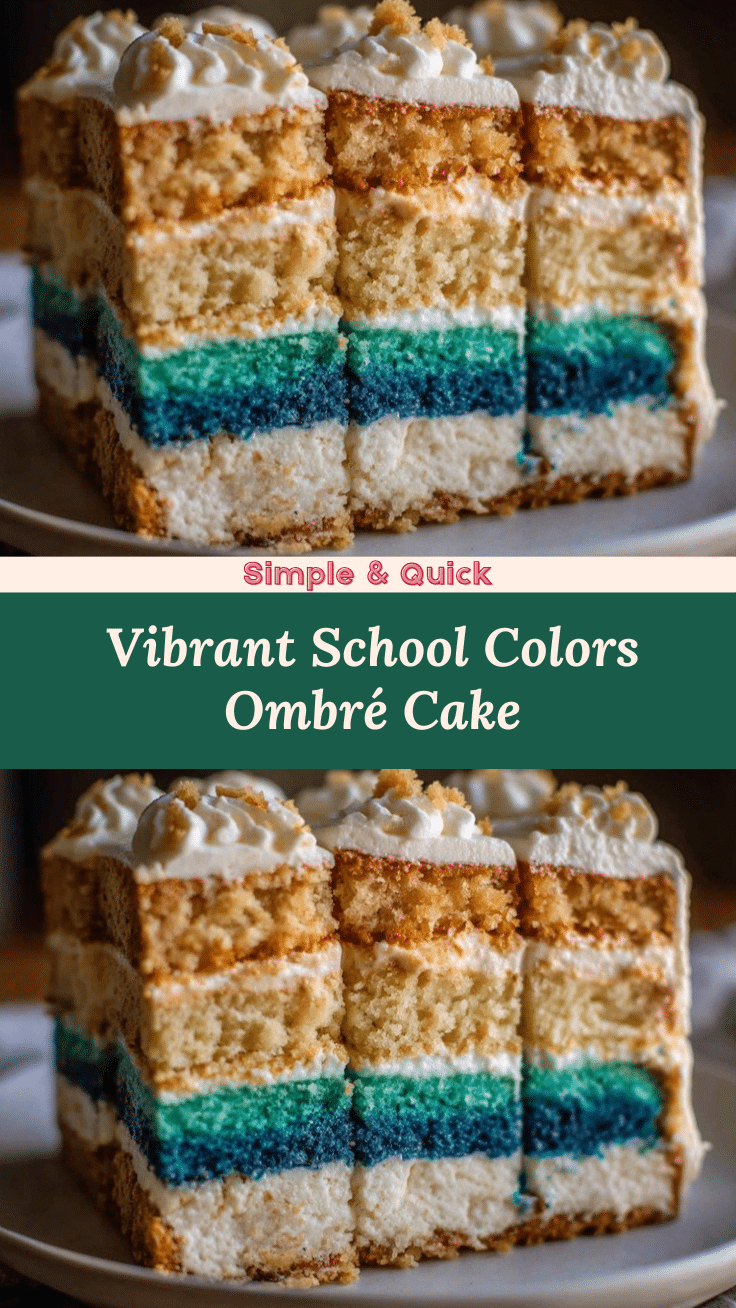
“You know that feeling when you walk into a party, and the cake just stops you in your tracks? That’s exactly what happened to me one bright Saturday afternoon at my niece’s graduation. The cake was this stunning school colors ombré layer cake, sitting pretty at the center of the table, with layers fading beautifully from deep navy to soft sky blue. Honestly, I wasn’t even planning to bake that day—I’d forgotten to bring a dessert to the celebration, and my kitchen was a chaotic mess from earlier attempts at cupcakes. But the sight of that cake sparked something. It wasn’t just about the colors; it was about capturing that spirit and pride in every slice.
I ended up borrowing a cracked mixing bowl (because, yes, my favorite was in the dishwasher), grabbed a handful of ingredients, and set to work. The first layer was a bit lumpy, and I nearly burned the edges while juggling calls, but something about this ombré layer cake felt worth the chaos. Maybe you’ve been there—the pressure of making something special, but with a kitchen that’s anything but calm. This recipe stuck with me because it’s straightforward enough for a busy afternoon, yet impressive enough to turn heads at any celebration.
Let me tell you, this isn’t your run-of-the-mill cake. It’s the kind of dessert that brings people together, where every bite whispers school pride and a little bit of magic. Whether you’re cheering on your favorite team or marking a milestone with colors that mean something, this cake has a way of making those moments sweeter.
Why You’ll Love This Recipe
From one baker to another, I’ve tested and tweaked this school colors ombré layer cake until it hits just the right note. Here’s why you’ll want to make it for your next celebration:
- Quick & Easy: The layers come together in under 90 minutes, perfect for last-minute party plans or when you’re juggling a million things.
- Simple Ingredients: No need to hunt down fancy stuff—most are pantry staples or easy to find at your local store.
- Perfect for Celebrations: Whether it’s a graduation, pep rally, or birthday, the school colors ombré effect adds that wow factor without extra fuss.
- Crowd-Pleaser: Kids and adults alike rave about the moist texture and balanced sweetness, making it a guaranteed hit.
- Unbelievably Delicious: The layers are tender, and the frosting smooth, with just the right hint of vanilla that keeps you coming back for more.
What sets this recipe apart? It’s the technique of tinting the batter in graduated shades, which creates that flawless ombré effect. Plus, the frosting recipe is a secret weapon—airy, creamy, and stable, holding up beautifully between layers and on the outside. I’ve swapped in different color combos for friends’ teams, but this blue gradient always feels like a celebration in itself. Trust me, once you see those layers come together, you’ll want to bake this again and again.
What Ingredients You Will Need
This recipe uses simple, wholesome ingredients to deliver bold flavor and a satisfying texture without the fuss. The colors come from natural and food-safe dyes, so you can feel good about every slice. Most of these items are probably sitting in your kitchen right now!
- For the Cake Batter:
- All-purpose flour – 2 ½ cups (320 g), sifted for lightness
- Baking powder – 2 ½ teaspoons (10 g), for lift
- Salt – ½ teaspoon (3 g), to balance flavor
- Unsalted butter – 1 cup (227 g), softened (I like using Land O’Lakes for consistency)
- Granulated sugar – 2 cups (400 g), for sweetness
- Large eggs – 4, at room temperature (helps the batter emulsify better)
- Vanilla extract – 2 teaspoons (10 ml), pure if possible
- Whole milk – 1 cup (240 ml), warmed slightly to help batter mix smoothly
- Gel food coloring – various shades of blue (Wilton or AmeriColor brands work best for vibrant but smooth color)
- For the Frosting:
- Unsalted butter – 1 cup (227 g), softened
- Powdered sugar – 4 cups (480 g), sifted to avoid lumps
- Heavy cream – 2-3 tablespoons (30-45 ml), for fluffiness
- Vanilla extract – 1 teaspoon (5 ml)
- Pinch of salt, to cut sweetness
Substitution tips: For a dairy-free option, swap the butter and milk with coconut oil and almond milk, respectively. Almond or coconut milk will slightly change the crumb but keeps it moist. If you want a gluten-free cake, use a 1:1 gluten-free baking flour blend—just expect a denser crumb.
Equipment Needed
- Two or three 8-inch (20 cm) round cake pans – non-stick or lined with parchment paper for easy release
- Electric mixer or stand mixer – a handheld mixer works, but a stand mixer makes the process smoother
- Mixing bowls – several sizes for batter and frosting
- Measuring cups and spoons – for precise ingredient amounts
- Rubber spatula – to scrape down the bowl and fold ingredients gently
- Cooling racks – to keep the cake layers from steaming and getting soggy
- Offset spatula or butter knife – for spreading frosting evenly
- Food coloring brushes or toothpicks – for adding gel dye gradually
If you don’t have multiple cake pans, no worries! You can bake layers one at a time, just add extra baking time and cooling wait. Also, if budget’s tight, silicone pans work great and clean up easily. I’ve had my trusty metal pans for years, but silicone definitely saves on scrubbing.
Preparation Method
- Prep your pans and ingredients (10 minutes): Grease and flour your cake pans or line them with parchment paper. Preheat your oven to 350°F (175°C). Take the butter and eggs out early so they’re at room temperature—helps everything blend smoother.
- Mix dry ingredients (5 minutes): In a medium bowl, whisk together the flour, baking powder, and salt. Set aside.
- Cream butter and sugar (5-7 minutes): Using your mixer on medium speed, beat the softened butter until smooth and creamy. Gradually add the sugar and keep beating until the mixture is light and fluffy—this traps air for a tender crumb.
- Add eggs and vanilla (3-4 minutes): Crack in the eggs one at a time, beating well after each addition. Then stir in the vanilla extract. The batter might look a bit curdled here, but that’s normal.
- Alternate adding flour and milk (5-7 minutes): Add the dry ingredients in three parts, alternating with the warm milk, starting and ending with the flour. Mix gently on low speed to avoid overworking the batter.
- Divide and color the batter (10 minutes): Evenly divide the batter into 4-5 small bowls, depending on how many ombré layers you want. Add increasing amounts of blue gel food coloring to each bowl, stirring well until you reach the desired gradient from light to dark.
- Bake the layers (20-25 minutes each): Pour each colored batter into its prepared pan. Bake one or two pans at a time, rotating halfway through, until a toothpick inserted comes out clean. The edges should pull slightly from the pan, and the tops will spring back when lightly pressed.
- Cool completely (30-40 minutes): Let the cakes cool in their pans for 10 minutes, then run a knife along the edges and invert onto cooling racks. Patience here helps avoid crumbling when you frost!
- Make the frosting (10 minutes): Beat softened butter until creamy. Gradually add powdered sugar, alternating with heavy cream, until fluffy and spreadable. Mix in vanilla and salt. If it’s too stiff, add a splash more cream; if too loose, a bit more powdered sugar.
- Assemble the cake (15 minutes): Level the tops of each cake layer with a serrated knife if needed. Start with the darkest layer at the bottom, spread a thin layer of frosting, then stack the next lighter layer. Repeat until all layers are stacked. Use the remaining frosting to cover the top and sides smoothly.
- Chill before serving (at least 30 minutes): Place the cake in the fridge to set the frosting. This also helps flavors meld and makes slicing cleaner.
Cooking Tips & Techniques
There are a few tricks I’ve learned that make the perfect school colors ombré layer cake feel a little less intimidating. First, don’t rush the creaming process—the fluffier your butter and sugar, the lighter your cake. I once skipped this step and ended up with a dense, sad-looking cake (lesson learned the hard way!).
When adding food coloring, gel dyes are your best friend—they give rich color without watering down the batter. Add the dye in small increments; it’s easier to darken than to lighten. I usually stir with a toothpick, so I don’t accidentally dump in too much.
Another tip: baking times can vary depending on your oven and pan material. Keep an eye from minute 18 onward and test with a toothpick. Also, rotating pans halfway through baking helps get an even color and bake.
Stacking layers can be tricky, especially if the cakes aren’t cooled completely. I like to chill the layers for a bit before frosting—it reduces crumbs and makes spreading the frosting smoother. And if you want clean edges, a cake scraper or even a bench scraper can be a game changer.
Finally, multitasking is key. While one batch bakes, prep the next batter or start the frosting. It keeps things moving, and you avoid the “cake panic” that hits when you realize the clock’s ticking down to party time!
Variations & Adaptations
Feel like mixing things up? Here are some fun twists and changes you can make to this ombré layer cake:
- Dietary swap: Try substituting half the all-purpose flour with almond flour for a nuttier flavor and denser texture. Perfect if you want a gluten-reduced cake.
- Seasonal colors: Instead of blues, go for warm reds and oranges in fall or bright greens for spring celebrations. Use natural coloring like beet powder or spinach juice for a wholesome touch.
- Flavor boosts: Add a teaspoon of lemon zest or almond extract to the batter for an extra layer of flavor that complements the vanilla base beautifully.
- Frosting alternatives: Swap the buttercream for cream cheese frosting for a tangy contrast or a whipped coconut cream frosting for a dairy-free option.
- Mini cakes: Bake smaller layers in cupcake tins and create mini ombré cupcakes—a fun option for school parties or easier serving.
I once tried the red and gold combo for a friend’s high school reunion. The crowd loved it, and it was surprisingly easier to get those colors just right with gel dyes than I expected!
Serving & Storage Suggestions
This cake shines when served slightly chilled or at room temperature. Let it sit out for about 20 minutes before slicing to soften the frosting a bit. Presentation-wise, a simple dusting of edible glitter or a scattering of fresh berries on top adds a festive touch without stealing the spotlight from those gorgeous layers.
Pair it with a cup of hot tea, coffee, or a cold glass of milk to balance the sweetness. For celebrations, it pairs well with light finger foods or fruit platters to keep things fresh.
To store, keep the cake covered in the fridge for up to 3 days. Wrap it well with plastic wrap or use a cake dome to prevent drying. You can also freeze individual slices wrapped tightly for up to a month—just thaw overnight in the fridge and bring to room temperature before serving.
Interestingly, the flavors tend to mellow and meld after a day, making leftovers even more delicious (if you have any!).
Nutritional Information & Benefits
Each slice (assuming 12 servings) contains approximately:
| Calories | 350 kcal |
|---|---|
| Fat | 18 g |
| Carbohydrates | 45 g |
| Protein | 4 g |
The use of real butter and whole milk adds richness and some essential fat-soluble vitamins, while the eggs contribute protein and moisture. Using gel food coloring avoids added sugars or artificial dyes found in some liquid options. This cake is not low-calorie, but it’s a treat made with quality ingredients—perfect for special occasions.
If you’re mindful of allergens, this recipe contains gluten, dairy, and eggs. For a dairy-free or gluten-free version, the substitutions mentioned earlier work well, but always check labels to keep it safe.
From a wellness perspective, I appreciate that this recipe balances indulgence with straightforward ingredients, allowing me to enjoy a slice without guilt or mystery additives.
Conclusion
The school colors ombré layer cake is more than just a dessert; it’s a way to celebrate moments that matter with a splash of color and a whole lot of heart. It’s approachable, fun, and honestly, a conversation starter wherever it goes. Whether you’re new to baking or a seasoned pro, this recipe invites you to customize and make it your own.
I love this cake because it brings a little extra joy to gatherings—watching people’s faces light up as they see those layers is priceless. Plus, it’s a reminder that with a bit of patience and a few simple ingredients, you can create something truly special.
Give it a try, and don’t forget to share your color combos or tweaks in the comments! I’m always excited to hear how you make this recipe your own. Happy baking, and here’s to many celebrations filled with sweetness and color!
FAQs
Can I make this cake in advance?
Absolutely! You can bake the layers a day ahead and keep them wrapped tightly at room temperature. Assemble and frost the cake the next day for the freshest look and taste.
What if I don’t have gel food coloring?
Gel coloring gives the best vibrant hues without thinning the batter. If you only have liquid, use sparingly to avoid a runny batter, and expect softer colors.
How do I get even layers for the ombré effect?
Weighing your batter portions or using measuring cups helps keep layers consistent. Also, smooth the batter evenly in each pan before baking.
Can I freeze the whole cake?
Yes! Wrap the assembled cake tightly in plastic wrap and then foil. Freeze for up to one month. Thaw overnight in the fridge before serving.
What if my cake layers dome or crack?
This can happen if the oven is too hot or you overmix. Try lowering your oven temperature by 10-15°F (5-8°C) next time and mix batter just until combined to avoid too much gluten development.
Pin This Recipe!
Perfect School Colors Ombré Layer Cake
A stunning ombré layer cake featuring school colors, perfect for celebrations like graduations and pep rallies. This easy recipe uses simple ingredients and creates a moist, tender cake with smooth vanilla frosting.
- Prep Time: 30 minutes
- Cook Time: 60 minutes
- Total Time: 1 hour 30 minutes
- Yield: 12 servings 1x
- Category: Dessert
- Cuisine: American
Ingredients
- 2 ½ cups (320 g) all-purpose flour, sifted
- 2 ½ teaspoons (10 g) baking powder
- ½ teaspoon (3 g) salt
- 1 cup (227 g) unsalted butter, softened
- 2 cups (400 g) granulated sugar
- 4 large eggs, room temperature
- 2 teaspoons (10 ml) vanilla extract
- 1 cup (240 ml) whole milk, warmed slightly
- Gel food coloring in various shades of blue (Wilton or AmeriColor recommended)
- For the Frosting:
- 1 cup (227 g) unsalted butter, softened
- 4 cups (480 g) powdered sugar, sifted
- 2–3 tablespoons (30–45 ml) heavy cream
- 1 teaspoon (5 ml) vanilla extract
- Pinch of salt
Instructions
- Prep your pans and ingredients (10 minutes): Grease and flour your cake pans or line them with parchment paper. Preheat oven to 350°F (175°C). Bring butter and eggs to room temperature.
- Mix dry ingredients (5 minutes): Whisk together flour, baking powder, and salt in a medium bowl. Set aside.
- Cream butter and sugar (5-7 minutes): Beat softened butter on medium speed until smooth and creamy. Gradually add sugar and beat until light and fluffy.
- Add eggs and vanilla (3-4 minutes): Add eggs one at a time, beating well after each. Stir in vanilla extract.
- Alternate adding flour and milk (5-7 minutes): Add dry ingredients in three parts alternating with warm milk, starting and ending with flour. Mix gently on low speed.
- Divide and color the batter (10 minutes): Divide batter evenly into 4-5 bowls. Add increasing amounts of blue gel food coloring to create gradient from light to dark.
- Bake the layers (20-25 minutes each): Pour each colored batter into prepared pans. Bake one or two pans at a time, rotating halfway through. Test doneness with toothpick.
- Cool completely (30-40 minutes): Cool cakes in pans for 10 minutes, then invert onto cooling racks to cool fully.
- Make the frosting (10 minutes): Beat softened butter until creamy. Gradually add powdered sugar alternating with heavy cream until fluffy. Mix in vanilla and salt. Adjust consistency as needed.
- Assemble the cake (15 minutes): Level cake tops if needed. Start with darkest layer at bottom, spread thin layer of frosting, stack next lighter layer. Repeat for all layers. Cover top and sides with remaining frosting.
- Chill before serving (at least 30 minutes): Refrigerate cake to set frosting and meld flavors.
Notes
Use gel food coloring for vibrant colors without thinning batter. Add dye gradually. Rotate pans halfway through baking for even color and bake. Chill layers before frosting to reduce crumbs. For dairy-free, substitute butter and milk with coconut oil and almond milk. For gluten-free, use a 1:1 gluten-free flour blend.
Nutrition
- Serving Size: 1 slice (1/12 of cak
- Calories: 350
- Fat: 18
- Carbohydrates: 45
- Protein: 4
Keywords: ombré cake, layer cake, school colors cake, celebration cake, vanilla cake, easy cake recipe, party dessert