“You sure this will work?” my friend asked, holding a plastic cup filled with what looked like a chaotic mix of brownies, berries, and whipped cream. Honestly, I was a little skeptical myself. It was one of those last-minute ideas during a July 4th barbecue when the grill was smoking, the kids were running wild, and dessert seemed like an afterthought at best. The idea of red, white, and blue in individual brownie trifle cups was a spur-of-the-moment plan inspired by the patriotic spirit—and a rather unruly batch of brownies that had turned out a bit denser than usual.
But then, between bites, something clicked. The rich chocolate of the brownies paired with the fresh, tart berries and the fluffy whipped cream created this surprisingly refreshing and festive dessert. It wasn’t just a quick fix; it became a favorite that I found myself making repeatedly, not just for Independence Day but all summer long. It’s funny how something that started as a “grab whatever’s in the kitchen” experiment ended up being a dessert people requested again and again.
These Perfect Red White and Blue Brownie Trifle Cups are more than just pretty layers—they’re a celebration of flavor and ease all in one. They capture that sweet balance between indulgence and freshness that feels just right for festive gatherings. And if you ask me, this recipe sticks around because it’s straightforward, forgiving, and honestly, a little bit fun to put together.
By the time you’ve made a batch, you’ll probably realize why these trifle cups hold a special place at summer parties and why they might just become your go-to dessert for any occasion that calls for a splash of color and a whole lot of yum.
Why You’ll Love This Recipe
From the first time I layered these trifle cups, it was clear this recipe isn’t your average dessert. It’s got personality, ease, and that perfect festive flair. Here’s why this recipe shines:
- Quick & Easy: You can whip these up in under 30 minutes—ideal when your schedule is packed and a festive dessert is a must.
- Simple Ingredients: No fancy or hard-to-find components. Most of these are pantry staples or fresh fruits you can grab at any grocery store.
- Perfect for Celebrations: Whether it’s a backyard barbecue, Memorial Day picnic, or a casual brunch, these trifle cups bring that red, white, and blue magic without fuss.
- Crowd-Pleaser: These cups consistently get rave reviews, especially from kids who love the layers and adults who appreciate the balance of flavors.
- Unbelievably Delicious: The chewy brownie base combined with juicy berries and airy whipped cream creates a texture and flavor combo that’s honestly hard to beat.
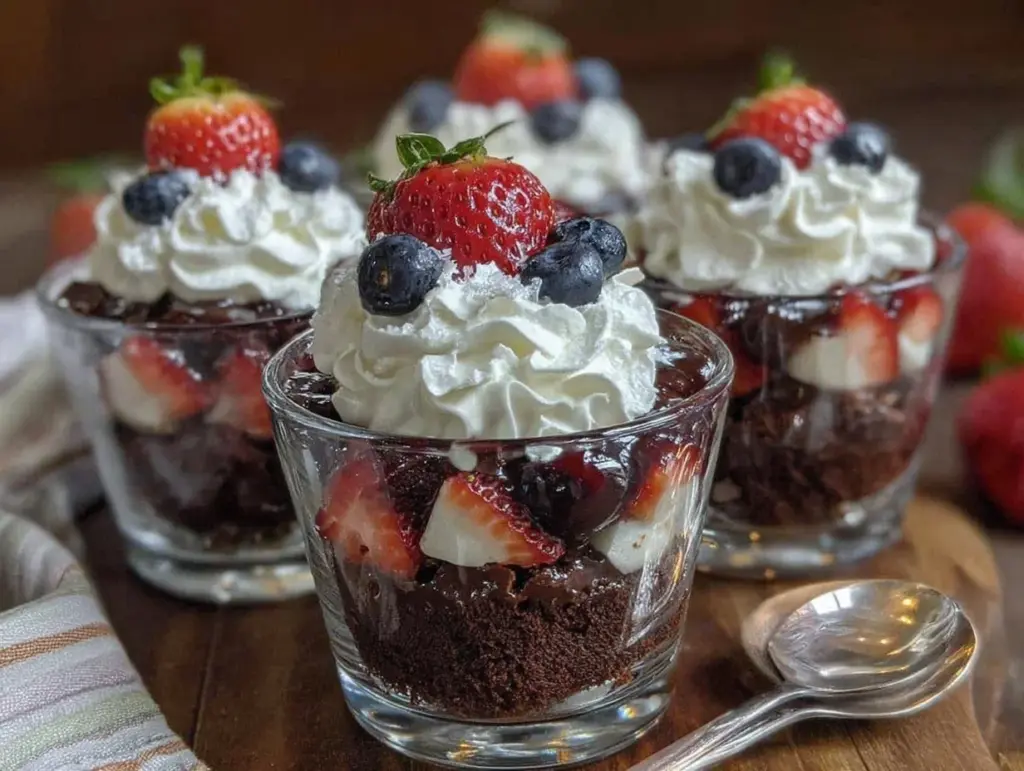
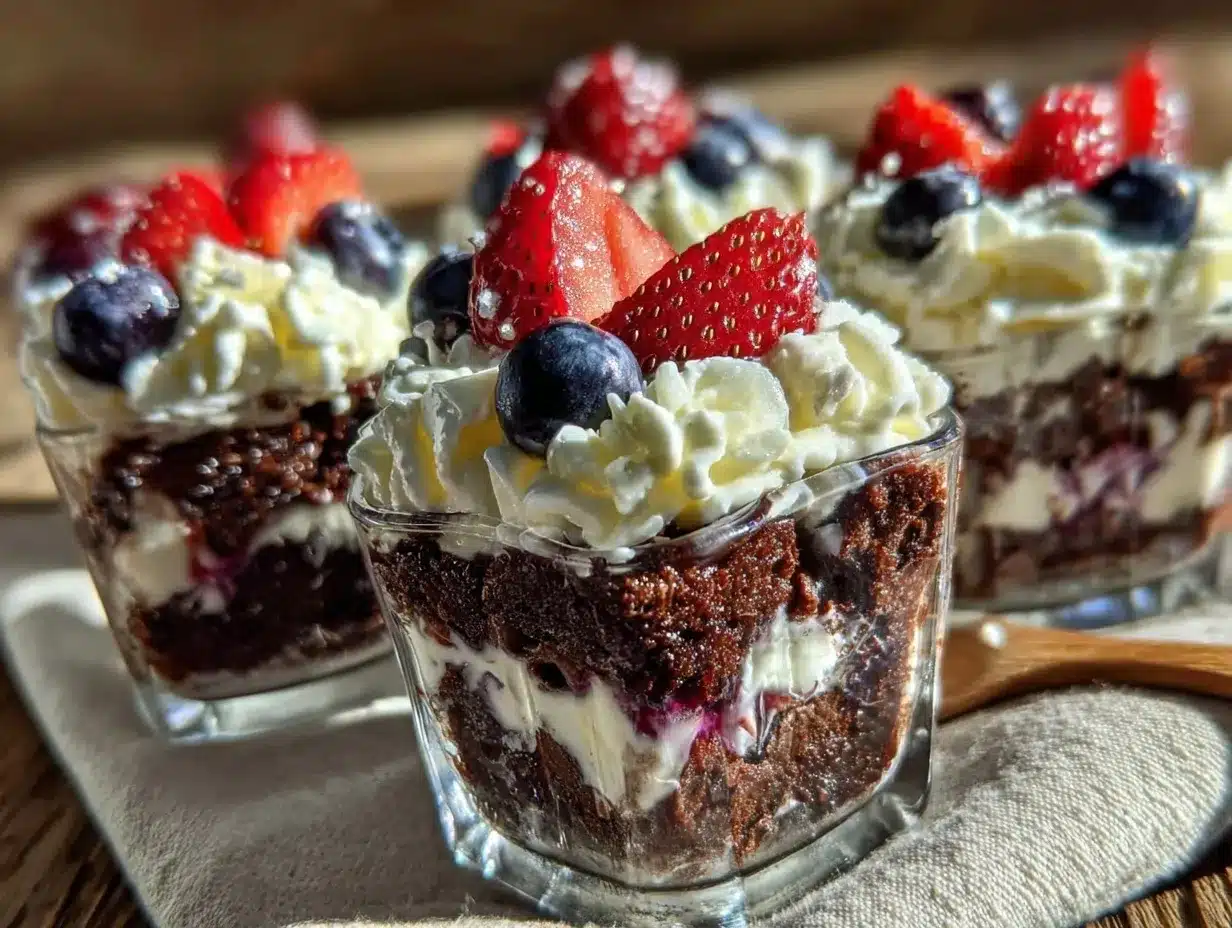
What sets this recipe apart is the layering technique and the use of brownies instead of the usual cake or cookie crumbs. I’ve tried versions with regular sponge cake, but the fudgy brownie chunks add a rich depth that makes each spoonful feel special. Plus, mixing fresh blueberries and strawberries gives that natural, vibrant color without artificial dyes, making it a dessert that tastes as good as it looks.
This isn’t just dessert; it’s a way to make a simple gathering feel a little more festive and a bit more memorable. If you want a sweet that’s fuss-free but still shows you care, these trifle cups fit the bill perfectly.
What Ingredients You Will Need
This recipe calls for straightforward, wholesome ingredients that come together beautifully without complicating your prep. Each component plays a key role in flavor and texture, creating that irresistible red, white, and blue layering.
- Brownies: 1 batch of your favorite brownies, cut into bite-sized cubes (store-bought or homemade; I prefer a fudgy recipe like Ghirardelli’s mix for best texture)
- Strawberries: About 1 ½ cups fresh, hulled, and sliced (choose firm, bright red berries for the best color and sweetness)
- Blueberries: 1 cup fresh, washed and dried (fresh berries hold up better than frozen here)
- Whipped Cream: 2 cups heavy whipping cream, chilled, whipped to soft peaks (or store-bought whipped cream if you’re short on time)
- Powdered Sugar: 2 tablespoons to sweeten the whipped cream slightly (adjust to taste)
- Vanilla Extract: 1 teaspoon for the whipped cream (adds depth and warmth)
- Optional: A handful of white chocolate chips or chopped nuts for a little crunch on top
If you want a dairy-free or lighter option, you can swap the heavy cream for coconut whipped cream or a plant-based alternative, but I have to say the classic whipped cream just feels right here. For gluten-free eaters, using almond flour-based brownies works wonderfully and keeps the texture moist and rich.
One last tip: I always make sure my berries are fresh and vibrant. Frozen berries can get mushy, which affects the layering’s crisp look. Also, slicing strawberries thin helps keep the layers even and makes each cup look like a little work of art.
Equipment Needed
- Mixing Bowls: For whipping cream and tossing berries.
- Electric Mixer or Whisk: To whip the cream to just the right texture — handheld or stand mixer, whatever you have on hand.
- Measuring Cups and Spoons: For precise ingredient amounts.
- Spatula: To gently fold the sugar and vanilla into the whipped cream.
- Trifle Cups or Clear Dessert Cups: These help showcase the beautiful layers. If you don’t have individual cups, a large glass trifle bowl works perfectly too.
- Knife and Cutting Board: For slicing strawberries and brownies.
If you’re like me and sometimes forget to chill your bowl for whipping cream, a quick tip is to pop it in the freezer for 10 minutes before you start. It really helps the cream whip up faster and fluffier. No fancy tools needed, but if you want to get fancy, a piping bag can make the whipped cream layers look extra neat.
Preparation Method
- Prepare the Brownies: If baking from scratch, make your favorite brownie recipe and allow it to cool completely. Then, cut into 1-inch (2.5 cm) cubes. If using store-bought brownies, unwrap and cut similarly. (Time: 30-40 minutes including cooling)
- Wash and Prepare Berries: Gently rinse strawberries and blueberries separately under cold water. Pat dry with paper towels to avoid watery layers. Hull and slice strawberries thinly. (Time: 5-7 minutes)
- Whip the Cream: In a cold mixing bowl, add 2 cups (480 ml) heavy whipping cream, 2 tablespoons (15 g) powdered sugar, and 1 teaspoon (5 ml) vanilla extract. Whip on medium-high speed until soft peaks form—when you lift the whisk, the cream should hold its shape but still be soft. (Time: 5-8 minutes)
- Assemble the Trifle Cups: Start with a layer of brownie cubes at the bottom of each cup (about ½ inch or 1.25 cm deep). Next, add a layer of sliced strawberries, followed by a dollop of whipped cream (about 2 tablespoons or 30 ml). Then, add a layer of blueberries and another spoonful of whipped cream. Repeat layers if your cups are tall enough, finishing with whipped cream on top.
- Optional Toppings: Sprinkle white chocolate chips or chopped nuts for a little crunch and extra flair. You can also add a few whole berries on top for decoration.
- Chill Before Serving: Refrigerate the assembled trifle cups for at least 1 hour to let the flavors meld and layers set. This also helps the whipped cream firm up slightly, making the cups easier to eat.
Watch out for soggy brownies! If you find the brownies getting too soft, try adding a thin layer of cream cheese frosting or a smear of jam between brownie and berry layers next time. It adds a nice barrier and a little tang.
When assembling, I like to keep the whipped cream light and fluffy rather than over-whipping into stiff peaks. It makes the texture less dense and easier to spoon out. Also, slicing the strawberries evenly ensures every bite has that perfect burst of berry flavor.
Cooking Tips & Techniques
When making these trifle cups, a few tricks can make a big difference:
- Whip Cream Just Right: Don’t overdo it. Soft peaks give the best texture—too stiff, and it feels heavy; too loose, and it won’t hold the layers well.
- Brownie Texture Matters: Fudgy brownies are your friend here. If your brownies are cakey, the texture can feel a bit off when layered with cream and berries.
- Keep Berries Dry: Excess moisture from wet berries leads to soggy layers. Pat them dry and add them just before serving if possible.
- Layering Technique: Use a spoon or piping bag for the whipped cream to keep layers neat and visually appealing. It’s a small detail that makes a big difference, especially if you’re serving guests.
- Chill Time: Don’t skip the chilling step. It helps flavors meld and lets the whipped cream set just right.
I remember one time rushing assembly, and the whipped cream wasn’t fully whipped—it ended up melting into the berries, and the whole cup looked a bit sad. Lesson learned: take those extra minutes to get the cream just right. Also, pairing this dessert with a savory dish like honey mustard glazed chicken thighs balances the meal nicely when you’re hosting a summer dinner.
Variations & Adaptations
These trifle cups are pretty versatile. Here are some fun ways to mix things up:
- Berry Swap: Use raspberries or blackberries instead of strawberries or blueberries for a different flavor profile.
- Chocolate Lovers’ Dream: Add a layer of chocolate mousse or drizzle melted dark chocolate between layers for extra decadence.
- Dairy-Free Option: Replace whipped cream with coconut whipped cream or a cashew-based cream for those avoiding dairy.
- Nutty Crunch: Incorporate toasted pecans or almonds for texture contrast.
- Seasonal Twist: In summer, add fresh peaches or mango slices for a tropical touch, or swap berries for pomegranate seeds in winter for a festive pop.
I once made a batch using mini brownie bites and layered them in a large bowl for a family gathering. It was a hit, especially when paired with a simple, fresh salad like the crispy Caesar salad to keep things light and balanced.
Serving & Storage Suggestions
These trifle cups are best served chilled, straight from the fridge. The layers hold up beautifully, and the cool cream contrasts nicely with the rich brownies and fresh berries. For presentation, clear cups showcase the festive red, white, and blue layers, making them perfect for buffet tables or individual servings at parties.
If you’re prepping ahead, store the cups covered tightly in the refrigerator for up to 24 hours. Beyond that, the brownies may start to soften too much, and the whipped cream can lose some of its fluffiness. The flavors actually deepen a bit after a few hours, so if you have time, prepping the day before is ideal.
Reheating isn’t recommended since this dessert is best cold and fresh. But if you want to switch things up, try serving the brownie base warm with the cold berries and cream on top—it’s a delightful contrast!
For pairing, these trifle cups go well with simple iced beverages or a light sparkling lemonade, balancing the sweetness nicely.
Nutritional Information & Benefits
Each serving of these trifle cups delivers a satisfying mix of indulgence and fresh fruit nutrients. Here’s an estimate per serving (based on 8 servings):
| Nutrient | Amount |
|---|---|
| Calories | 320 kcal |
| Fat | 18 g |
| Saturated Fat | 10 g |
| Carbohydrates | 36 g |
| Sugar | 24 g |
| Protein | 3 g |
| Fiber | 2 g |
The star ingredients—berries—bring antioxidants, vitamin C, and fiber, which add a nutritional boost to this dessert. Using fresh berries instead of sugary jams keeps the recipe lighter and more natural. If you’re watching your calorie intake, consider smaller serving sizes or using a lighter whipped topping.
For those with dietary needs, this recipe can be adapted gluten-free or dairy-free with simple swaps, making it accessible while still festive and delicious.
Conclusion
These Perfect Red White and Blue Brownie Trifle Cups have become my go-to festive dessert because they’re easy, colorful, and honestly, just plain fun to eat. Whether you’re throwing a casual barbecue or just want a simple way to add a bit of celebration to your table, this recipe fits the bill without any stress.
Feel free to tweak the layers, swap berries, or add your own crunchy toppings—there’s room for a little creativity here. I love that it brings people together, with each spoonful offering a little bit of everything: chocolate, creaminess, and fresh fruit.
If you give these trifle cups a try, let me know how you made them your own. I’m always curious to hear new twists or how they fit into your special occasions. Here’s to sweet moments and colorful celebrations!
FAQs
Can I use store-bought brownies for the trifle cups?
Absolutely! Store-bought brownies work just fine, especially fudgy ones. Just cut them into small cubes and layer as usual. It’s a great shortcut when you’re short on time.
How far in advance can I assemble these trifle cups?
You can assemble them up to 24 hours before serving if you keep them refrigerated and covered. Beyond that, the brownies may get soggy and whipped cream can lose texture.
Can I make this dessert dairy-free?
Yes! Swap the heavy whipping cream for coconut whipped cream or another plant-based alternative. Just keep in mind the texture and flavor might vary slightly.
What’s the best way to keep the brownies from getting soggy?
Make sure your berries are dry before layering and consider adding a thin layer of cream cheese frosting or jam between the brownies and berries as a moisture barrier.
Can I prepare this dessert in a large trifle bowl instead of individual cups?
Definitely! A large trifle bowl works wonderfully and looks beautiful on buffet tables. Just layer the ingredients the same way and serve with a big spoon.
Pin This Recipe!
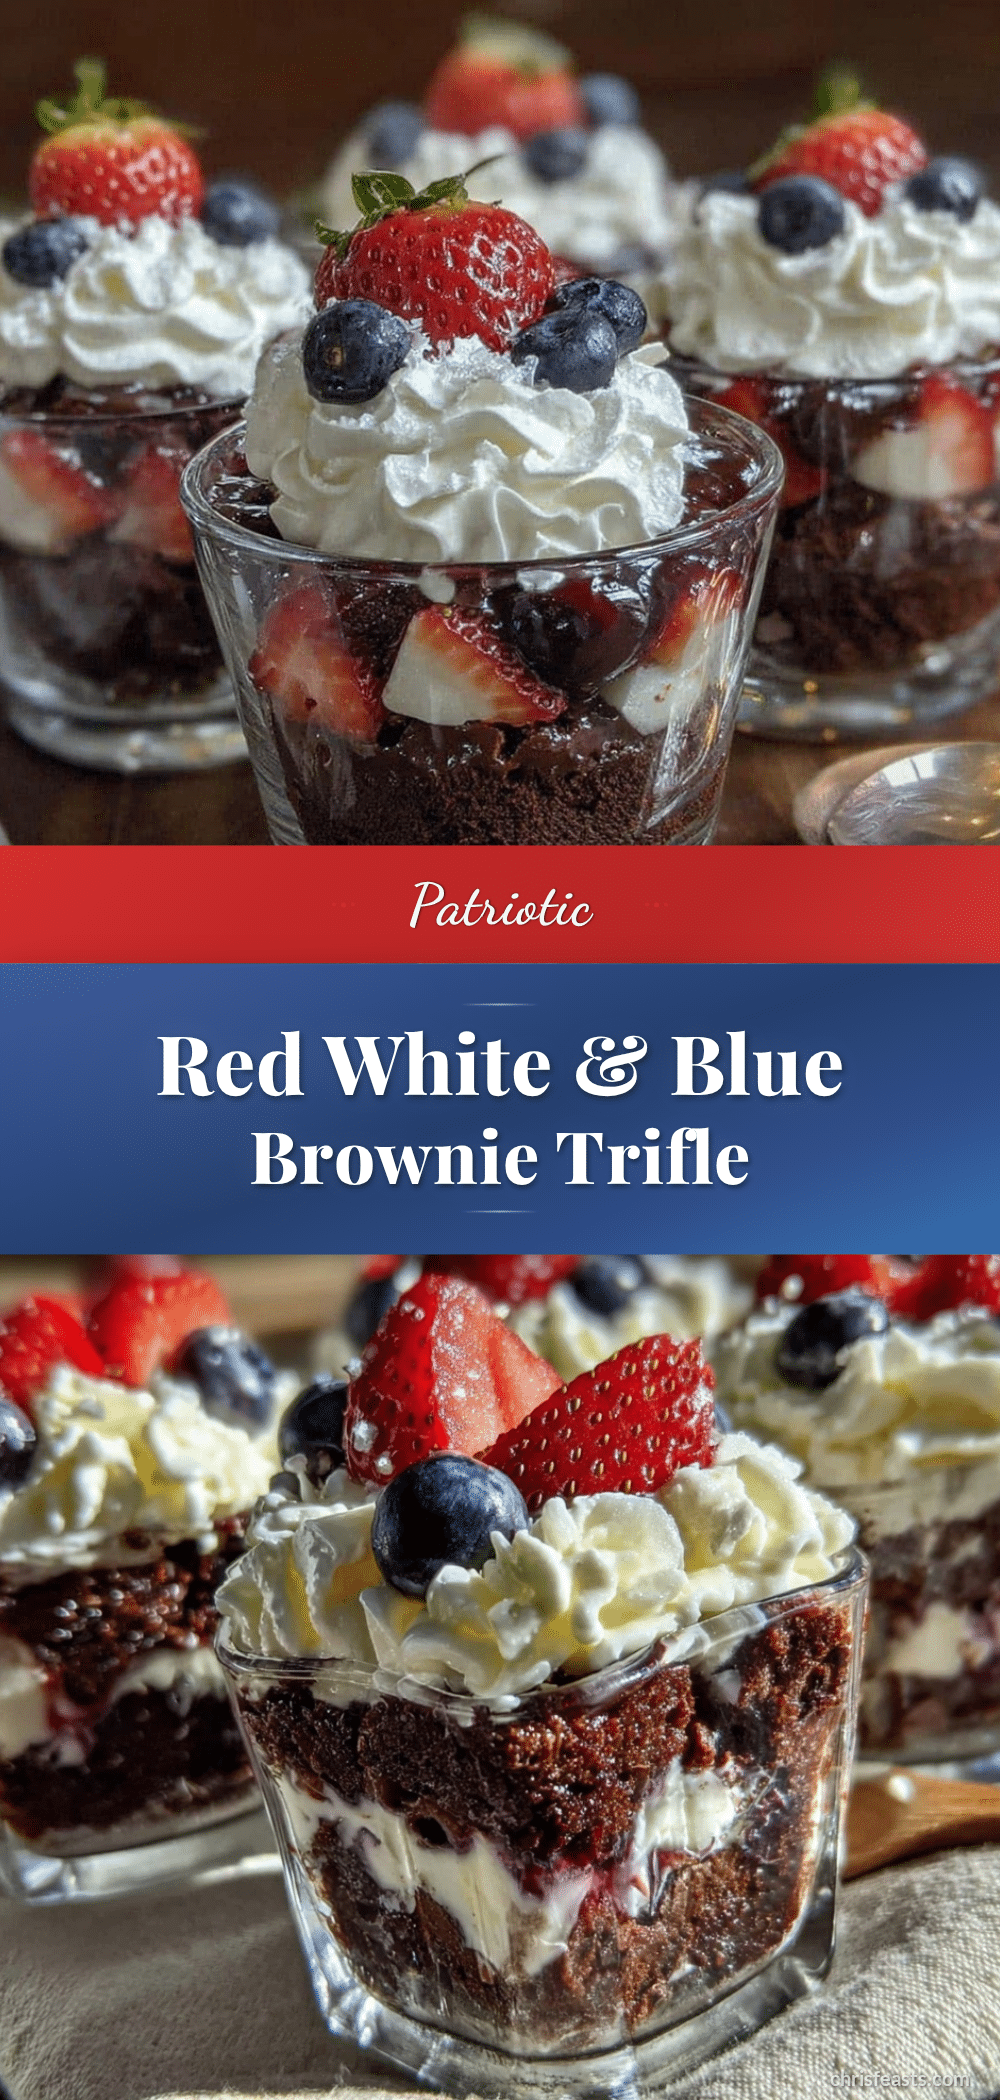
Perfect Red White and Blue Brownie Trifle Cups

A quick and festive dessert featuring layers of fudgy brownies, fresh strawberries and blueberries, and fluffy whipped cream, perfect for summer celebrations and patriotic gatherings.
- Prep Time: 15 minutes
- Cook Time: 30-40 minutes (including brownie baking and cooling)
- Total Time: 1 hour 45 minutes
- Yield: 8 servings 1x
- Category: Dessert
- Cuisine: American
Ingredients
- 1 batch of your favorite brownies, cut into 1-inch cubes (store-bought or homemade)
- 1 ½ cups fresh strawberries, hulled and sliced
- 1 cup fresh blueberries, washed and dried
- 2 cups heavy whipping cream, chilled
- 2 tablespoons powdered sugar
- 1 teaspoon vanilla extract
- Optional: white chocolate chips or chopped nuts for topping
Instructions
- Prepare the brownies: bake your favorite brownie recipe and allow to cool completely, then cut into 1-inch cubes. If using store-bought brownies, unwrap and cut similarly.
- Wash and prepare berries: rinse strawberries and blueberries separately under cold water, pat dry, hull and slice strawberries thinly.
- Whip the cream: in a cold mixing bowl, combine heavy whipping cream, powdered sugar, and vanilla extract. Whip on medium-high speed until soft peaks form.
- Assemble the trifle cups: layer brownie cubes at the bottom of each cup (about ½ inch deep), add a layer of sliced strawberries, then a dollop of whipped cream (about 2 tablespoons). Add a layer of blueberries and another spoonful of whipped cream. Repeat layers if cups are tall enough, finishing with whipped cream on top.
- Optional toppings: sprinkle white chocolate chips or chopped nuts on top, and add a few whole berries for decoration.
- Chill before serving: refrigerate the assembled trifle cups for at least 1 hour to let flavors meld and layers set.
Notes
Use fudgy brownies for best texture. Keep berries dry to avoid soggy layers. Whip cream to soft peaks for light texture. Chill assembled cups at least 1 hour before serving. Optional to add a thin layer of cream cheese frosting or jam between brownie and berry layers to prevent sogginess. Can be made dairy-free with coconut whipped cream and gluten-free with almond flour brownies.
Nutrition
- Serving Size: 1 trifle cup (approx
- Calories: 320
- Sugar: 24
- Fat: 18
- Saturated Fat: 10
- Carbohydrates: 36
- Fiber: 2
- Protein: 3
Keywords: brownie trifle, red white and blue dessert, patriotic dessert, easy summer dessert, layered dessert, 4th of July dessert


