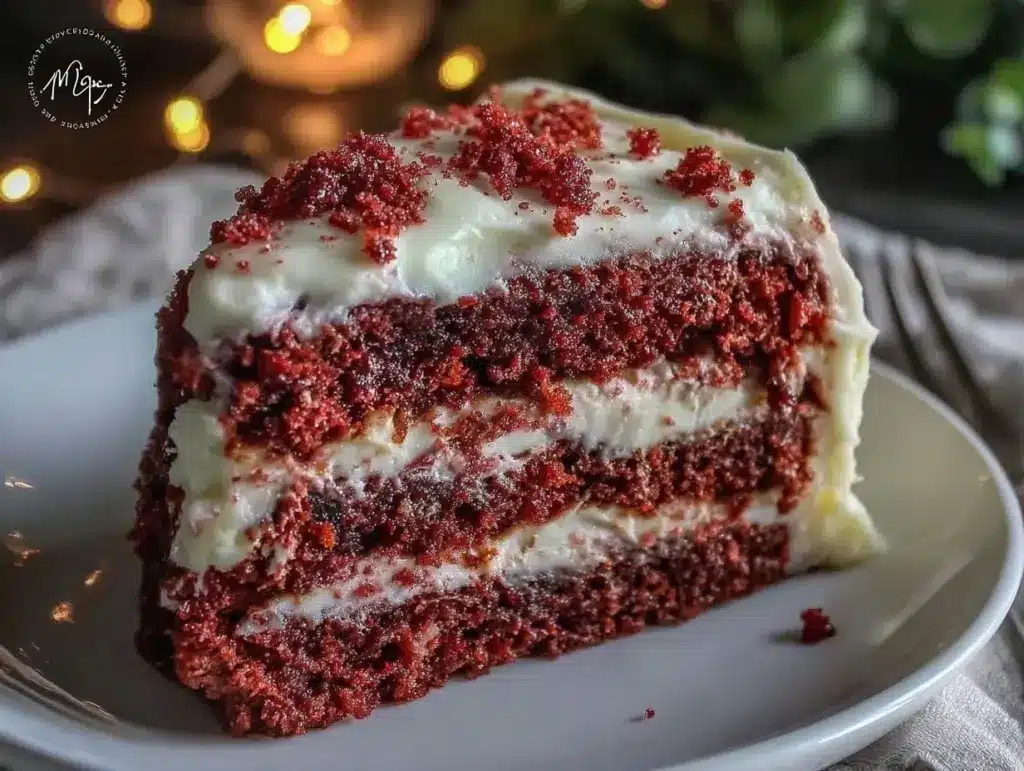
“Are you kidding me? A flag cake?” That was my friend’s text after I sent her a blurry snapshot of the red velvet flag cake I’d just pulled out of the oven. Honestly, I wasn’t even sure it would come together right when I started baking it late one evening. I’d been craving something festive but simple, and the idea of a red velvet cake arranged like a flag—bold stripes of cream cheese frosting and that unmistakable bright red crumb—just popped into my head. It felt a little goofy at first, like a dessert more suited for a party than my quiet kitchen.
But as the layers baked and the cream cheese frosting whipped up into that luscious, tangy swirl, I found myself making it again and again that week. This Perfect Red Velvet Flag Cake with Cream Cheese Frosting became my go-to for celebrations or just when I needed a sweet reset after a long day. The cake’s tender crumb, paired with the smooth frosting, felt like a little patriotic hug on a plate. And the best part? It’s easier than it looks—no complicated piping or fancy decorations needed.
So, here I am sharing the recipe, not because it’s the fanciest cake you’ll ever find, but because it’s genuinely joyful to make and eat. It’s a simple, cozy kind of special that sticks with you, maybe because it’s got that perfect balance of sweetness and tang, or maybe because it reminds me that sometimes, a little whimsy in the kitchen goes a long way. If you’re curious about making a red velvet cake that’s just as fun to assemble as it is to devour, this one might just become your new favorite too.
Why You’ll Love This Recipe
After testing this red velvet flag cake multiple times, I can say it’s one of those recipes that feels like a win no matter what. The combination of classic flavors with a simple decorative twist made it stand out in my baking repertoire. Here’s why this recipe is a keeper:
- Quick & Easy: The whole cake comes together in about 1 hour and 15 minutes, including baking and frosting—ideal for busy bakers who want a showstopper without the hassle.
- Simple Ingredients: No need to hunt for rare items. You probably have everything in your pantry: cocoa powder, buttermilk, cream cheese, and red food coloring.
- Perfect for Celebrations: Whether it’s Independence Day, a birthday, or just a fun weekend treat, this cake’s flag-inspired design makes it instantly festive.
- Crowd-Pleaser: The cream cheese frosting adds tangy richness that both kids and adults rave about. I’ve brought this cake to potlucks and family dinners, and it always disappears fast.
- Unbelievably Delicious: The moist, tender crumb combined with that smooth frosting creates a texture and flavor combo that feels like a hug in dessert form.
This isn’t just any red velvet cake recipe—it’s the version I trust for consistent results and a crowd-pleasing finish. The frosting is whipped just right for the perfect balance of sweetness and creaminess, and the layering technique gives it that striking flag look without needing fancy piping skills. Honestly, it’s the kind of cake that makes you pause mid-bite and savor every mouthful. It’s comfort food with a little playful personality, and I can’t wait for you to try it.
What Ingredients You Will Need
This Perfect Red Velvet Flag Cake uses simple, wholesome ingredients to deliver bold flavor and that iconic red hue, all without complicated steps. Most are pantry staples, and substitutions are easy if needed.
- For the Cake Batter:
- All-purpose flour (2 ½ cups / 320g) – I recommend King Arthur for consistent texture.
- Cocoa powder (2 tablespoons / 15g), unsweetened – use Dutch-processed for richer color.
- Baking soda (1 teaspoon)
- Salt (½ teaspoon)
- Granulated sugar (1 ½ cups / 300g)
- Vegetable oil (1 cup / 240ml) – neutral flavor works best.
- Large eggs (2), room temperature
- Buttermilk (1 cup / 240ml), room temperature – adds moisture and tang.
- Red food coloring (2 tablespoons) – gel-based for vibrant color without thinning batter.
- Vanilla extract (1 teaspoon)
- White vinegar (1 teaspoon) – reacts with baking soda for lift.
- For the Cream Cheese Frosting:
- Cream cheese (8 oz / 225g), softened – Philadelphia brand is my go-to for smooth frosting.
- Unsalted butter (½ cup / 115g), softened
- Powdered sugar (4 cups / 480g), sifted for lump-free frosting
- Vanilla extract (1 teaspoon)
- Pinch of salt – balances sweetness
If you prefer a dairy-free option, swap buttermilk with almond milk mixed with 1 tablespoon lemon juice, and use dairy-free cream cheese and butter substitutes. For a gluten-free version, almond flour can work, but the texture will be denser. In summer, I like to add fresh strawberries on top for a fresh twist.
Equipment Needed
- Two 9-inch (23 cm) round cake pans – I find non-stick pans make flipping easier, but greasing and flouring work just as well.
- Electric mixer (handheld or stand) – essential for whipping the cream cheese frosting smooth and mixing the batter thoroughly.
- Mixing bowls – at least two, one for dry and one for wet ingredients.
- Measuring cups and spoons – accuracy matters with baking!
- Rubber spatula – perfect for folding and scraping batter from the bowl.
- Wire cooling rack – helps cakes cool evenly without sogginess.
- Offset spatula or butter knife – for smooth frosting application.
If you don’t have a stand mixer, a strong handheld mixer works just fine. For budget-conscious cooks, silicone spatulas and metal pans from local stores work great without breaking the bank. I’ve learned that washing pans immediately after use prevents stubborn residue, which saves scrubbing time later.
Preparation Method
- Preheat the oven to 350°F (175°C). Grease and flour two 9-inch round pans, tapping out excess flour. This prevents sticking and helps the cakes release cleanly after baking. (5 minutes)
- Mix dry ingredients: In a large bowl, sift together 2 ½ cups (320g) all-purpose flour, 2 tablespoons (15g) cocoa powder, 1 teaspoon baking soda, and ½ teaspoon salt. Set aside. The cocoa powder adds that subtle chocolate note essential for classic red velvet flavor. (5 minutes)
- Combine wet ingredients: In another large bowl, whisk 1 ½ cups (300g) granulated sugar with 1 cup (240ml) vegetable oil until smooth. Add 2 large eggs, one at a time, beating well after each. Stir in 1 cup (240ml) buttermilk, 2 tablespoons red food coloring, 1 teaspoon vanilla extract, and 1 teaspoon white vinegar. The vinegar reacts with baking soda for the cake’s tender crumb and slight tang. (8 minutes)
- Combine wet and dry: Gradually add the dry ingredient mixture into the wet ingredients, folding gently with a rubber spatula until just combined. Avoid overmixing to keep the crumb light and fluffy. The batter should be smooth and vibrant red. (5 minutes)
- Pour and bake: Divide batter evenly between the prepared pans and smooth tops with a spatula. Bake for 28-32 minutes or until a toothpick inserted in the center comes out clean. Don’t open the oven early to avoid collapse. (30 minutes)
- Cool cakes: Let cakes cool in pans for 10 minutes, then turn out onto wire racks to cool completely. This prevents sogginess and helps the frosting stick better. (45 minutes)
- Make cream cheese frosting: In a large bowl, beat 8 oz (225g) softened cream cheese with ½ cup (115g) softened unsalted butter until creamy and smooth. Gradually add 4 cups (480g) powdered sugar, beating on low speed to keep it from puffing up, then increase speed to medium. Stir in 1 teaspoon vanilla extract and a pinch of salt. The frosting should be thick but spreadable. (10 minutes)
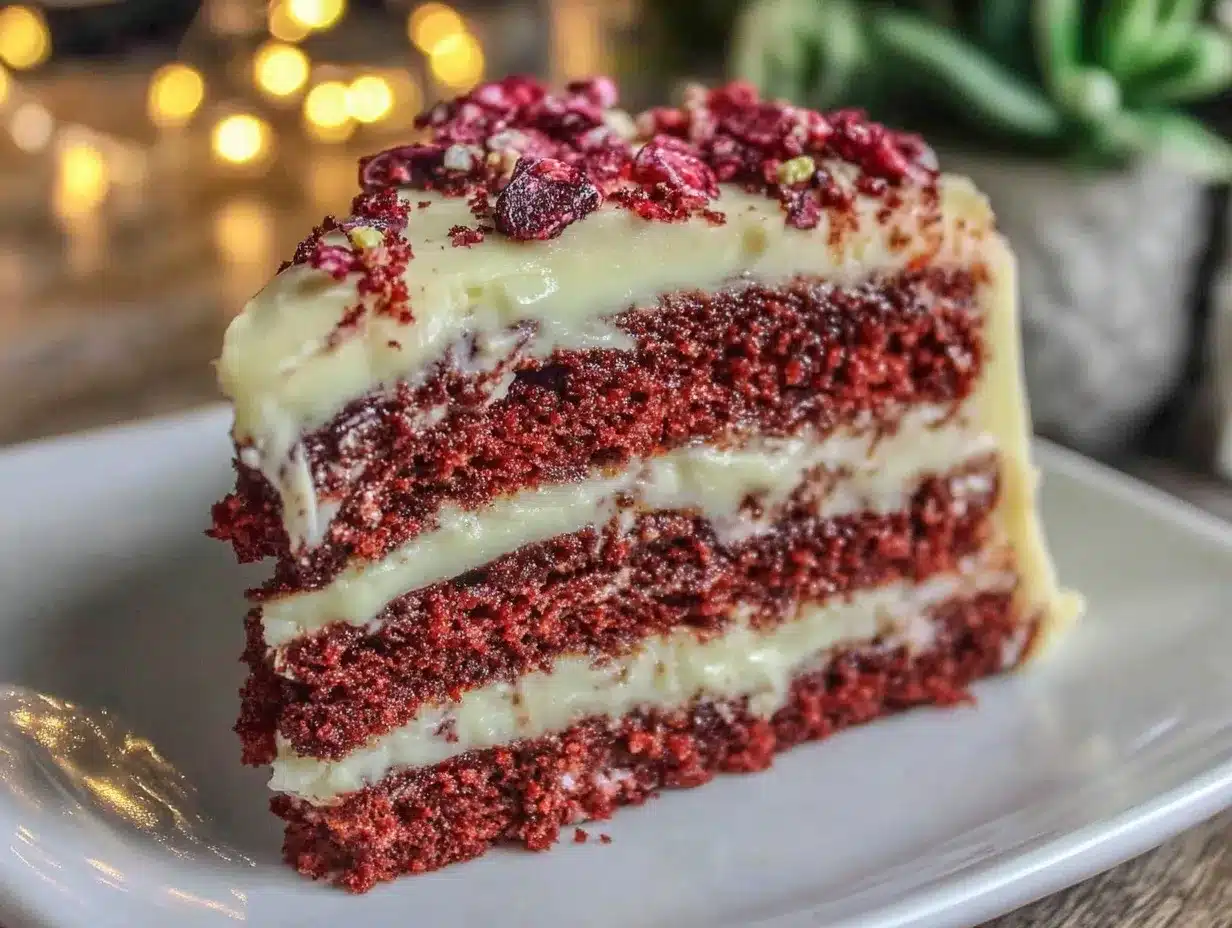
- Assemble the flag cake: Place one cake layer on a serving plate. Spread an even layer of cream cheese frosting over the top. Add the second cake layer. Using the remaining frosting, spread the top and sides smoothly. For the flag effect, pipe or spread horizontal stripes of frosting and leave some red cake visible between. You can use a butter knife or offset spatula for a rustic look. (15 minutes)
- Chill before serving: Refrigerate the cake for at least 30 minutes to let the frosting set. This makes slicing cleaner and flavors meld better. (30 minutes)
Pro tip: If your frosting feels too soft, pop it in the fridge for 10 minutes before spreading. And if the cake layers domed during baking, level them with a serrated knife for even stacking.
Cooking Tips & Techniques
Red velvet cake can be a bit tricky if you don’t keep a few things in mind. I’ve had my share of crumbly, dry attempts before perfecting this recipe.
- Room temperature ingredients: Eggs and buttermilk blend better when not cold, preventing a lumpy batter.
- Don’t overmix: Mixing the batter too much can develop gluten, which makes the cake tough instead of tender.
- Use gel food coloring: Liquid food coloring can thin the batter, affecting texture and color intensity.
- Careful with baking time: Overbaking dries out the cake, so start checking at 28 minutes. A clean toothpick is your best friend.
- Frosting consistency: Beat cream cheese and butter until very smooth before adding sugar to avoid grainy frosting.
- Chill the cake: Letting the assembled cake rest in the fridge helps the frosting firm up and keeps slices neat. I like to chill mine while prepping sides or setting the table.
One mistake I made early on was skipping the vinegar—without it, the cake was dense and lacked that signature tang. Another time, I used cold eggs straight from the fridge, and the batter split a bit. It’s those little things that make a big difference.
Multitasking tip: While the cakes bake, whip up the frosting and clean your mixing bowls. This keeps the kitchen tidy and ready for assembly once the cakes cool.
Variations & Adaptations
This red velvet flag cake is pretty classic, but I’ve had fun tweaking it over time:
- Chocolate lovers’ twist: Add mini chocolate chips to the batter for pockets of melty chocolate in every bite.
- Berry flag: Swap some of the frosting stripes with fresh blueberries or sliced strawberries to add a juicy contrast and natural color.
- Gluten-free: Use a 1:1 gluten-free baking flour blend, but expect a slightly denser crumb.
- Dairy-free: Replace cream cheese and butter with vegan cream cheese and margarine; use almond milk + lemon juice for buttermilk substitute.
- Layered cupcakes: Make mini red velvet cupcakes and pipe cream cheese frosting stripes on top for a portable flag-themed treat.
One personal favorite is a carrot cake with cream cheese frosting variation I made for a fall party—same frosting technique, different flavor vibe. And if you want to try a savory bite after your sweet cake, the sausage and peppers skillet is a great dinner to balance it out.
Serving & Storage Suggestions
This cake is best served chilled or at room temperature. I find that letting it sit out for about 15 minutes before slicing brings out the cream cheese frosting’s tangy richness without it feeling too cold or hard.
For a festive presentation, serve with fresh berries or a dusting of cocoa powder. It pairs nicely with a cup of strong coffee or a glass of cold milk.
To store, cover the cake loosely with plastic wrap or place it in an airtight container. It keeps well in the refrigerator for up to 4 days. If you need longer storage, wrap tightly and freeze slices for up to 2 months. Thaw in the fridge overnight and bring to room temperature before serving.
The flavors actually deepen after a day or two, so if you have the patience, making it a day ahead can be a nice touch.
Nutritional Information & Benefits
Estimated per serving (1 slice of 12): Approx. 350 calories, 18g fat, 45g carbohydrates, 3g protein.
The cake’s key ingredients like buttermilk and cream cheese provide calcium and some protein, while the moderate sugar level keeps it indulgent but not overwhelming. This recipe is naturally gluten-containing but can be adapted for gluten-free diets.
While it’s definitely a treat, the homemade cream cheese frosting uses real cream cheese and butter, avoiding overly processed alternatives. You can also tweak sweetness by adjusting powdered sugar to taste.
From a wellness perspective, it’s a dessert that brings a little joy without being over the top, which is what I look for in recipes I make regularly.
Conclusion
This Perfect Red Velvet Flag Cake with Cream Cheese Frosting is a recipe that’s stuck with me because of its blend of simple ingredients, straightforward steps, and that unmistakable festive flair. It’s not just a cake; it’s a little celebration you can make anytime you want to brighten the day.
Feel free to tweak the design or flavors to make it your own—you might find a new favorite variation just like I did. I love how this cake turned a late-night craving into a week’s worth of baking joy, and I hope it brings the same warmth and smiles to your kitchen.
If you try it, I’d love to hear how your flag cake turned out or what fun twists you added. Baking is best when shared, even if it’s just through stories and photos. So here’s to many sweet moments ahead!
Frequently Asked Questions
What makes red velvet cake different from chocolate cake?
Red velvet cake has a mild cocoa flavor combined with buttermilk and vinegar, which gives it a tender crumb and a slight tang distinct from traditional chocolate cake’s richer, more intense chocolate taste.
Can I make this cake without red food coloring?
You can skip the food coloring, but the signature red color won’t be there. Some bakers use beet juice as a natural alternative, but it may alter the flavor slightly.
How do I prevent the cream cheese frosting from being runny?
Make sure both the cream cheese and butter are softened but not melted. Beat them thoroughly before adding powdered sugar, and chill the frosting if it feels too soft before spreading.
Can I freeze the cake after assembling it?
Yes, wrap the cake tightly in plastic wrap and aluminum foil to avoid freezer burn. Thaw in the fridge overnight and bring to room temperature before serving for best texture.
What if I don’t have buttermilk on hand?
You can make a quick substitute by adding 1 tablespoon of lemon juice or white vinegar to 1 cup of milk; let it sit for 5-10 minutes before using.
Pin This Recipe!
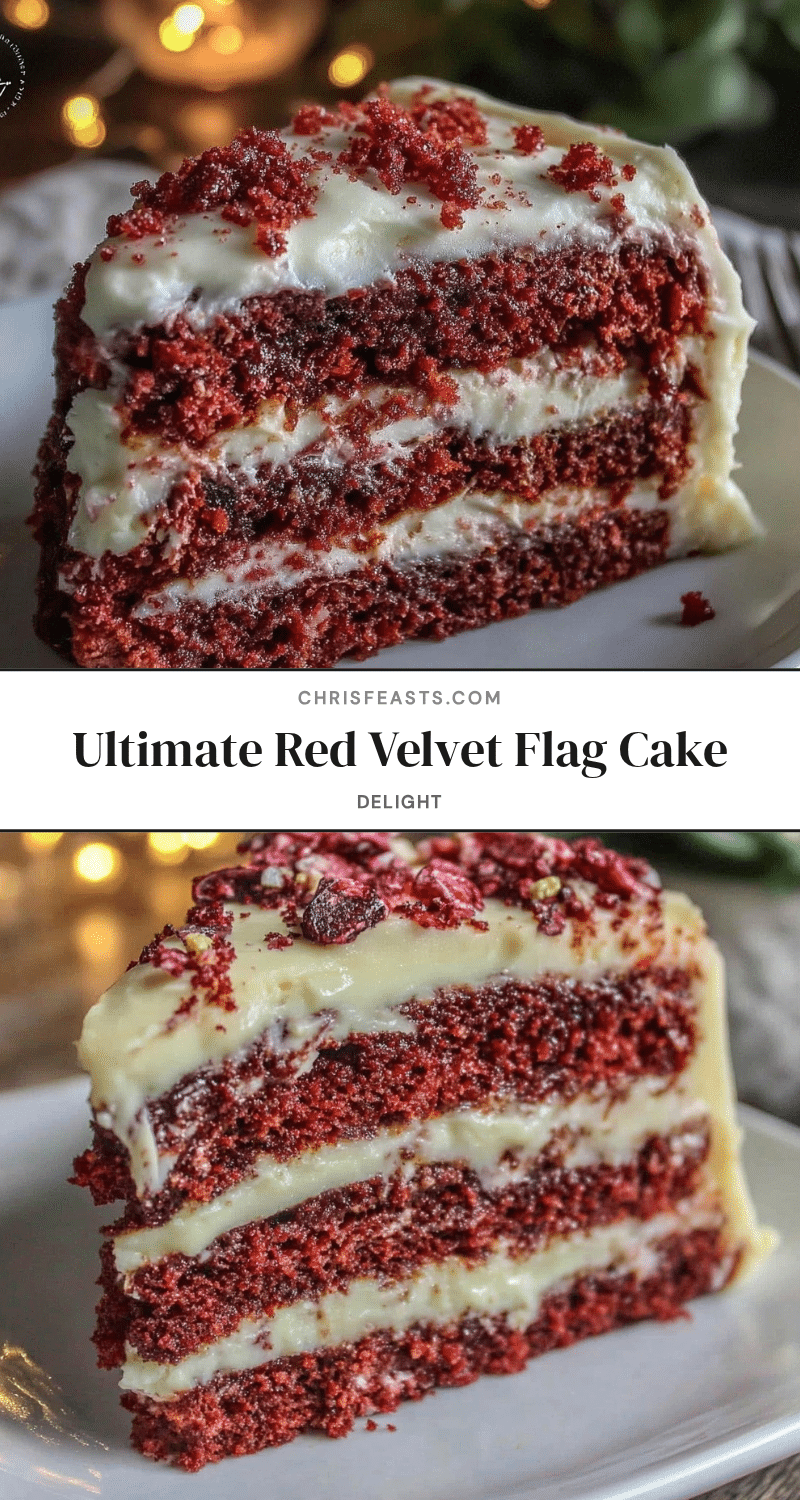
Perfect Red Velvet Flag Cake Recipe Easy Homemade Cream Cheese Frosting
A festive and simple red velvet cake arranged like a flag with bold stripes of tangy cream cheese frosting. This easy homemade recipe delivers a moist, tender crumb and smooth frosting perfect for celebrations or everyday treats.
- Prep Time: 23 minutes
- Cook Time: 30 minutes
- Total Time: 1 hour 15 minutes
- Yield: 12 servings 1x
- Category: Dessert
- Cuisine: American
Ingredients
- 2 ½ cups (320g) all-purpose flour
- 2 tablespoons (15g) unsweetened Dutch-processed cocoa powder
- 1 teaspoon baking soda
- ½ teaspoon salt
- 1 ½ cups (300g) granulated sugar
- 1 cup (240ml) vegetable oil
- 2 large eggs, room temperature
- 1 cup (240ml) buttermilk, room temperature
- 2 tablespoons red gel food coloring
- 1 teaspoon vanilla extract
- 1 teaspoon white vinegar
- 8 oz (225g) cream cheese, softened
- ½ cup (115g) unsalted butter, softened
- 4 cups (480g) powdered sugar, sifted
- 1 teaspoon vanilla extract
- Pinch of salt
Instructions
- Preheat the oven to 350°F (175°C). Grease and flour two 9-inch round pans, tapping out excess flour.
- In a large bowl, sift together the flour, cocoa powder, baking soda, and salt. Set aside.
- In another large bowl, whisk granulated sugar with vegetable oil until smooth. Add eggs one at a time, beating well after each.
- Stir in buttermilk, red food coloring, vanilla extract, and white vinegar.
- Gradually add the dry ingredients to the wet ingredients, folding gently with a rubber spatula until just combined. Avoid overmixing.
- Divide batter evenly between prepared pans and smooth tops. Bake for 28-32 minutes or until a toothpick inserted in the center comes out clean.
- Let cakes cool in pans for 10 minutes, then turn out onto wire racks to cool completely.
- For the frosting, beat cream cheese and butter until creamy and smooth. Gradually add powdered sugar, beating on low then medium speed.
- Stir in vanilla extract and a pinch of salt until frosting is thick but spreadable.
- Place one cake layer on a serving plate. Spread an even layer of frosting over the top. Add the second cake layer.
- Spread remaining frosting on top and sides. Create horizontal stripes of frosting leaving some red cake visible for the flag effect.
- Refrigerate the cake for at least 30 minutes to let the frosting set before slicing.
Notes
Use gel-based red food coloring for vibrant color without thinning the batter. Room temperature eggs and buttermilk blend better. Avoid overmixing to keep cake tender. Chill frosting if too soft before spreading. Level domed cake layers with a serrated knife for even stacking. Refrigerate assembled cake for cleaner slicing.
Nutrition
- Serving Size: 1 slice (1/12 of cak
- Calories: 350
- Fat: 18
- Carbohydrates: 45
- Protein: 3
Keywords: red velvet cake, cream cheese frosting, flag cake, easy cake recipe, festive dessert, homemade frosting, celebration cake


