
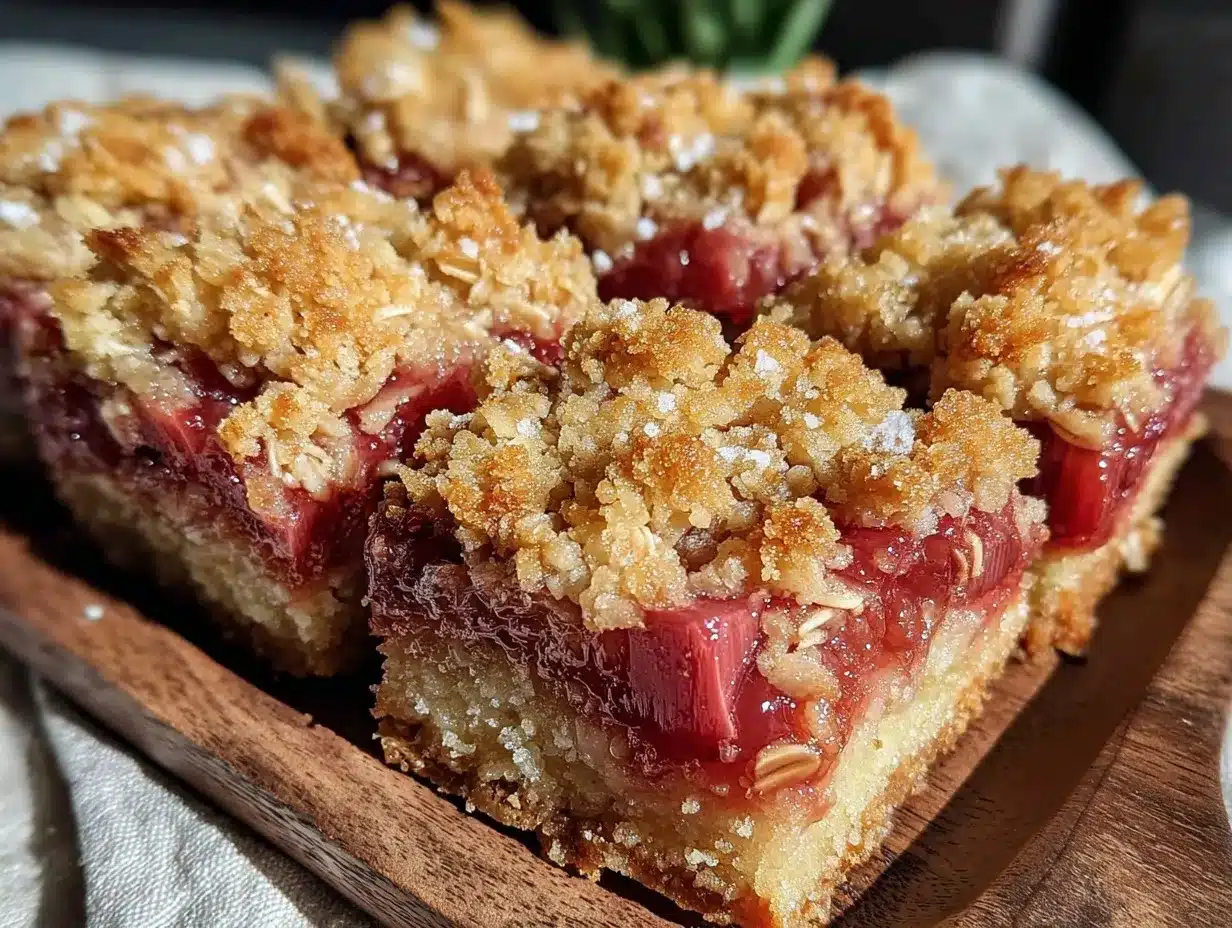
“You know that moment when you stumble into the kitchen late on a Sunday afternoon, craving something sweet but not too fussy? Well, that’s exactly how these cozy rhubarb crumble bars came to be. It was a quiet April day—gray skies outside but the promise of spring in the air—and my neighbor, Joan, popped in with a bunch of freshly picked rhubarb from her garden. I wasn’t sure what to do with it at first; I mean, rhubarb can be a bit tart and tricky to balance. But as we chatted over coffee, she mentioned her grandmother’s old recipe for crumble bars—simple, rustic, with a crunchy oat topping that’s just irresistible.”
Honestly, I didn’t expect much since I hadn’t baked with rhubarb much before, but I gave it a shot that afternoon. I might’ve forgotten to preheat the oven at first (classic me), and the kitchen was a bit messy by the end, but the result was pure magic. The tangy rhubarb filling paired with the buttery oat crumble was like a warm hug on a plate. Maybe you’ve been there—searching for that perfect sweet-and-tart treat that’s easy enough for any day but special enough to feel like a little celebration. These bars stayed with me ever since, and I find myself making them whenever I want that cozy, comforting snack that feels homemade without hours of fuss.
Why You’ll Love This Recipe
Having tested this rhubarb crumble bars recipe over several seasons—sometimes with freshly picked rhubarb, other times with frozen—it’s become a go-to for quick baking that doesn’t skimp on flavor or texture. The balance between the tart rhubarb and sweet oat topping is spot-on, and the bars hold together beautifully, making them perfect for packing in lunchboxes or sharing at a casual brunch.
- Quick & Easy: Ready in just about 45 minutes, including baking time—perfect for those busy afternoons when you want something homemade fast.
- Simple Ingredients: Uses pantry staples like rolled oats, flour, and brown sugar, plus rhubarb which you can often find fresh in spring or grab frozen anytime.
- Perfect for Spring & Summer: Rhubarb’s natural tartness shines bright during these seasons, making the bars a refreshing treat.
- Crowd-Pleaser: Kids love the crunchy topping, while adults appreciate the subtle tang and buttery crust.
- Unbelievably Delicious: The oat crumble topping has just the right crunch, and the rhubarb filling gets beautifully thick and jammy.
What sets this apart from other crumble bars is the technique of mixing half the oats into the base and the rest as a topping, giving you that perfect chewy-crunchy contrast. Plus, I like to add a hint of cinnamon and vanilla extract to the crumble—it’s a subtle twist that makes the flavors pop without overpowering the rhubarb’s natural brightness. Honestly, this isn’t just any crumble bar; it’s the kind you’ll find yourself making on repeat because it feels both nostalgic and refreshingly new.
What Ingredients You Will Need
This recipe uses simple, wholesome ingredients to deliver bold flavor and satisfying texture without the fuss. Most are pantry staples, so you might already have them on hand. The rhubarb adds that delightful tartness, perfectly balanced by the sweet, crunchy oat topping.
- For the Base & Topping:
- 1 ½ cups (150g) rolled oats (I prefer Bob’s Red Mill for a nice chew)
- 1 ¼ cups (160g) all-purpose flour (can swap with gluten-free flour blend for GF option)
- ½ teaspoon ground cinnamon (adds warmth)
- ¼ teaspoon salt
- ¾ cup (170g) unsalted butter, melted and slightly cooled (use European-style butter for richness)
- ½ cup (100g) brown sugar, packed (light or dark both work)
- 1 teaspoon vanilla extract (optional but highly recommended)
- For the Rhubarb Filling:
- 4 cups (about 500g) chopped rhubarb (fresh or frozen, thawed and drained)
- ¾ cup (150g) granulated sugar (adjust to taste depending on rhubarb tartness)
- 2 tablespoons cornstarch (helps thicken the filling)
- 1 tablespoon lemon juice (brightens flavor)
If you want to switch things up, frozen rhubarb works wonderfully when fresh isn’t available; just be sure to drain excess liquid to avoid soggy bars. For a dairy-free version, swap butter with coconut oil, but the texture will be slightly different—still tasty though! And if you prefer a less sweet bar, reduce the sugar in the filling by a few tablespoons to suit your palate.
Equipment Needed
- 9×9-inch (23×23 cm) baking pan – I like using a glass pan for even baking, but metal works fine too.
- Mixing bowls – at least two, one for the crumble mixture and one for the filling.
- Measuring cups and spoons – accuracy helps the crumble texture.
- Spatula or wooden spoon – for mixing the filling and crumble.
- Sharp knife and cutting board – to chop the rhubarb into bite-sized pieces.
- Oven mitts and cooling rack – safety and cooling essentials.
If you don’t have a 9×9 pan, an 8×8-inch pan works but the bars will be thicker and may need a few extra minutes baking. For budget-friendly baking, I’ve used disposable aluminum pans in a pinch, though the bars can brown a little faster. Keep an eye on them if you do! Also, a silicone spatula is a lifesaver for scraping down bowls without losing any of that yummy filling.
Preparation Method
- Preheat the oven to 350°F (175°C). Lightly grease your 9×9-inch baking pan or line it with parchment paper—this makes removing bars later a breeze.
- Prepare the rhubarb filling: In a medium bowl, combine the chopped rhubarb, granulated sugar, cornstarch, and lemon juice. Stir gently until the rhubarb is evenly coated. Set aside to macerate while you prepare the crumble (about 10 minutes).
- Make the crumble base: In a large bowl, mix together half of the rolled oats (¾ cup/75g), all-purpose flour, ground cinnamon, salt, and brown sugar. Pour in the melted butter and vanilla extract, then stir until the mixture is crumbly but holds together when pressed.
- Press the base into the pan: Transfer about two-thirds of the crumble mixture into your prepared pan. Press firmly and evenly into the bottom using your fingers or the back of a spoon. This forms a sturdy crust, so be thorough but don’t compact it too hard.
- Bake the base for 15 minutes until it’s lightly golden around the edges but still firm to the touch. This helps prevent sogginess once the filling is added.
- Spread the rhubarb filling: Remove the pan from the oven and carefully spoon the rhubarb mixture over the warm base, spreading it evenly.
- Add the oat topping: Crumble the remaining oat mixture over the rhubarb filling. Don’t press it down; you want a light, crunchy texture on top.
- Bake again for 30-35 minutes, until the topping is golden brown and the rhubarb filling is bubbling around the edges. Keep an eye on it after 30 minutes to avoid burning.
- Cool completely: Let the bars cool in the pan on a wire rack for at least 1 hour before slicing. This step is key—it helps the filling set and keeps the bars from falling apart.
- Slice and serve: Use a sharp knife to cut into squares or rectangles. For cleaner cuts, warm the knife under hot water and dry it before slicing.
Pro tip: If your rhubarb seems extra juicy, sprinkle a little extra cornstarch in the filling to prevent any runny spots. Also, I sometimes line my pan with parchment that overhangs the sides—makes lifting the whole slab out for slicing way easier!
Cooking Tips & Techniques
Getting the perfect texture for rhubarb crumble bars is all about balance and timing. Here are some things I learned the hard way:
- Don’t skip pre-baking the base. This little step keeps the crust from getting soggy under the juicy rhubarb. I once tried skipping it, and the bars were a bit mushy—lesson learned!
- Drain excess moisture. If using frozen rhubarb, thaw and drain it well. Excess liquid can make the bars too wet and affect baking time.
- Use room temperature butter. It blends more evenly into the oats and flour, giving you that perfect crumble texture.
- Watch your oven closely. Every oven’s a little different—if your topping is browning too fast, tent with foil during the last 10 minutes.
- Let bars cool completely. It’s tempting to dig in early, but cooling helps the filling thicken and bars hold their shape.
- Multitask efficiently: While the base bakes, mix your filling and clean up the prep area. It feels like a race against the clock but keeps things flowing smoothly.
One time, I underestimated how much the rhubarb juice would bubble up; I recommend placing a baking sheet on the rack below your pan if you want to catch any drips and avoid oven messes. Trust me, cleaning baked-on sugar isn’t fun!
Variations & Adaptations
This cozy rhubarb crumble bars recipe is quite flexible. Here are some ways to mix it up based on what you have or your preferences:
- Berry Boost: Add 1 cup (150g) fresh or frozen strawberries or raspberries to the rhubarb filling for a sweeter, more colorful bar.
- Gluten-Free: Substitute the all-purpose flour with a 1:1 gluten-free baking flour blend. Just be sure your blend contains xanthan gum for structure.
- Vegan Version: Swap the butter for coconut oil or a plant-based margarine. Use maple syrup instead of brown sugar to deepen flavor.
- Nutty Crunch: Mix ½ cup chopped walnuts or pecans into the oat topping for extra texture and a toasty note.
- Spiced Up: Add a pinch of ground ginger or nutmeg to the crumble for a cozy twist that pairs wonderfully with rhubarb.
Personally, I once made a batch with a splash of orange zest in the filling and it added a lovely brightness that surprised me. Feel free to experiment—you might find your own favorite version!
Serving & Storage Suggestions
These rhubarb crumble bars are best served at room temperature or slightly warm. I like to enjoy them with a dollop of whipped cream or a scoop of vanilla ice cream for an indulgent treat. They also pair really well with a hot cup of tea or coffee, perfect for a cozy afternoon snack.
For storage, keep the bars in an airtight container at room temperature for up to 2 days. If you want to keep them longer, store in the refrigerator for up to 5 days. They reheat beautifully—just pop them in a preheated 325°F (160°C) oven for about 10 minutes to bring back that fresh-baked warmth.
You can freeze the bars too! Wrap individual slices tightly in plastic wrap and place in a freezer-safe bag. They’ll keep for up to 3 months. Thaw overnight in the fridge and warm slightly before serving.
Flavor-wise, the bars actually taste better a day after baking, once the rhubarb has had time to soak into the crumble layers. So if you can wait, I recommend making them a day ahead for maximum cozy satisfaction.
Nutritional Information & Benefits
Each serving of these rhubarb crumble bars (assuming 12 bars per batch) provides approximately:
| Calories | 210 kcal |
|---|---|
| Carbohydrates | 30g |
| Fat | 9g |
| Protein | 2g |
| Fiber | 3g |
Rhubarb is a good source of vitamin K and dietary fiber, aiding digestion. The oats contribute heart-healthy beta-glucan fiber, which can help lower cholesterol. Using brown sugar adds moisture and flavor but can be moderated for lower sugar intake.
This recipe is naturally gluten-free with simple swaps and can be made vegan, making it suitable for various dietary needs. If you have nut allergies, avoid adding nuts and watch for cross-contamination in oats.
From my experience, these bars hit the sweet spot between indulgence and wholesome ingredients—comfort food you feel good about sharing with family and friends.
Conclusion
Cozy rhubarb crumble bars bring together the best of spring flavors and simple baking magic. They’re not just easy to make but also deliver that wonderful crunchy oat topping with a tangy, jammy rhubarb center that’s hard to resist. Whether you’re new to baking with rhubarb or a longtime fan, this recipe offers a reliable, tasty way to enjoy it in bar form.
Feel free to customize by adding berries, nuts, or spices to make it your own. I love how forgiving the recipe is, perfect for both beginners and seasoned bakers looking for a fuss-free treat. Honestly, these bars have become a little tradition in my kitchen for casual gatherings or a cozy night in.
If you try this recipe, I’d love to hear how it turns out or any fun twists you come up with—drop a comment below or share your photos! Happy baking, and here’s to many cozy bites ahead.
FAQs
Can I use frozen rhubarb for these crumble bars?
Yes! Just be sure to thaw and drain the rhubarb well to avoid excess moisture making the bars soggy.
How do I store leftover rhubarb crumble bars?
Store them in an airtight container at room temperature for up to 2 days or refrigerate for up to 5 days. Bars also freeze well for up to 3 months.
Can I make this recipe gluten-free?
Absolutely! Substitute the all-purpose flour with a gluten-free baking blend that includes xanthan gum for best results.
Is there a vegan version of this recipe?
Yes, swap the butter with coconut oil or plant-based margarine and use maple syrup instead of brown sugar to keep it vegan.
How do I prevent the crumble topping from burning?
If the topping browns too quickly, tent the pan loosely with foil for the last 10 minutes of baking to protect it while the filling finishes cooking.
Pin This Recipe!
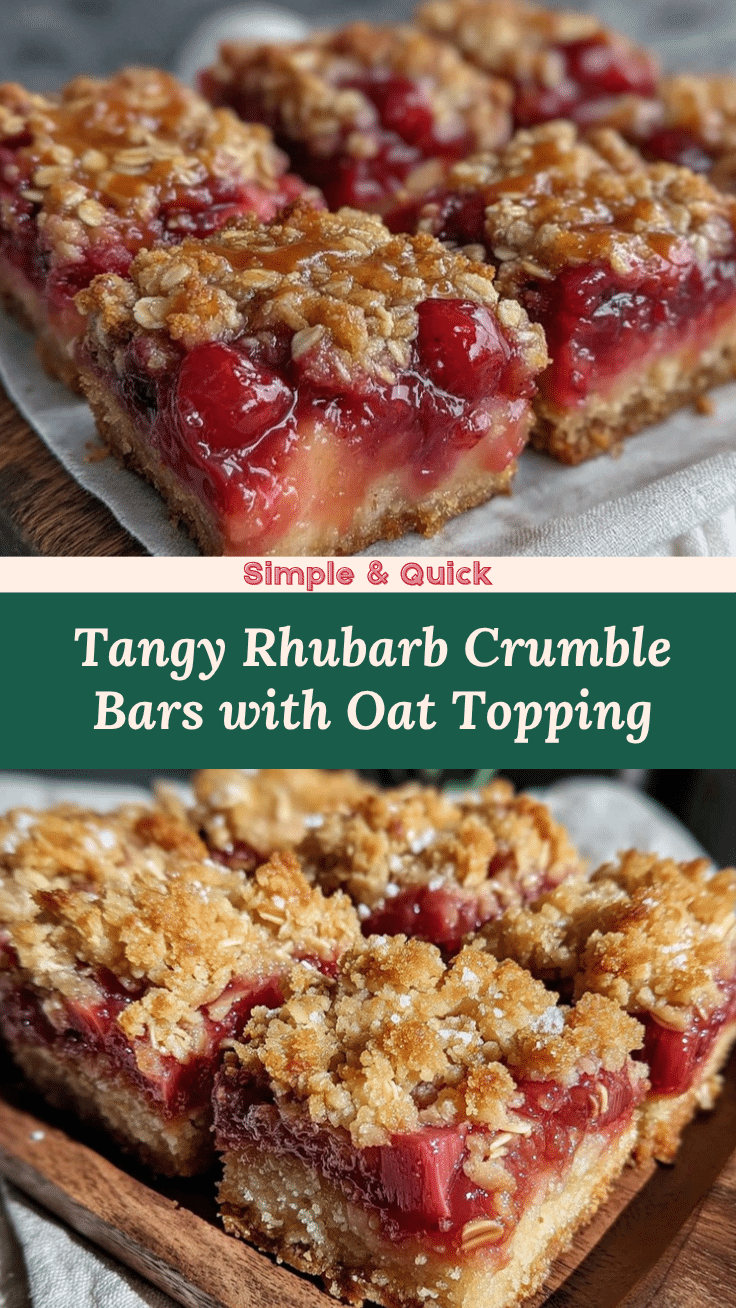
Cozy Rhubarb Crumble Bars
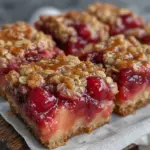
These cozy rhubarb crumble bars feature a tangy rhubarb filling paired with a buttery, crunchy oat topping, perfect for a quick and comforting homemade treat.
- Prep Time: 15 minutes
- Cook Time: 45 minutes
- Total Time: 1 hour
- Yield: 12 bars 1x
- Category: Dessert
- Cuisine: American
Ingredients
- 1 ½ cups (150g) rolled oats
- 1 ¼ cups (160g) all-purpose flour (can swap with gluten-free flour blend for GF option)
- ½ teaspoon ground cinnamon
- ¼ teaspoon salt
- ¾ cup (170g) unsalted butter, melted and slightly cooled (use European-style butter for richness)
- ½ cup (100g) brown sugar, packed (light or dark both work)
- 1 teaspoon vanilla extract (optional)
- 4 cups (about 500g) chopped rhubarb (fresh or frozen, thawed and drained)
- ¾ cup (150g) granulated sugar (adjust to taste)
- 2 tablespoons cornstarch
- 1 tablespoon lemon juice
Instructions
- Preheat the oven to 350°F (175°C). Lightly grease a 9×9-inch baking pan or line it with parchment paper.
- In a medium bowl, combine chopped rhubarb, granulated sugar, cornstarch, and lemon juice. Stir gently and set aside to macerate for about 10 minutes.
- In a large bowl, mix half of the rolled oats (¾ cup), all-purpose flour, ground cinnamon, salt, and brown sugar.
- Pour in melted butter and vanilla extract, stirring until the mixture is crumbly but holds together when pressed.
- Press about two-thirds of the crumble mixture firmly and evenly into the bottom of the prepared pan.
- Bake the base for 15 minutes until lightly golden and firm to the touch.
- Remove from oven and spread the rhubarb filling evenly over the warm base.
- Crumble the remaining oat mixture over the rhubarb filling without pressing down.
- Bake again for 30-35 minutes until the topping is golden brown and the filling is bubbling around the edges.
- Cool completely in the pan on a wire rack for at least 1 hour before slicing.
- Slice into squares or rectangles using a sharp knife warmed under hot water for cleaner cuts.
Notes
Pre-baking the base prevents sogginess. Drain excess moisture from frozen rhubarb to avoid wet bars. Use room temperature butter for better crumble texture. Tent with foil if topping browns too fast. Cool bars completely before slicing to help filling set. For easier removal, line pan with parchment paper that overhangs the sides.
Nutrition
- Serving Size: 1 bar (1/12th of rec
- Calories: 210
- Fat: 9
- Carbohydrates: 30
- Fiber: 3
- Protein: 2
Keywords: rhubarb crumble bars, oat topping, easy dessert, spring dessert, homemade bars, rhubarb recipe, crunchy oat bars, gluten-free option, vegan option


