
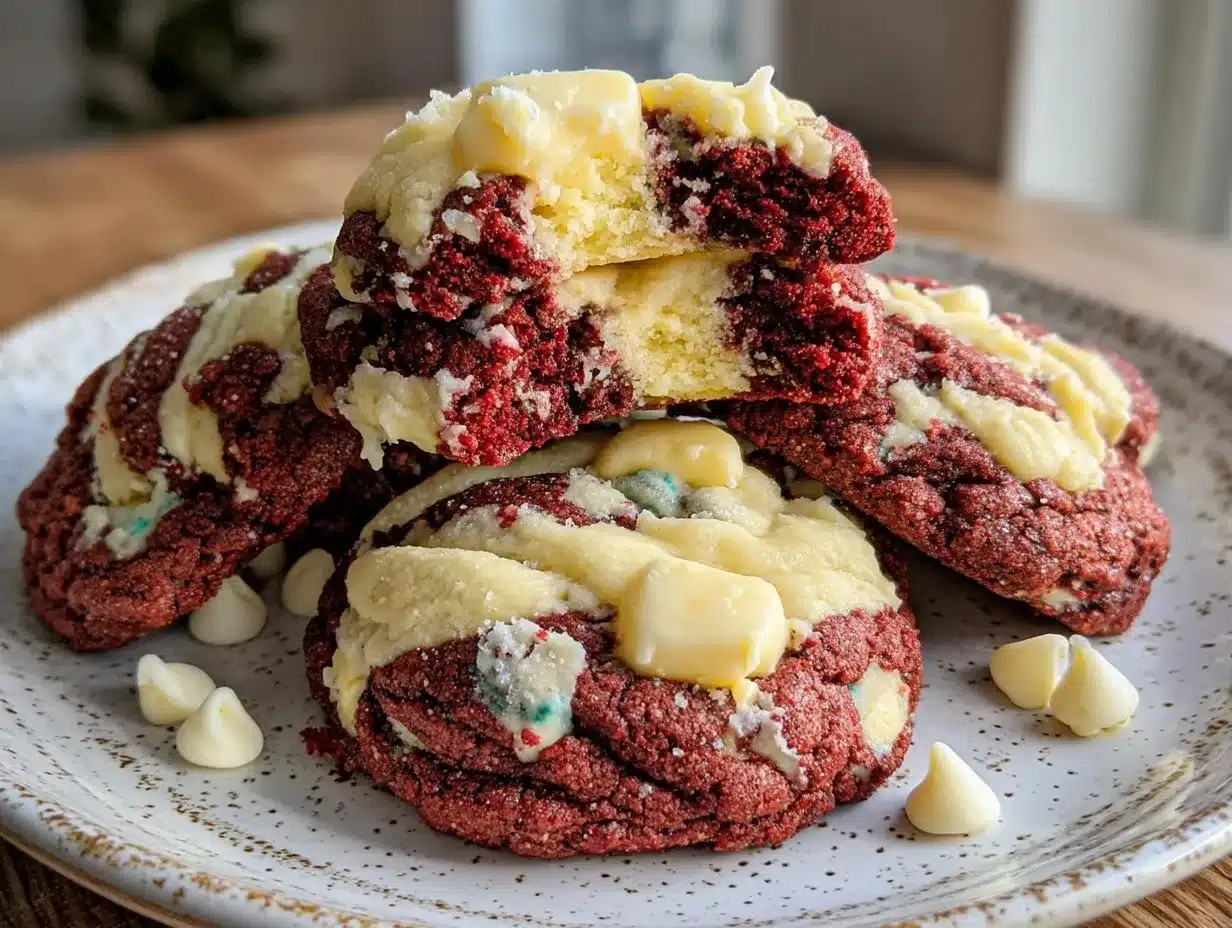
Let me tell you, the scent of cocoa and cream cheese wafting from my kitchen the first time I baked these red velvet cheesecake cookies is enough to make anyone’s mouth water. The moment I pulled that tray from the oven, my whole house smelled like a cozy bakery on a chilly afternoon. The first time I baked these, I was instantly hooked—the kind of moment where you pause, take a deep breath, and just smile because you know you’re onto something truly special. Honestly, I wish I’d discovered this recipe years ago when I was knee-high to a grasshopper and begging my grandma for treats on rainy weekends.
Years ago, I stumbled upon this recipe while trying to recreate a bakery favorite during a lazy Sunday afternoon. My family couldn’t stop sneaking them off the cooling rack (and I can’t really blame them). These red velvet cheesecake cookies with creamy swirls quickly became a staple for family gatherings and gifting. You know what makes them so dangerously easy? The perfect combo of rich, velvety red velvet cookie dough with luscious cream cheese swirls baked right in. They’re pure, nostalgic comfort wrapped in a cookie — perfect for potlucks, sweet treats for your kids, or just a little indulgence to brighten up your Pinterest cookie board.
After testing this recipe multiple times in the name of research, of course, I can say without a doubt that these cookies feel like a warm hug in dessert form. You’ll want to bookmark this one—it’s that good.
Why You’ll Love This Recipe
Having spent countless afternoons perfecting these red velvet cheesecake cookies, I’m confident this recipe will become your go-to for a cozy, impressive dessert. Here’s why:
- Quick & Easy: Comes together in under 30 minutes, perfect for busy weeknights or last-minute cravings.
- Simple Ingredients: No fancy grocery trips needed; you likely already have everything in your kitchen pantry.
- Perfect for Any Occasion: Whether it’s a holiday gathering, brunch, or casual get-together, these cookies steal the spotlight.
- Crowd-Pleaser: Always gets rave reviews from kids and adults alike—because who doesn’t love cheesecake in cookie form?
- Unbelievably Delicious: The texture and flavor combo is next-level comfort food, with that creamy cheesecake swirl adding a silky surprise.
What sets this recipe apart isn’t just the classic red velvet flavor—it’s the way the cream cheese gets gently folded into the dough, creating those dreamy swirls that melt in your mouth. This isn’t just another cookie; it’s a little celebration of textures and tastes. Plus, it’s got the perfect balance of sweetness and cocoa richness that makes you close your eyes after the first bite. Honestly, these cookies are comfort food reimagined—healthier than your average cheesecake but just as soul-soothing. If you’re looking to impress guests without stress or just want to turn a simple afternoon into something memorable, these red velvet cheesecake cookies are your ticket.
What Ingredients You Will Need
This recipe uses simple, wholesome ingredients to deliver bold flavor and satisfying texture without the fuss. Most are pantry staples with a few fresh touches to keep things interesting.
- For the Red Velvet Cookie Dough:
- All-purpose flour – 2 ½ cups (312g), sifted for lightness
- Unsweetened cocoa powder – 2 tbsp (15g), choose Dutch-processed for deeper flavor
- Baking powder – 1 tsp
- Baking soda – ½ tsp
- Salt – ½ tsp
- Unsalted butter – 1 cup (227g), softened (I recommend using [Land O’Lakes] for best texture)
- Granulated sugar – 1 ½ cups (300g)
- Large eggs – 2, room temperature
- Vanilla extract – 1 tsp, pure if possible
- Red food coloring – 2 tbsp (liquid or gel works fine; gel gives more vibrant color)
- Buttermilk – ¼ cup (60ml), for that classic red velvet tang (or add 1 tbsp lemon juice to regular milk as substitute)
- For the Cream Cheese Swirl:
- Cream cheese – 8 oz (226g), softened (use full-fat for best creaminess)
- Powdered sugar – ½ cup (60g), sifted to avoid lumps
- Vanilla extract – ½ tsp
For seasonal twists, consider swapping the cream cheese filling with a lemon cream cheese mix for a zingy note. If you want a gluten-free option, almond flour can be used, but the texture will be slightly different (still delicious, promise!). Personally, I always recommend using fresh butter and cream cheese as they make a world of difference in flavor and texture.
Equipment Needed
- Mixing bowls – medium and large sizes for dough and filling
- Electric mixer – handheld or stand mixer (stand mixer with paddle attachment speeds things up)
- Measuring cups and spoons – for accuracy
- Sifter – optional but recommended for dry ingredients to keep the batter light
- Rubber spatula – great for folding in ingredients gently
- Baking sheets – two standard size, lined with parchment paper for easy cleanup
- Cooling rack – essential for cooling cookies evenly
- Optional: cookie scoop – helps make uniformly sized cookies (I use a 2-tablespoon scoop for best results)
If you don’t have a stand mixer, no worries—just be prepared to put in a little extra arm work with a whisk or wooden spoon. Parchment paper is a lifesaver here, as these cookies can be sticky, and it helps prevent burning on the bottom. I’ve found that investing in a good silicone baking mat can save wear and tear on your pans over time.
Preparation Method
- Preheat and Prep: Set your oven to 350°F (175°C). Line two baking sheets with parchment paper or silicone mats. This step takes about 10 minutes, including gathering ingredients.
- Mix Dry Ingredients: In a medium bowl, sift together 2 ½ cups (312g) all-purpose flour, 2 tbsp (15g) cocoa powder, 1 tsp baking powder, ½ tsp baking soda, and ½ tsp salt. Give it a good stir and set aside.
- Cream Butter and Sugar: Using an electric mixer, beat 1 cup (227g) softened unsalted butter with 1 ½ cups (300g) granulated sugar on medium speed until fluffy and pale—about 3-4 minutes. This is crucial for light texture.
- Add Eggs and Flavorings: Beat in 2 large eggs, one at a time, ensuring each is fully incorporated. Then add 1 tsp vanilla extract and 2 tbsp red food coloring. Mix until the dough is uniformly red.
- Incorporate Buttermilk: Add ¼ cup (60ml) buttermilk and mix on low speed just until combined. This keeps the dough tender with that classic red velvet tang.
- Combine Dry and Wet: Gradually add the sifted dry ingredients to the wet mix, folding gently with a spatula or mixing on low speed until just combined. Be careful not to overmix or the cookies will be tough. The dough should be soft but hold its shape.
- Prepare Cream Cheese Filling: In a separate bowl, beat 8 oz (226g) softened cream cheese with ½ cup (60g) powdered sugar and ½ tsp vanilla extract until smooth and creamy. This usually takes about 2 minutes.
- Assemble Cookies: Scoop 2 tablespoons of red velvet dough onto the baking sheet. Then, dollop about 1 teaspoon of cream cheese filling on top of each dough mound. Using a toothpick or the back of a spoon, swirl the cream cheese gently into the dough to create those signature creamy swirls.
- Bake: Place the trays in the preheated oven and bake for 12-15 minutes, or until the edges are set but the centers still look slightly soft. The cookies will firm up as they cool. Avoid overbaking to keep them chewy and moist.
- Cool: Let the cookies cool on the baking sheet for 5 minutes before transferring to a wire rack to cool completely. This prevents breakage and keeps the creamy swirl intact.
If you notice the cream cheese filling spreading too much, chilling the dough for 20 minutes before baking can help keep the swirls defined. The smell when they come out of the oven? Honestly, it’s pure magic.
Cooking Tips & Techniques
When making these red velvet cheesecake cookies, a few tricks can save you from common pitfalls. First, don’t skip sifting the dry ingredients—it keeps the batter lighter and prevents lumps, which is especially important for that delicate cocoa powder. Also, beating the butter and sugar until light and fluffy is key; it traps air that helps your cookies rise just right.
One time I overmixed the flour, and the cookies turned out dense and crumbly—not fun. So, fold the flour in gently and stop as soon as it’s combined. Trust me, less fuss means better texture here. When swirling the cream cheese, be gentle; too vigorous mixing will blend it completely into the dough, losing that pretty marbled effect you want.
Timing is everything. Baking just until the edges set but the center looks soft ensures a chewy, moist center every time. Multitasking tip: while the first batch bakes, prep the next batch’s dough and filling to keep your workflow smooth. Lastly, use room temperature ingredients—they combine easier and bake more evenly.
Variations & Adaptations
Feel like mixing things up? Here are a few variations you might enjoy:
- White Chocolate Swirls: Replace cream cheese filling with a mix of melted white chocolate and cream cheese for a sweeter, silkier twist.
- Seasonal Berry Burst: Fold in fresh or frozen raspberries or strawberries into the cream cheese filling for a fruity surprise.
- Gluten-Free Version: Swap all-purpose flour with a 1:1 gluten-free baking blend. The cookies will be a bit softer but just as tasty.
- Vegan Adaptation: Use dairy-free cream cheese and a flax egg (1 tbsp ground flaxseed + 3 tbsp water) instead of eggs for a plant-based option.
Personally, I tried adding a pinch of cinnamon to the dough once—subtle but lovely, especially in the fall. Also, if you want crispier cookies, flatten the dough balls slightly before baking. For a cakier texture, bake a minute or two longer, but watch closely.
Serving & Storage Suggestions
These red velvet cheesecake cookies are best served at room temperature, so the creamy swirls stay delightfully soft. Pair them with a cold glass of milk or a hot cup of coffee or tea for a cozy combo. For parties, arrange them on a pretty platter garnished with fresh berries or a dusting of powdered sugar.
Store cookies in an airtight container at room temperature for up to 3 days. For longer storage, freeze them in a single layer on a tray, then transfer to a freezer-safe bag for up to 3 months. Thaw overnight in the fridge and bring to room temp before serving.
Reheating them briefly in a warm oven (about 300°F/150°C for 5 minutes) brings back that fresh-baked softness and enhances the creamy swirl’s flavor. Over time, the flavors deepen, making leftovers even more irresistible.
Nutritional Information & Benefits
| Nutrient | Per Cookie (approx.) |
|---|---|
| Calories | 180 kcal |
| Fat | 9g |
| Carbohydrates | 22g |
| Protein | 3g |
| Sugar | 14g |
These cookies, while a treat, include some nutritional perks thanks to the cream cheese providing protein and calcium. The cocoa powder adds antioxidants, and using real butter and full-fat cream cheese provides satisfying richness that helps you feel more satiated. For those mindful of dietary needs, this recipe can be easily adapted to gluten-free or vegan versions, as mentioned earlier. Just be aware of common allergens like dairy, eggs, and gluten.
Conclusion
In short, these red velvet cheesecake cookies with creamy swirls are a must-try for anyone who loves a little twist on classic comfort food. They strike the perfect balance between rich, tangy cheesecake and sweet, tender red velvet cookie—making them a crowd favorite every time. Feel free to customize the swirls or add your favorite flavors to make them truly your own.
I love this recipe because it’s simple, reliably delicious, and a little slice of happiness in cookie form. If you give it a go, I’d love to hear your tweaks and how your family reacts! Don’t be shy—drop a comment, share with friends, or even send me your photos. Baking should be fun, after all, and these cookies are a joyful way to bring a little sweetness into your day.
Happy baking, and remember: sometimes the best recipes are the ones that come with a swirl of love.
FAQs About Red Velvet Cheesecake Cookies
Can I use store-bought red velvet cake mix instead of making the dough from scratch?
You can, but making the dough from scratch gives you full control over flavor and texture. Using cake mix may result in softer, less chewy cookies. If you do use cake mix, consider adding a bit of extra butter and egg to improve texture.
How do I keep the cream cheese swirls from spreading too much?
Chilling the dough for 20-30 minutes before baking helps the cream cheese hold its shape better. Also, gently swirl rather than mixing the cream cheese fully into the dough.
Can I freeze these cookies after baking?
Absolutely! Freeze fully cooled cookies in a single layer, then transfer to a sealed bag or container. Thaw overnight in the fridge and warm slightly before serving for best flavor.
What if I don’t have buttermilk—can I substitute it?
Yes! Mix 1 tablespoon of lemon juice or white vinegar into ¼ cup (60ml) milk and let it sit for 5 minutes before using as a buttermilk substitute.
Are these cookies suitable for kids?
Definitely. They’re sweet but not overly so, with a fun texture and bright color kids love. Just keep an eye on the red food coloring amount if you’re concerned about dyes.
Pin This Recipe!
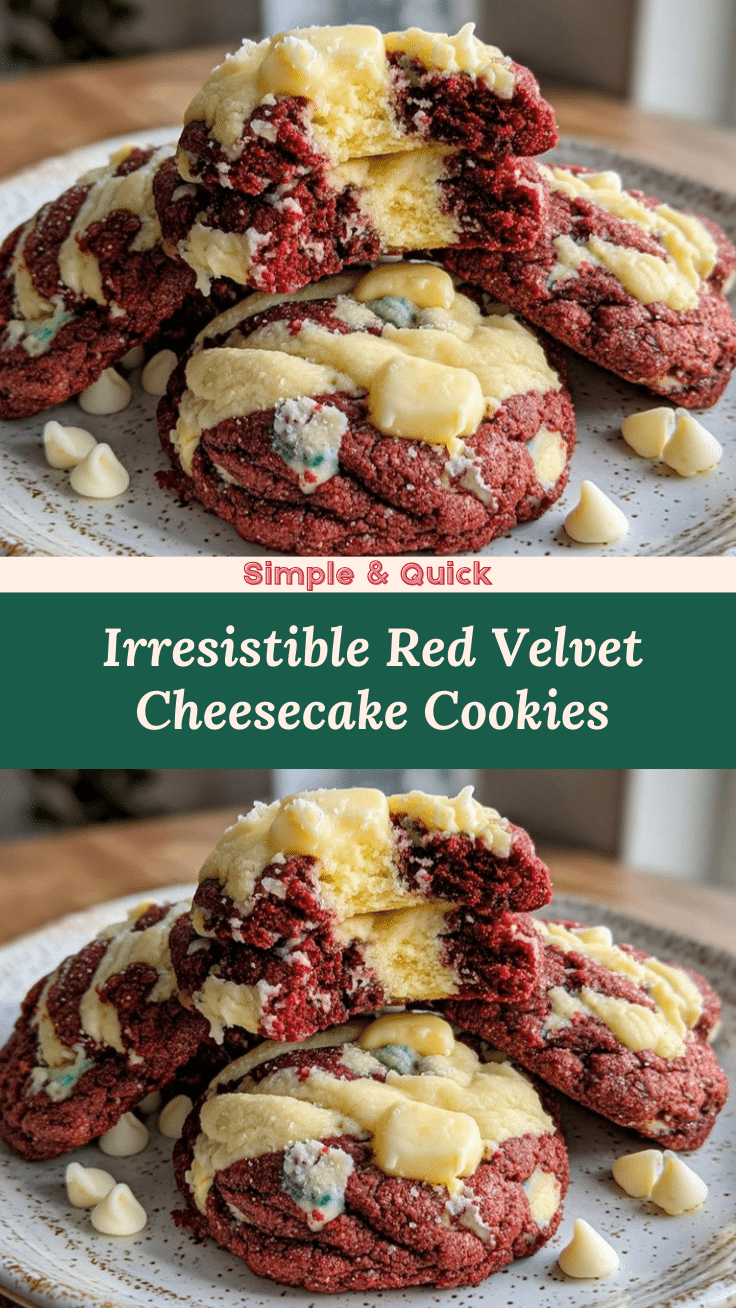
Red Velvet Cheesecake Cookies Recipe Easy Homemade with Creamy Swirls

These red velvet cheesecake cookies combine rich, velvety red velvet cookie dough with luscious cream cheese swirls for a cozy, nostalgic treat perfect for any occasion.
- Prep Time: 20 minutes
- Cook Time: 15 minutes
- Total Time: 35 minutes
- Yield: 24 cookies 1x
- Category: Dessert
- Cuisine: American
Ingredients
- 2 ½ cups (312g) all-purpose flour, sifted
- 2 tbsp (15g) unsweetened cocoa powder (Dutch-processed recommended)
- 1 tsp baking powder
- ½ tsp baking soda
- ½ tsp salt
- 1 cup (227g) unsalted butter, softened
- 1 ½ cups (300g) granulated sugar
- 2 large eggs, room temperature
- 1 tsp vanilla extract
- 2 tbsp red food coloring (liquid or gel)
- ¼ cup (60ml) buttermilk (or ¼ cup milk + 1 tbsp lemon juice as substitute)
- 8 oz (226g) cream cheese, softened (full-fat recommended)
- ½ cup (60g) powdered sugar, sifted
- ½ tsp vanilla extract
Instructions
- Preheat oven to 350°F (175°C). Line two baking sheets with parchment paper or silicone mats.
- In a medium bowl, sift together flour, cocoa powder, baking powder, baking soda, and salt. Stir and set aside.
- Using an electric mixer, beat softened butter and granulated sugar on medium speed until fluffy and pale, about 3-4 minutes.
- Beat in eggs one at a time until fully incorporated. Add vanilla extract and red food coloring; mix until dough is uniformly red.
- Add buttermilk and mix on low speed just until combined.
- Gradually add dry ingredients to wet mixture, folding gently or mixing on low speed until just combined. Do not overmix.
- In a separate bowl, beat cream cheese, powdered sugar, and vanilla extract until smooth and creamy, about 2 minutes.
- Scoop 2 tablespoons of red velvet dough onto baking sheet. Dollop about 1 teaspoon of cream cheese filling on top of each dough mound. Swirl gently with a toothpick or back of a spoon to create creamy swirls.
- Bake for 12-15 minutes until edges are set but centers look slightly soft. Cookies will firm as they cool.
- Cool cookies on baking sheet for 5 minutes, then transfer to wire rack to cool completely.
Notes
Chill dough for 20-30 minutes before baking to keep cream cheese swirls defined. Avoid overmixing flour to prevent dense cookies. Use room temperature ingredients for best results. For gluten-free, substitute flour with gluten-free baking blend. For vegan, use dairy-free cream cheese and flax egg.
Nutrition
- Serving Size: 1 cookie
- Calories: 180
- Sugar: 14
- Fat: 9
- Carbohydrates: 22
- Protein: 3
Keywords: red velvet cookies, cheesecake cookies, red velvet cheesecake, creamy swirls, easy cookies, homemade cookies, dessert, baking


