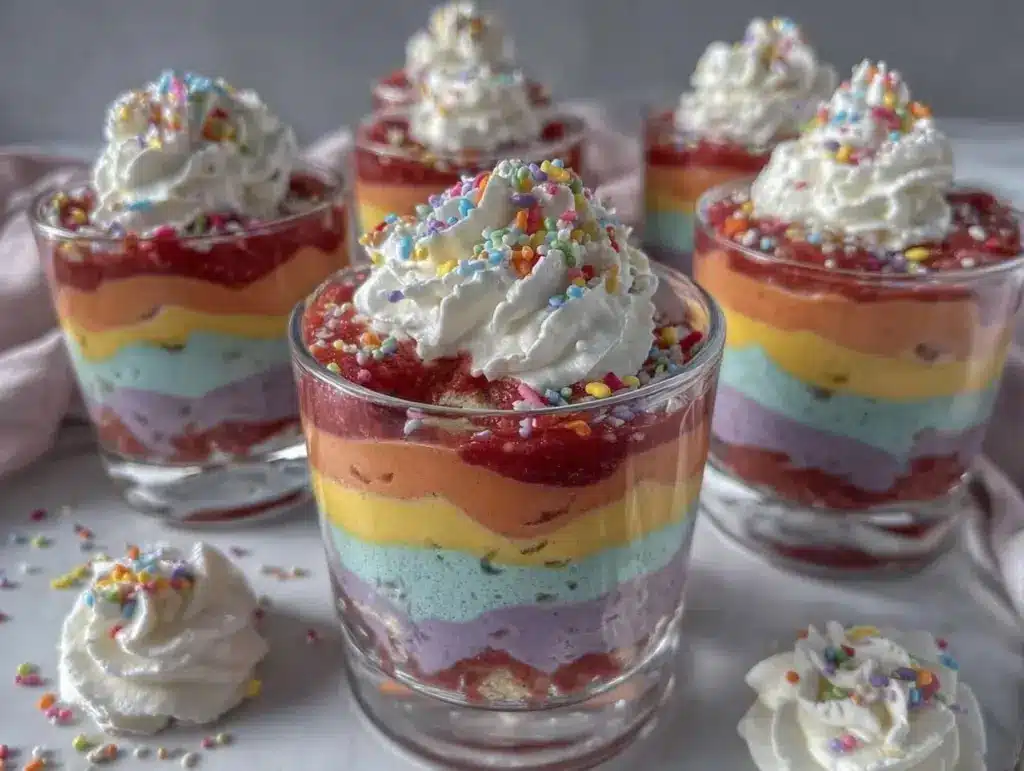
Let me tell you, the sight of those vibrant, swirling colors in the Creamy Dr. Seuss Rainbow Pudding Whirl Cups is enough to make anyone’s heart skip a beat—especially if you’re a kid (or a kid-at-heart!). The first time I made these, I was instantly hooked by how the bright layers of pudding reminded me of those whimsical Dr. Seuss books I loved when I was knee-high to a grasshopper. Honestly, it was the kind of moment where you pause, take a deep breath, and just smile because you know you’re onto something truly special. My kids couldn’t stop grinning as they eagerly dug in, their eyes wide with delight at the colorful swirls.
Years ago, on a rainy weekend, I stumbled upon this idea while trying to come up with a fun, no-fuss dessert that would brighten up a gloomy day. The Creamy Dr. Seuss Rainbow Pudding Whirl Cups quickly became a staple at our family gatherings and birthday parties. I wish I’d discovered this recipe years ago—it’s dangerously easy and brings pure, nostalgic comfort without any stress in the kitchen. My family couldn’t stop sneaking them off the cooling rack (and I can’t really blame them). Whether you’re looking to brighten up your Pinterest cookie board or need a sweet treat for the kids’ party, these pudding cups are the perfect pick-me-up you didn’t know you needed.
After testing the recipe multiple times (in the name of research, of course), it’s clear these pudding whirls deliver on every level. The creamy texture paired with the cheerful rainbow colors feels like a warm hug from your favorite storybook. Trust me—you’re going to want to bookmark this one!
Why You’ll Love This Creamy Dr. Seuss Rainbow Pudding Whirl Cups Recipe
As someone who’s spent countless hours in the kitchen, I can confidently say this recipe ticks all the boxes for a hassle-free, fun dessert that kids and adults adore. Here’s why you’re going to fall in love with these pudding whirl cups:
- Quick & Easy: Comes together in under 30 minutes, which is perfect for busy weeknights or last-minute kids parties.
- Simple Ingredients: No fancy grocery runs needed; you probably have most of these on hand already.
- Perfect for Kids’ Parties: The colorful swirls add excitement and whimsy to any celebration.
- Crowd-Pleaser: Always gets rave reviews from kids and adults alike—even picky eaters ask for seconds.
- Unbelievably Delicious: The creamy texture combined with playful colors makes this dessert both fun and comforting.
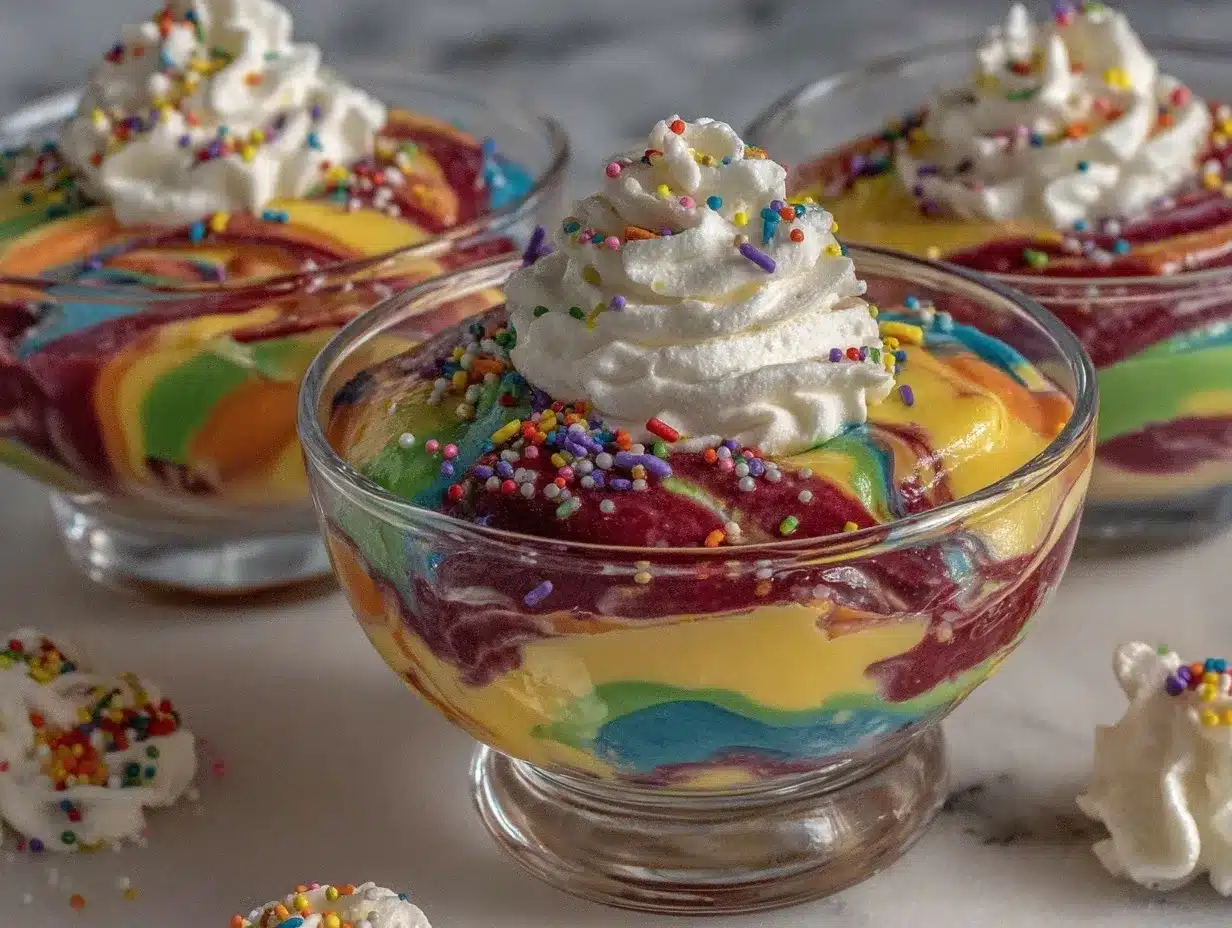
This isn’t just another pudding recipe. The secret lies in how you gently fold the layers to create that signature whirl effect, making every bite a surprise of flavors and colors. Plus, I use a blend of cream cheese and whipped topping to add richness and a velvety smooth finish that’s not too sweet. It’s the kind of dessert that makes you close your eyes after the first bite and say, “Yep, that’s good.”
Whether you’re impressing guests without stress or turning an ordinary afternoon into a memorable moment, these pudding whirl cups deliver smiles with every spoonful.
What Ingredients You Will Need
This recipe uses simple, wholesome ingredients to deliver bold flavor and a satisfying, creamy texture without the fuss. Most are pantry staples or easy-to-find items, making this dessert as approachable as it is fun.
- Instant pudding mix: 1 box (3.4 oz / 96 g) vanilla flavor (I recommend Jell-O for the best texture)
- Milk: 2 cups (480 ml), whole milk works best for creaminess
- Cream cheese: 4 oz (115 g), softened (adds richness and tang)
- Whipped topping: 1 cup (240 ml), thawed (cool whip style)
- Food coloring: Red, orange, yellow, green, blue, and purple gel food colors (gel works better for vibrant hues without watering down the pudding)
- Vanilla extract: 1 tsp (5 ml) for extra flavor depth
- Granulated sugar: 2 tbsp (25 g), optional and adjustable based on your sweetness preference
Optional:
- Mini marshmallows or sprinkles: For garnish and extra fun on top
- Gluten-free option: This recipe is naturally gluten-free, but check pudding mix labels to be sure.
- Dairy-free alternative: Use coconut milk and dairy-free cream cheese substitutes for a vegan twist.
When picking cream cheese, I usually go for Philadelphia—it’s smooth and consistent every time. The gel food coloring is key here; it makes those colors pop like a rainbow in a cup. If you can, avoid liquid colors as they can thin out the pudding. Feel free to swap milk for almond or oat milk if you prefer a plant-based version.
Equipment Needed
- Mixing bowls: Multiple small bowls to divide pudding for coloring (glass or stainless steel preferred)
- Electric mixer or whisk: An electric hand mixer speeds things up but a sturdy whisk works fine
- Measuring cups and spoons: For precise ingredient amounts
- Spatula: Flexible silicone spatula for folding and scraping
- Small clear cups or parfait glasses: For serving and showing off those beautiful rainbows
- Spoons or piping bags: To layer and swirl pudding (piping bags are optional but make layering easier)
If you don’t have piping bags, no worries—just use spoons to carefully layer pudding colors. I once used zipper-lock bags with a tiny corner cut off, and that worked like a charm in a pinch. For cleanup, silicone spatulas are lifesavers, especially when working with sticky pudding mixtures.
Preparation Method
- Prepare the vanilla pudding base: In a large bowl, whisk together 1 box (3.4 oz / 96 g) of instant vanilla pudding mix with 2 cups (480 ml) cold whole milk until thickened, about 2 minutes. Let it sit for 5 minutes to fully set.
- Make the cream cheese blend: In a separate bowl, beat 4 oz (115 g) softened cream cheese with 1 cup (240 ml) whipped topping and 1 tsp (5 ml) vanilla extract until smooth and creamy. Add 2 tbsp (25 g) granulated sugar if you like it sweeter.
- Combine pudding and cream cheese mixtures: Gently fold the pudding into the cream cheese mixture until fully combined and silky smooth.
- Divide pudding for coloring: Split the combined pudding evenly into six small bowls. Add a drop or two of gel food coloring to each bowl to create red, orange, yellow, green, blue, and purple colors. Stir well until color is uniform. (Adjust the amount of gel coloring to get your desired vibrancy.)
- Layer the pudding colors: Using spoons or piping bags, carefully layer each colored pudding into your serving cups, starting with red at the bottom, then orange, yellow, green, blue, and purple on top. For the swirl effect, gently use a toothpick or skewer to create soft spirals through the layers without mixing them too much.
- Chill: Refrigerate the pudding cups for at least 1 hour to let the flavors meld and the pudding firm up.
- Serve: Just before serving, garnish with mini marshmallows or sprinkles if desired. Enjoy the creamy, colorful fun!
Preparation Notes: When folding pudding with cream cheese, be gentle to keep that light, airy texture. If the pudding feels too thick after chilling, let it sit at room temperature for 10 minutes before serving for a creamier mouthfeel. Avoid over-swizzling the colors or they’ll turn muddy—less is more when creating those delicate whirls.
Cooking Tips & Techniques
Creating the perfect Creamy Dr. Seuss Rainbow Pudding Whirl Cups is as much about the technique as it is the ingredients. Here are some tips I’ve learned the hard way:
- Use gel food coloring: It delivers vibrant colors without thinning your pudding mix.
- Chill adequately: Don’t skip the chilling step—it helps the pudding set properly and deepens flavor.
- Gentle folding: When mixing cream cheese into pudding, fold gently to keep the texture light and creamy instead of dense and chalky.
- Layer slowly: Pour each colored pudding slowly and evenly to avoid colors mixing prematurely.
- Swirling technique: Use a toothpick or skewer in soft, circular motions to create the whirl effect without blending colors completely.
- Make ahead: These cups can be prepped a day ahead, but add garnishes just before serving to keep them fresh and pretty.
One time, I got impatient and swirled too vigorously—the colors turned into a muddy mess. Learned my lesson! Patience pays off with this one. Also, multitasking tip: while pudding chills, prep your garnishes or set the table to save time. Consistency in measuring ingredients is key for texture—too much milk and the pudding won’t set properly.
Variations & Adaptations
Want to mix things up? Here are some fun and tasty ways to customize your Rainbow Pudding Whirl Cups:
- Dairy-free version: Swap regular milk for coconut or almond milk and use dairy-free cream cheese and whipped topping.
- Flavor twists: Replace vanilla pudding with chocolate or strawberry pudding for a different color palette and taste.
- Fruit additions: Layer in fresh berries or sliced bananas between pudding layers for extra texture and natural sweetness.
- Adult-friendly: Add a splash of flavored liqueur like Grand Marnier or Bailey’s to the cream cheese mixture for a grown-up treat.
- Gluten-free option: The recipe is naturally gluten-free, but double-check pudding mix labels to be safe.
Personally, I tried swapping in lemon pudding once for a zesty surprise, and my kids loved it—felt like summer in a cup! You can also experiment with different food coloring shades or edible glitter for extra whimsy. If you want to use gelatin or agar agar to make it firmer, just be mindful that it might change the texture slightly.
Serving & Storage Suggestions
Serve these pudding whirl cups chilled for the best creamy texture and vibrant colors. They’re perfect as a sweet finale to a kids’ party or a cheerful snack on a sunny afternoon.
Pair them with simple finger foods like mini sandwiches, fruit kebabs, or even popcorn for a fun party spread. For drinks, a light lemonade or sparkling water with a splash of fruit juice complements the sweetness nicely.
Store leftovers covered in the refrigerator for up to 3 days. The colors and texture stay lovely, though the swirl effect softens a bit over time. Reheat? Nope—this dessert is best enjoyed cold. If chilling overnight, add your sprinkles or marshmallow garnish just before serving so they don’t get soggy.
Flavors tend to meld and mellow a bit after rest, making the pudding even creamier the next day (if you can wait that long!). It’s a treat that keeps giving.
Nutritional Information & Benefits
Each serving of the Creamy Dr. Seuss Rainbow Pudding Whirl Cups offers a satisfying balance of creamy richness and fun colors, coming in at approximately 200-250 calories depending on portion size and toppings.
Key ingredients like cream cheese provide a dose of calcium and protein, while milk contributes essential vitamins like B12 and D. Using whole milk helps with texture and richness, but you can opt for lower-fat or plant-based milks for a lighter version.
This dessert is naturally gluten-free and can be made dairy-free with simple swaps, making it versatile for various dietary needs. Just keep an eye on the pudding mix ingredients if allergies are a concern.
From a wellness perspective, it’s a treat that feels indulgent without being over-the-top sugary or heavy—perfect for those moments when you want to indulge but keep things balanced.
Conclusion
The Creamy Dr. Seuss Rainbow Pudding Whirl Cups are more than just a dessert—they’re a celebration of color, texture, and simple joy. Whether you’re making them for a kids’ party, a family gathering, or just because you want something sweet and cheerful, this recipe delivers smiles with every spoonful.
Feel free to customize the colors, flavors, and toppings to suit your taste and occasion. I love how easy these are to whip up, and the way they bring out the kid in all of us. Honestly, they make dessert time feel special in the most delightfully playful way.
If you give these pudding whirl cups a try, please drop a comment and share your favorite variations! And hey, don’t forget to share the fun with friends and family—they’ll thank you for it.
Remember, life’s too short for boring desserts. Here’s to colorful, creamy moments that brighten your day!
FAQs About Creamy Dr. Seuss Rainbow Pudding Whirl Cups
Can I make these pudding cups ahead of time?
Absolutely! They’re great made up to 24 hours in advance. Just cover and refrigerate, and add any toppings right before serving to keep them fresh.
What can I use if I don’t have gel food coloring?
You can use liquid food coloring, but be cautious—it may thin out the pudding and result in less vibrant colors. If you only have liquid, use it sparingly.
Can I use homemade pudding instead of instant mix?
You can, but instant pudding sets faster and holds up better for layering and swirling. Homemade pudding might be softer and harder to layer cleanly.
Is this recipe suitable for vegan diets?
With some swaps—like using plant-based milk, dairy-free cream cheese, and whipped topping—this recipe can be adapted for vegans.
How do I get the swirl effect without mixing the colors too much?
Use a toothpick or skewer to gently drag through the layers in circular or figure-eight motions. Be gentle and don’t overdo it, or the colors will blend together.
Pin This Recipe!
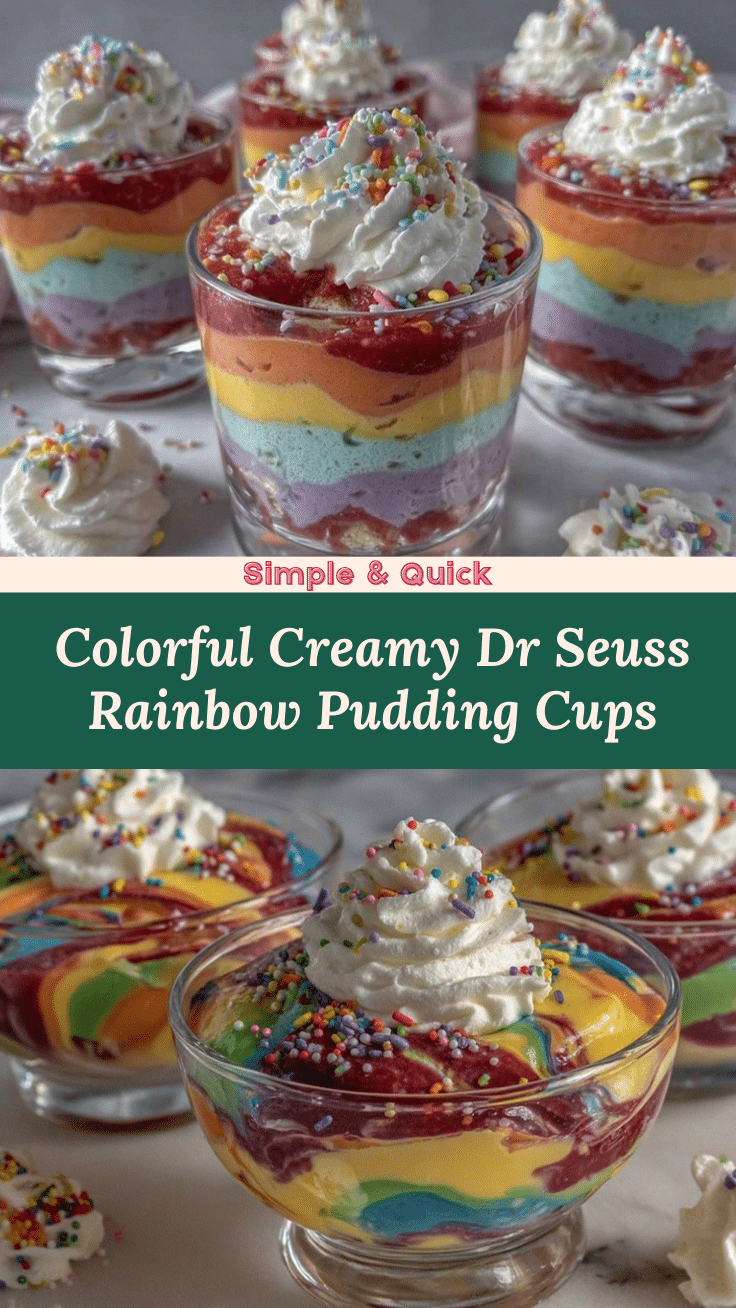
Creamy Dr. Seuss Rainbow Pudding Whirl Cups Easy Recipe for Kids Party Fun
A fun, colorful, and creamy layered pudding dessert perfect for kids’ parties and family gatherings, featuring vibrant rainbow swirls and a smooth cream cheese blend.
- Prep Time: 15 minutes
- Cook Time: 0 minutes
- Total Time: 1 hour 15 minutes
- Yield: 6 servings 1x
- Category: Dessert
- Cuisine: American
Ingredients
- 1 box (3.4 oz / 96 g) instant vanilla pudding mix (recommend Jell-O)
- 2 cups (480 ml) whole milk
- 4 oz (115 g) cream cheese, softened
- 1 cup (240 ml) whipped topping, thawed (cool whip style)
- Red, orange, yellow, green, blue, and purple gel food coloring
- 1 tsp (5 ml) vanilla extract
- 2 tbsp (25 g) granulated sugar (optional)
- Optional garnishes: mini marshmallows or sprinkles
Instructions
- In a large bowl, whisk together instant vanilla pudding mix with cold whole milk until thickened, about 2 minutes. Let sit for 5 minutes to fully set.
- In a separate bowl, beat softened cream cheese with whipped topping and vanilla extract until smooth and creamy. Add granulated sugar if desired for sweetness.
- Gently fold the pudding into the cream cheese mixture until fully combined and silky smooth.
- Divide the combined pudding evenly into six small bowls. Add gel food coloring to each bowl to create red, orange, yellow, green, blue, and purple colors. Stir well until uniform.
- Using spoons or piping bags, carefully layer each colored pudding into serving cups starting with red at the bottom, then orange, yellow, green, blue, and purple on top.
- Use a toothpick or skewer to gently swirl through the layers creating soft spirals without mixing colors too much.
- Refrigerate the pudding cups for at least 1 hour to let flavors meld and pudding firm up.
- Just before serving, garnish with mini marshmallows or sprinkles if desired.
Notes
Use gel food coloring for vibrant colors without thinning pudding. Fold pudding gently with cream cheese to keep texture light and creamy. Chill at least 1 hour. Avoid over-swizzling to prevent muddy colors. Can be made a day ahead; add garnishes just before serving. For dairy-free, use coconut or almond milk and dairy-free cream cheese and whipped topping.
Nutrition
- Serving Size: 1 pudding cup (appro
- Calories: 225
- Sugar: 22
- Sodium: 150
- Fat: 12
- Saturated Fat: 7
- Carbohydrates: 28
- Protein: 4
Keywords: rainbow pudding, kids party dessert, creamy pudding cups, layered pudding, colorful dessert, easy pudding recipe, Dr. Seuss dessert, no-bake dessert


