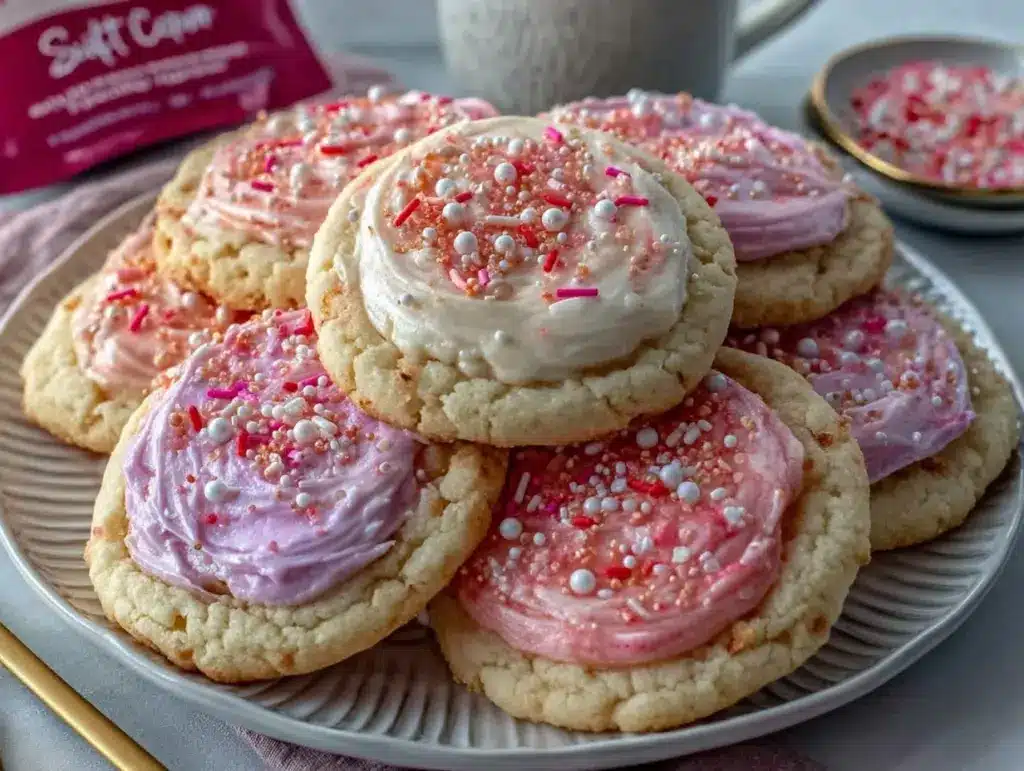
Picture this: the aroma of freshly baked pink velvet sugar cookies swirling through your kitchen, a buttery-sweet scent mingled with hints of vanilla, all wrapped up in the prettiest rosy hue you ever did see. Honestly, the first time I made these pink velvet sugar cookies, I was transported back to those cozy afternoons at my grandma’s house—when I was knee-high to a grasshopper, perched on a wooden stool, watching her roll out dough and sprinkle sugar with a twinkle in her eye. The kind of moment where you pause, take a deep breath, and just smile because you know you’re onto something truly special.
I first stumbled upon this recipe while trying to recreate the nostalgia of a bake sale treat I could never quite forget. There was something magical about that dusty pink cookie—soft, almost creamy in texture, but with a gentle snap as you bit in. My family couldn’t stop sneaking them off the cooling rack (and I can’t really blame them). Even the pickiest eaters went in for seconds, and these cookies quickly became the star of every gathering. Let’s face it, nothing says “celebration” like a plateful of pastel cookies, especially when they’re dressed up with elegant royal icing swirls.
These pink velvet sugar cookies are dangerously easy (I wish I’d found this recipe years ago!). They’re pure, nostalgic comfort with a modern twist—perfect for potlucks, birthday parties, or just brightening up your Pinterest cookie board. I’ve tested this recipe more times than I’ll admit (purely in the name of research, of course), and every batch feels like a warm hug. It’s a staple for family gatherings and gifting, and honestly, you’re going to want to bookmark this one for every sweet occasion.
Why You’ll Love This Recipe
Let me give you the inside scoop—these pink velvet sugar cookies aren’t just pretty, they’re the kind of treat you’ll crave year-round. After plenty of kitchen trials and taste tests with family and friends, here’s why you’ll keep coming back to this pink velvet sugar cookies recipe:
- Quick & Easy: These cookies come together in under 45 minutes, which means you can whip up a batch for spontaneous get-togethers or last-minute celebrations without breaking a sweat.
- Simple Ingredients: No fancy grocery runs here; everything you need is likely sitting in your pantry or fridge right now.
- Perfect for Any Occasion: Whether it’s a girly brunch, a baby shower, Valentine’s Day, or a cozy night in, these cookies add a pop of color and fun to any event.
- Crowd-Pleaser: Kids love the vibrant color, adults rave about the tender crumb and vanilla flavor, and honestly, they disappear faster than you’d expect.
- Unbelievably Delicious: The texture is perfectly soft with just enough chew, and the royal icing adds a little sparkle and elegance that makes them truly special.
What sets this pink velvet sugar cookies recipe apart? It’s the combination of cream cheese for ultra-tender texture, a hint of almond extract for depth, and the right balance of food coloring to achieve that dreamy pink hue. Trust me, I’ve tried every trick in the book, and this method delivers cookies that aren’t just eye-catching—they’re melt-in-your-mouth good.
This recipe isn’t just about looking pretty; it’s comfort food made modern. Healthier than store-bought options (thanks to real butter and less processed sugar), faster than most sugar cookie recipes, and packed with soul-soothing satisfaction. It’s impressive without the stress—ideal for making memories and winning over guests. Close your eyes after the first bite and let that sweet nostalgia kick in.
What Ingredients You Will Need
This pink velvet sugar cookies recipe relies on simple, wholesome ingredients for bold flavor and that signature tender texture. Most are pantry staples, and there’s plenty of room for easy swaps or upgrades if you’re feeling adventurous.
- For the Cookies:
- All-purpose flour (2 ⅔ cups / 333g) – gives structure and a delicate crumb
- Cornstarch (2 tbsp / 16g) – adds softness and keeps the cookies tender
- Salt (½ tsp / 3g) – balances sweetness
- Baking powder (1 tsp / 5g) – lifts the dough for that light texture
- Unsalted butter, softened (¾ cup / 170g) – for rich flavor (I love Kerrygold for extra creaminess)
- Cream cheese, softened (3 oz / 85g) – this is the secret to velvet softness
- Granulated sugar (1 cup / 200g) – classic sweetness
- Large egg (1, room temperature) – binds the dough
- Vanilla extract (2 tsp / 10ml) – use real vanilla for best results
- Almond extract (½ tsp / 2.5ml, optional) – adds depth (skip if you prefer pure vanilla)
- Pink gel food coloring (¼ tsp or to desired shade) – gel is best for vivid color without thinning the dough
- For the Royal Icing:
- Powdered sugar (2 cups / 240g) – gives that glossy finish
- Meringue powder (2 tbsp / 18g, or pasteurized egg white for DIY) – sets the icing
- Warm water (3-4 tbsp / 45-60ml) – adjust for consistency
- Vanilla extract (½ tsp / 2.5ml) – a little extra flavor
- Pink gel food coloring (few drops, optional) – for matching or accent details
A couple of helpful notes: For gluten-free, swap the all-purpose flour for a 1:1 gluten-free blend, and use dairy-free cream cheese and butter if needed. You can skip the almond extract if you’re allergic, or replace with lemon extract for a zesty twist. In summer, add a handful of freeze-dried raspberries for a berry pink look. For a richer flavor, try adding a tablespoon of sour cream to the dough (it amps up the velvet!). If you’re out of meringue powder, a little lemon juice and egg white work in a pinch.
Honestly, the key is quality butter and fresh extracts—those make all the difference. If you’re unsure about food coloring, the gel version is my go-to for intense color without making the dough sticky.
Equipment Needed
Let’s talk kitchen tools! You don’t need anything fancy to make these pink velvet sugar cookies, but a few basics will make your baking smoother.
- Mixing bowls – at least two, one for dry and one for wet ingredients
- Hand mixer or stand mixer – for creaming butter and sugar (I use my old KitchenAid, but any reliable mixer works)
- Measuring cups and spoons – accuracy is key for that perfect texture
- Silicone spatula – for scraping every last bit of dough
- Rolling pin – for even cookie thickness (if you don’t have one, use a clean bottle)
- Cookie cutters – circles, hearts, or whatever Pinterest-worthy shape you love
- Baking sheets – lined with parchment for easy cleanup
- Wire cooling rack – helps cookies cool evenly
- Piping bags and tips – for royal icing decorating (zip-top bags work as a budget option)
- Small offset spatula or butter knife – for spreading icing if you skip piping
If you’re missing a cookie cutter, just use a glass rim—it’s an old-school trick that still works. My favorite cookie sheets are the heavy-duty aluminum kind; they bake evenly and last forever. For royal icing, disposable piping bags save a lot of mess, and cleaning piping tips is easy if you soak them in warm soapy water overnight.
Honestly, you don’t need to break the bank—most of these tools are multi-purpose and budget-friendly. I’ve even made these cookies with nothing more than a whisk and a spoon during a power outage (not recommended, but it worked!).
Preparation Method
-
Prep Your Ingredients: Measure out all ingredients before starting. Let butter, cream cheese, and egg sit at room temperature for 30 minutes. Line baking sheets with parchment paper.
Tip: Soft butter and cream cheese blend more smoothly and give the cookies their signature tenderness. -
Mix Dry Ingredients: In a medium bowl, whisk together flour (2 ⅔ cups/333g), cornstarch (2 tbsp/16g), baking powder (1 tsp/5g), and salt (½ tsp/3g). Set aside.
Look for a pale, even mixture with no lumps. -
Cream Butter & Sugar: In a large bowl, beat softened butter (¾ cup/170g), cream cheese (3 oz/85g), and granulated sugar (1 cup/200g) on medium speed for about 2-3 minutes until light and fluffy.
The mixture should be pale and slightly airy, not greasy. -
Add Eggs & Extracts: Beat in the egg and vanilla extract (2 tsp/10ml). If using, add almond extract (½ tsp/2.5ml). Mix until just combined.
The dough will look creamy and smooth. -
Color the Dough: Add pink gel food coloring (¼ tsp or to desired shade). Beat until the color is evenly distributed. Start with a small amount and add more if needed.
It’s easier to add color than to remove it, so go slow! -
Combine Wet & Dry: Add dry ingredients to the wet mixture in two batches, mixing on low speed until just combined. Do not overmix.
Dough should be soft and slightly sticky but hold its shape. -
Chill the Dough: Wrap dough in plastic and chill for 20-30 minutes. This helps avoid spreading and keeps shapes crisp.
If rushed, pop it in the freezer for 10 minutes. -
Shape the Cookies: Preheat oven to 350°F (175°C). Roll chilled dough to about ¼ inch (6mm) thickness on a lightly floured surface. Cut out shapes with your favorite cookie cutter.
If dough gets sticky, dust lightly with flour or chill again. -
Bake: Place cookies on prepared sheets, spaced about 1 inch apart. Bake for 9-11 minutes, or until edges are just set and centers look slightly soft.
Cookies should be pale pink with no browning. If they puff up, gently press down with a spatula after cooling for a minute. -
Cool: Let cookies cool on the sheet for 5 minutes, then transfer to a wire rack to cool completely before icing.
Warm cookies will melt the icing! -
Make Royal Icing: In a bowl, mix powdered sugar (2 cups/240g), meringue powder (2 tbsp/18g), and water (3-4 tbsp/45-60ml) until smooth. Add vanilla extract and pink coloring as desired. Beat for 2-3 minutes until glossy and thick.
Icing should hold soft peaks. Add water for thinning, more sugar for thickening. -
Decorate: Pipe or spread icing onto cooled cookies. Let icing set for at least 1 hour before serving or stacking.
For Pinterest-worthy designs, use a toothpick to swirl icing or add sprinkles before it dries.
If you notice the dough is spreading too much, chill it longer. For crisp edges, use metal cutters and firm, chilled dough. If you see air bubbles in the icing, tap cookies gently or use a toothpick to pop them.
Efficiency tip: While cookies bake, prep your icing and organize decorating tools. Trust me, it keeps the kitchen chaos down.
Cooking Tips & Techniques
Over the years, I’ve picked up some tricks for perfect pink velvet sugar cookies. Here’s what works, what doesn’t, and how to avoid common cookie catastrophes:
- Softened Butter & Cream Cheese: Don’t rush the softening. If you microwave, you risk melting and greasy dough. Set ingredients out 30 minutes before you start.
- Don’t Overmix: Mixing too much after adding flour can make cookies tough. Stop as soon as everything comes together.
- Chilling is Key: Chilled dough keeps cookies from spreading and helps hold those cute shapes. If you skip this step, you’ll end up with flat, sad cookies (learned the hard way!).
- Rolling Evenly: Use rolling pin rings or guides for uniform thickness. If you roll too thin, cookies can burn; too thick and they’ll be doughy.
- Baking Time: Watch closely in the last minute. You want pale edges, not browned. Cookies should look underdone; they firm up as they cool.
- Royal Icing Consistency: For piping, icing should be thick but not stiff. For flooding, thin with small drops of water. Always test on a plate before decorating cookies.
- Multitasking: Prep icing while cookies bake, so you’re ready to decorate as soon as they cool.
- Cleanup: Soak piping tips and bowls right after use. Royal icing hardens fast, and scrubbing dried icing isn’t fun.
Honestly, I’ve burned a batch by forgetting the oven timer (who hasn’t?), and once mixed in melted butter—both times, the cookies lost their velvet charm. If you’re new to royal icing, practice on parchment first. For consistent color, mix your gel into a small bowl of dough before adding to the full batch.
Variations & Adaptations
The beauty of these pink velvet sugar cookies is how easy it is to make them your own. Here are a few favorite twists:
- Dietary: Use a gluten-free flour blend and dairy-free cream cheese and butter for allergy-friendly cookies. Replace meringue powder with aquafaba for vegan icing.
- Seasonal: For Valentine’s Day, add heart-shaped sprinkles or a hint of rose extract. In summer, swirl in freeze-dried raspberry powder for berry pink flavor.
- Flavor: Swap almond extract for lemon or orange; add a pinch of cinnamon for autumn-inspired cookies. Mix in white chocolate chips for extra decadence.
- Cooking Method: Don’t want to roll and cut? Drop spoonfuls of dough onto the sheet for rustic rounds. Or press dough into a pan and bake as pink velvet bars (slice after icing).
- Customization: Let kids decorate with colored icing and edible glitter. For a grown-up version, use gold luster dust or paint tiny flowers with food coloring.
I’ve tried swapping out the cream cheese for Greek yogurt when I was out—result: slightly tangier, still super tender. If you’re looking for a nut-free version, skip the almond extract and double the vanilla. The dough is forgiving, so experiment with colors and shapes depending on your event or mood!
Serving & Storage Suggestions
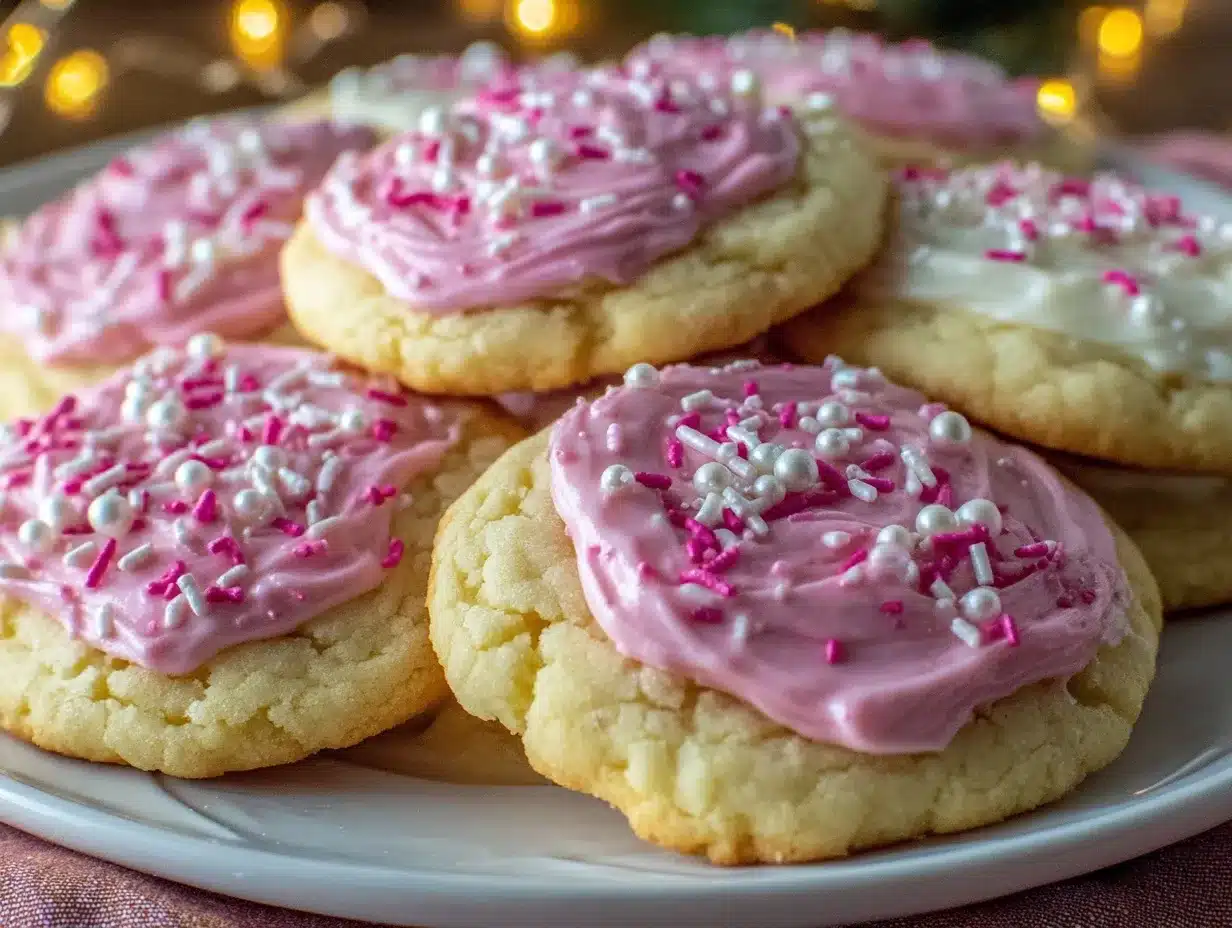
For best results, serve these pink velvet sugar cookies at room temperature. The royal icing sets into a glossy finish, so stack them carefully for party platters or gift boxes. They’re Pinterest-perfect paired with a glass of cold milk, berry lemonade, or a sweet rosé at brunch.
Store cookies in an airtight container at room temperature for up to 5 days. If you need to keep them longer, freeze undecorated cookies for up to 2 months (thaw before icing). Once iced, layer cookies between sheets of parchment in a container to avoid smudging.
Reheat cookies (if you must) in a low oven—250°F (120°C)—for 3-5 minutes. The flavor deepens over a day or two, and the texture stays soft. Honestly, they’re perfect for make-ahead parties or gifting. Flavors meld as they sit, so a day-old cookie is sometimes even better than fresh!
Nutritional Information & Benefits
Each pink velvet sugar cookie (approx. 35g) contains about:
- Calories: 110
- Fat: 5g (mostly from butter and cream cheese)
- Sugar: 8g
- Protein: 1.5g
- Carbs: 14g
Key ingredients like cream cheese add a bit of calcium and protein, while using real butter and less processed sugar makes these cookies richer and less artificial than store-bought. They’re nut-free unless you add almond extract, and easy to make gluten-free or dairy-free if you swap a few basics.
Potential allergens: dairy, eggs, wheat (unless adapted). From a personal wellness angle, I like knowing exactly what goes into my cookies—no weird preservatives, just real ingredients and a touch of pink happiness.
Conclusion
So, why should you bookmark this pink velvet sugar cookies recipe? They’re stunning, tender, and effortlessly elegant—plus, they’re customizable for any occasion. Whether you’re a decorating newbie or a seasoned baker, these cookies make every celebration brighter (and more delicious).
Feel free to tweak the color, flavor, or icing style to suit your taste. I love this recipe because it’s a joyful blend of nostalgia and modern baking—a little old school, a little Pinterest glam. Every batch feels like a celebration in itself.
If you try these cookies, let me know in the comments which variation you picked, or share your royal icing designs! I’m always inspired by your creative twists. Here’s to baking sweet memories—one pink velvet cookie at a time.
Frequently Asked Questions
Can I make pink velvet sugar cookies ahead of time?
Absolutely! Bake the cookies ahead, store them airtight, and decorate with royal icing the day you serve. They freeze well (undecorated) for up to 2 months.
What’s the best way to get a vibrant pink color?
Gel food coloring gives the brightest pink without messing up dough texture. Start with a small amount and add more until you reach your perfect shade.
Can I use store-bought icing instead of royal icing?
You can, but royal icing sets firm and glossy for that elegant finish. Store-bought icing works in a pinch, but may stay softer and smudge during stacking.
How do I make these cookies gluten-free?
Swap the all-purpose flour for a 1:1 gluten-free blend. Check labels on baking powder and meringue powder to make sure they’re gluten-free as well.
My cookies spread too much—what went wrong?
Usually, it’s warm dough or too little flour. Chill the dough longer, measure flour carefully, and make sure your butter isn’t melted. A quick fridge chill before baking helps keep shapes crisp.
Pin This Recipe!
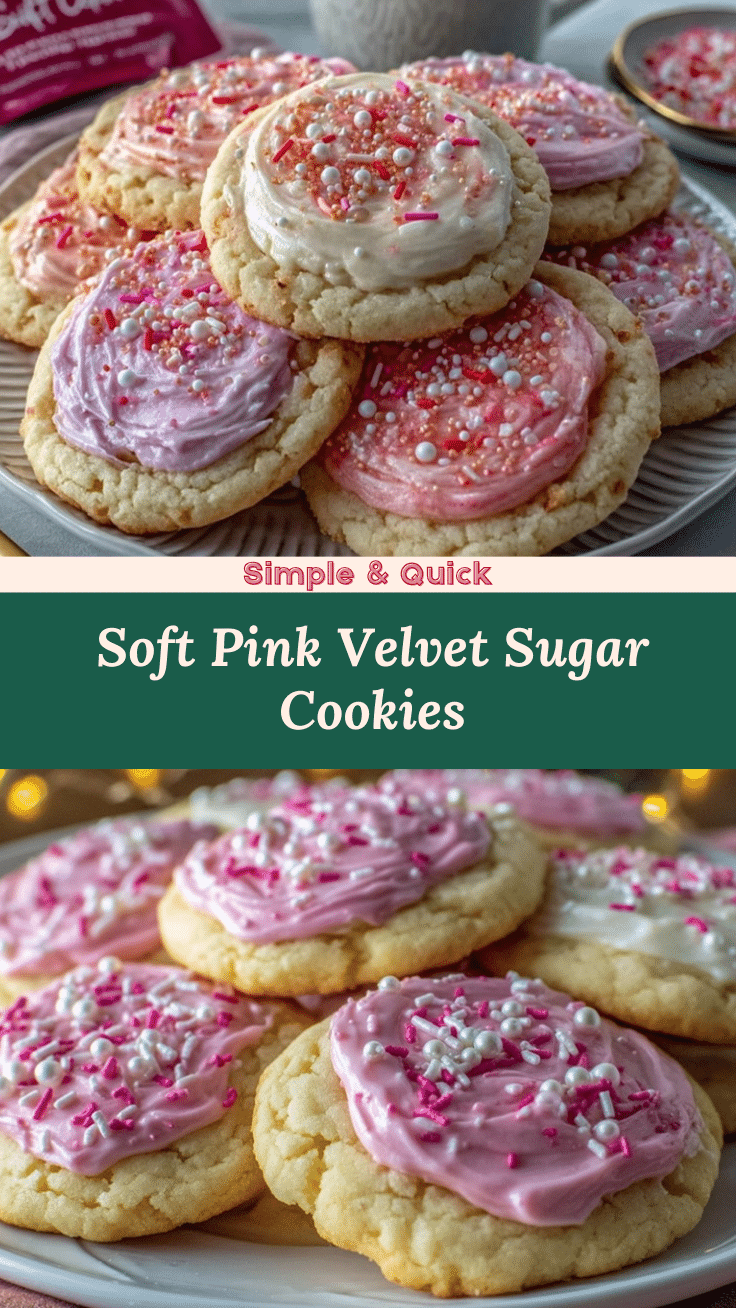
Pink Velvet Sugar Cookies

These pink velvet sugar cookies are soft, tender, and beautifully colored, topped with elegant royal icing. They’re easy to make, crowd-pleasing, and perfect for celebrations or gifting.
- Prep Time: 20 minutes
- Cook Time: 11 minutes
- Total Time: 45 minutes
- Yield: 24 cookies 1x
- Category: Dessert
- Cuisine: American
Ingredients
- 2 2/3 cups all-purpose flour
- 2 tablespoons cornstarch
- 1/2 teaspoon salt
- 1 teaspoon baking powder
- 3/4 cup unsalted butter, softened
- 3 ounces cream cheese, softened
- 1 cup granulated sugar
- 1 large egg, room temperature
- 2 teaspoons vanilla extract
- 1/2 teaspoon almond extract (optional)
- 1/4 teaspoon pink gel food coloring (or to desired shade)
- 2 cups powdered sugar
- 2 tablespoons meringue powder (or pasteurized egg white)
- 3–4 tablespoons warm water
- 1/2 teaspoon vanilla extract (for icing)
- Few drops pink gel food coloring (optional, for icing)
Instructions
- Measure out all ingredients before starting. Let butter, cream cheese, and egg sit at room temperature for 30 minutes. Line baking sheets with parchment paper.
- In a medium bowl, whisk together flour, cornstarch, baking powder, and salt. Set aside.
- In a large bowl, beat softened butter, cream cheese, and granulated sugar on medium speed for about 2-3 minutes until light and fluffy.
- Beat in the egg and vanilla extract. If using, add almond extract. Mix until just combined.
- Add pink gel food coloring and beat until the color is evenly distributed.
- Add dry ingredients to the wet mixture in two batches, mixing on low speed until just combined. Do not overmix.
- Wrap dough in plastic and chill for 20-30 minutes.
- Preheat oven to 350°F (175°C). Roll chilled dough to about 1/4 inch thickness on a lightly floured surface. Cut out shapes with cookie cutters.
- Place cookies on prepared sheets, spaced about 1 inch apart. Bake for 9-11 minutes, or until edges are just set and centers look slightly soft.
- Let cookies cool on the sheet for 5 minutes, then transfer to a wire rack to cool completely before icing.
- For royal icing: In a bowl, mix powdered sugar, meringue powder, and water until smooth. Add vanilla extract and pink coloring as desired. Beat for 2-3 minutes until glossy and thick.
- Pipe or spread icing onto cooled cookies. Let icing set for at least 1 hour before serving or stacking.
Notes
For gluten-free, use a 1:1 gluten-free flour blend. Chill dough for best shape and texture. Use gel food coloring for vibrant pink. Royal icing sets firm for stacking. Store cookies airtight for up to 5 days or freeze undecorated for up to 2 months. For vegan icing, use aquafaba instead of meringue powder.
Nutrition
- Serving Size: 1 cookie (about 35g)
- Calories: 110
- Sugar: 8
- Sodium: 55
- Fat: 5
- Saturated Fat: 3
- Carbohydrates: 14
- Fiber: 0.3
- Protein: 1.5
Keywords: pink velvet, sugar cookies, royal icing, easy cookies, party dessert, homemade cookies, cream cheese cookies, holiday cookies, baking, kid-friendly


