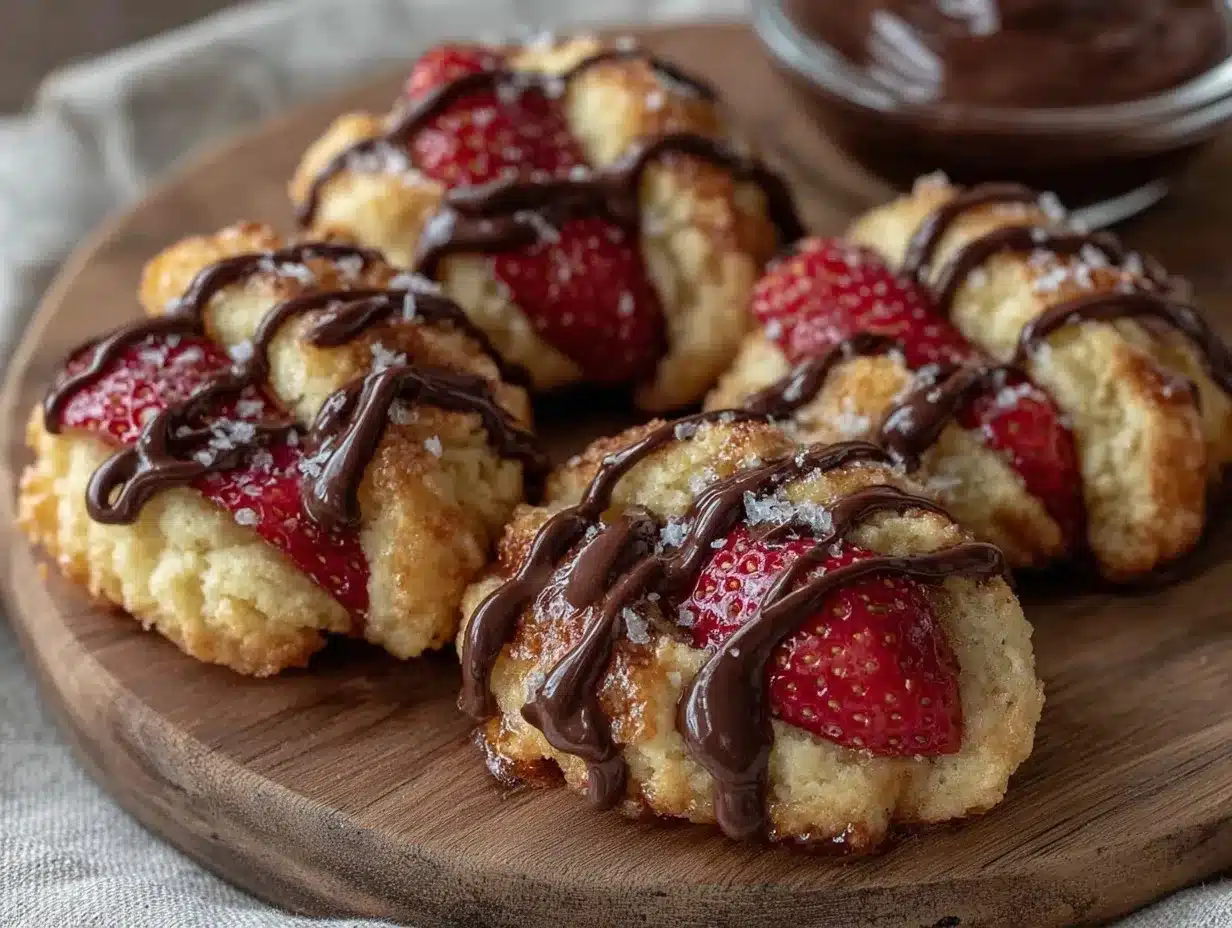
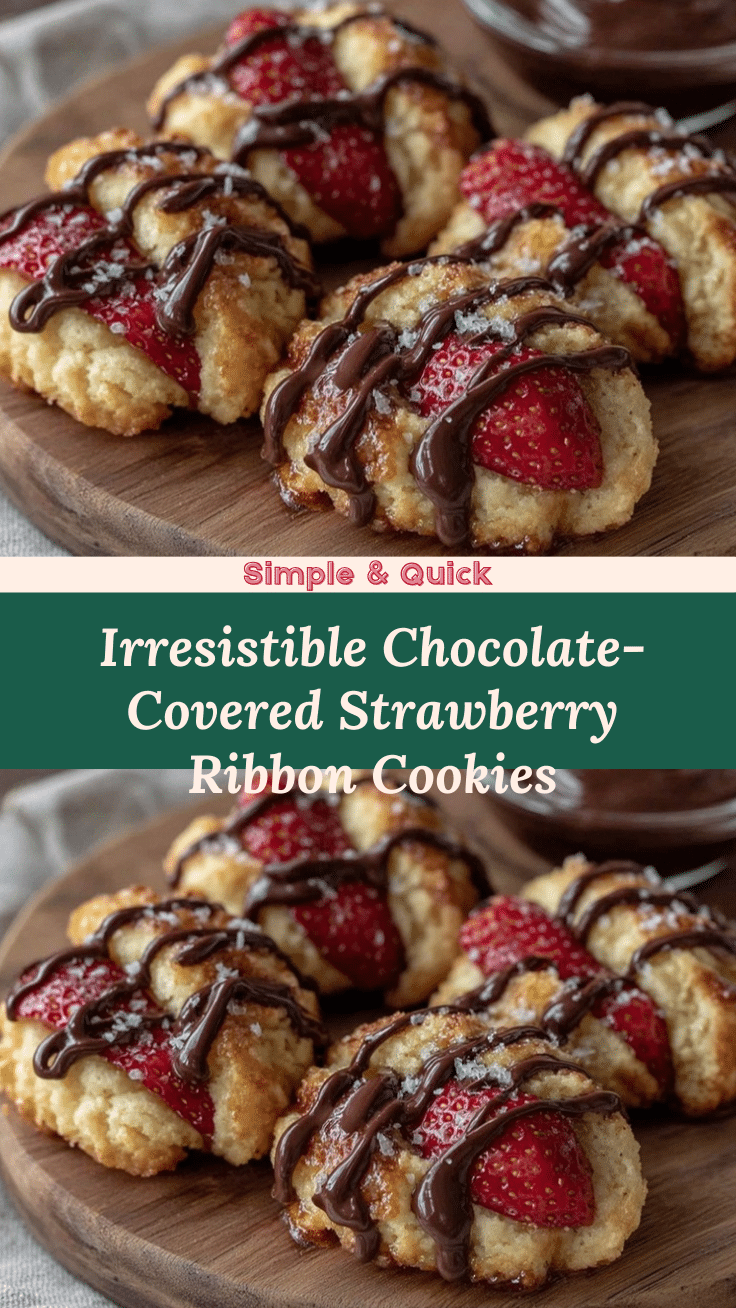
Let me tell you, the moment you catch a whiff of buttery dough mingling with fresh strawberries and melted chocolate, your kitchen instantly feels like a cozy little bakery. The Irresistible Chocolate-Covered Strawberry Ribbon Cookies have this magic—fresh, fruity sweetness swirled into tender cookie ribbons, then dipped in rich chocolate that makes you pause mid-bite. The first time I baked these, I was instantly hooked. It was one of those rare moments where you stop everything, take a deep breath, and just smile because you know you’re onto something truly special.
Years ago, when I was knee-high to a grasshopper, my grandma used to make simple butter cookies for every holiday. But these strawberry ribbon cookies? They came from a rainy weekend experiment when I wanted something fun and a little different to brighten up our usual cookie tray. Honestly, I wish I’d discovered this recipe way earlier—it’s dangerously easy and packs so much nostalgic comfort.
My family couldn’t stop sneaking these off the cooling rack (and I can’t really blame them). They’re perfect for potlucks, sweet treats for your kids, or even to brighten up your Pinterest cookie board. After testing this recipe multiple times (in the name of research, of course), it’s become a staple for family gatherings and gifting. This cookie feels like a warm hug in every bite, and you’re definitely going to want to bookmark this one.
Why You’ll Love This Recipe
Honestly, this recipe ticks so many boxes, and I’m about to share why it might become your new favorite cookie recipe:
- Quick & Easy: Comes together in under 45 minutes, perfect for busy weeknights or last-minute cookie cravings.
- Simple Ingredients: No fancy grocery trips needed; most of these are pantry staples you probably already have.
- Perfect for Any Occasion: Whether it’s a birthday party, tea time, or a cozy weekend treat, these cookies shine.
- Crowd-Pleaser: Kids and adults alike rave about the tender texture and that luscious chocolate finish.
- Unbelievably Delicious: The strawberry ribbons bring a fresh pop of flavor while the chocolate adds a velvety richness—true comfort food with a twist.
What makes these cookies stand out? It’s all in the technique—carefully folding in strawberry preserves into the dough creates those beautiful ribbons without overpowering sweetness. Then, dipping only half the cookie in chocolate keeps things balanced and elegant. This isn’t just another chocolate-covered cookie. It’s the best version you’ll find, with a perfect balance of buttery, fruity, and chocolaty notes. It’s the kind of cookie that makes you close your eyes after the first bite and say, “Yep, this is it.”
What Ingredients You Will Need
This recipe uses simple, wholesome ingredients to deliver bold flavor and satisfying texture without the fuss. Most of these are pantry staples, and the strawberry ribbons add a fresh, seasonal touch that brightens up the cookie.
- Unsalted butter, softened (adds richness and tenderness; I recommend Land O Lakes for best results)
- Granulated sugar (for sweetness and slight crispness)
- Large egg, room temperature (helps bind the dough)
- Pure vanilla extract (for depth of flavor)
- All-purpose flour (for structure; King Arthur brand gives a nice texture)
- Baking powder (for a light rise)
- Salt (balances sweetness)
- Strawberry preserves (the star of the ribbons; homemade or your favorite store-bought brand works well)
- Semisweet chocolate chips or melting chocolate (for dipping; Ghirardelli or Valrhona if you want to splurge)
Substitution tips: Use almond flour for a gluten-free twist, though texture will be a bit different. Swap strawberry preserves with raspberry or apricot jam for seasonal variation. For dairy-free options, replace butter with coconut oil and use dairy-free chocolate chips.
Equipment Needed
- Mixing bowls (preferably one large and one medium-sized)
- Electric hand mixer or stand mixer (makes creaming butter and sugar easier, but a sturdy whisk works too)
- Measuring cups and spoons (accuracy really helps with baking)
- Baking sheet(s) lined with parchment paper or silicone baking mat (to prevent sticking and promote even baking)
- Spatula (for folding preserves gently into the dough)
- Small offset spatula or butter knife (to swirl the preserves)
- Microwave-safe bowl or double boiler for melting chocolate
- Wire cooling rack (helps cookies cool evenly and chocolate to set nicely)
If you don’t have a stand mixer, no worries—just plan for a bit more arm work. I’ve tried this recipe with both hand mixers and by hand, and both work fine, though the mixer speeds things up. For dipping chocolate, I prefer a double boiler for gentle melting to avoid burning, but a microwave in short bursts works too.
Preparation Method
- Preheat your oven to 350°F (175°C). Line baking sheets with parchment paper or silicone mats and set aside.
- Cream the butter and sugar: In a large bowl, beat 1 cup (227 g) unsalted butter (softened) and ¾ cup (150 g) granulated sugar together using an electric mixer on medium speed until light and fluffy, about 3-4 minutes. This step is key for tender cookies.
- Add the egg and vanilla: Beat in 1 large egg (room temperature) and 1 teaspoon pure vanilla extract until fully incorporated. The dough will look smooth and creamy.
- Mix dry ingredients: In a separate bowl, whisk together 2 ½ cups (312 g) all-purpose flour, 1 teaspoon baking powder, and ½ teaspoon salt.
- Combine wet and dry: Gradually add the dry ingredients to the wet mixture, beating on low speed or folding with a spatula until just combined. Avoid overmixing to keep cookies tender.
- Fold in strawberry preserves: Gently spoon ⅓ cup (about 110 g) strawberry preserves on top of the dough. Using a small spatula or butter knife, carefully swirl the preserves through the dough to create pretty ribbons without fully blending it in.
- Shape the cookies: Using a tablespoon or cookie scoop, drop dough onto prepared baking sheets about 2 inches apart. Gently flatten each cookie to about ¼ inch (6 mm) thickness using the back of a spoon or your fingers.
- Bake: Place cookies in the oven and bake for 12-14 minutes or until edges are lightly golden. The centers will still look soft but will firm up as they cool.
- Cool: Let cookies cool on the baking sheet for 5 minutes, then transfer to a wire rack to cool completely before dipping.
- Melt the chocolate: In a microwave-safe bowl or double boiler, melt 1 cup (175 g) semisweet chocolate chips until smooth, stirring often. If microwaving, heat in 20-second intervals to prevent burning.
- Dip the cookies: Dip half of each cooled cookie into the melted chocolate, letting excess drip off. Place dipped cookies back on parchment or a wire rack.
- Set: Allow chocolate to set at room temperature or pop cookies in the fridge for 10-15 minutes to speed things up.
Pro tip: If your preserves are too runny, drain a little liquid off beforehand to avoid soggy dough. Also, never skip chilling the cookies before dipping chocolate; it keeps their shape intact.
Cooking Tips & Techniques
Let’s talk tricks to get these cookies just right, because a few little tweaks can make a huge difference.
- Butter temperature matters: Softened but not melted butter is your best friend here. Too warm, and the dough gets greasy; too cold, and it won’t blend smoothly.
- Swirling preserves gently: Don’t overmix the preserves into the dough. You want those beautiful ribbons that peek through, not a pink blob.
- Cookie thickness: Flattening the dough balls evenly ensures uniform baking. If too thick, cookies might stay doughy; too thin, and they crisp up too much.
- Chocolate dipping technique: Use a fork or dipping tool to submerge cookies halfway, then tap gently to remove excess. This keeps the chocolate neat and prevents mess.
- Timing the bake: Watch closely near the end of baking. Cookies continue to firm up after removal, so pulling them out just as edges turn golden prevents overbaking.
I once baked a whole batch without swirling preserves properly—result? A sad, pink-colored cookie with no charm. Learned my lesson there. Also, multitasking helps here: while cookies bake, melt chocolate so you can dip immediately after cooling. Saves time and keeps the magic going.
Variations & Adaptations
These cookies are a blank canvas waiting for your personal touch. Here are some ways to switch things up:
- Flavor swaps: Use raspberry or apricot preserves instead of strawberry for a different fruity twist.
- Chocolate alternatives: Try white chocolate or dark chocolate for dipping. If you prefer no chocolate, a light dusting of powdered sugar works beautifully.
- Dietary adaptations: For gluten-free, substitute all-purpose flour with a 1:1 gluten-free baking mix. For vegan versions, swap butter with vegan margarine and use dairy-free chocolate chips.
- Seasonal additions: Add finely chopped nuts like pistachios or almonds into the dough for some crunch.
One time, I tossed in a teaspoon of lemon zest to the dough—it added a subtle brightness that paired wonderfully with the strawberry ribbons. Don’t be afraid to experiment; these cookies handle creativity well!
Serving & Storage Suggestions
Serving these cookies at room temperature is best—the chocolate is set but still melts slightly on your tongue. Arrange them on a pretty platter for tea parties, holiday gatherings, or just a casual afternoon snack. They pair beautifully with a cup of hot tea or fresh milk.
Store cookies in an airtight container at room temperature for up to 3 days. To keep chocolate coatings from sticking, layer cookies between parchment paper. For longer storage, freeze uncoated cookies in a single layer on a baking sheet, then transfer to a freezer bag; thaw and dip in chocolate before serving.
If you want to reheat dipped cookies, pop them in the microwave for 5-7 seconds to soften chocolate slightly, but honestly, they’re best enjoyed fresh or at room temp. Flavors tend to deepen after a day, so if you can resist, letting them rest overnight is a treat for the taste buds.
Nutritional Information & Benefits
Each Chocolate-Covered Strawberry Ribbon Cookie contains roughly 150-170 calories, depending on chocolate type and size. They offer a modest amount of protein and fat from butter and eggs, while the strawberry preserves provide a touch of natural fruit sugars and antioxidants.
Key ingredients like strawberries bring vitamin C and antioxidants, supporting immunity and skin health. Using semisweet chocolate keeps added sugars moderate while still delivering that decadent flavor you crave.
For those mindful of allergens, this recipe contains gluten, dairy, and eggs, but can be adapted easily for gluten-free or vegan diets. Honestly, these cookies strike a nice balance between indulgence and a bit of wholesome goodness—perfect for treating yourself without guilt.
Conclusion
To wrap it up, these Irresistible Chocolate-Covered Strawberry Ribbon Cookies are a must-try for anyone who loves a cookie with character and charm. They’re quick to make, use simple ingredients, and offer that perfect blend of fruity and chocolaty goodness that’s hard to resist. Feel free to customize with your favorite jams or chocolate types to make the recipe truly your own.
I love this recipe because it brings back cozy memories while still feeling fresh and fun. Plus, it’s one of those rare treats that people actually ask for seconds on—and that says a lot! If you try it, don’t forget to leave a comment or share your own twist. Happy baking and treat yourself—you deserve it!
FAQs
Can I use fresh strawberries instead of preserves?
Fresh strawberries can be used, but they’ll release more moisture and might make the dough too wet. It’s best to chop them finely and reduce other liquids or stick to preserves for consistent ribbons.
How long do these cookies stay fresh?
Stored in an airtight container at room temperature, they stay fresh for up to 3 days. For longer storage, freeze the uncoated cookies and dip in chocolate after thawing.
Can I make these cookies ahead of time?
Absolutely! You can prepare the dough a day in advance and refrigerate it. Bake fresh and dip in chocolate just before serving for the best texture and flavor.
What type of chocolate works best for dipping?
Semisweet chocolate chips melt smoothly and balance sweetness well. You can also use dark or white chocolate depending on preference, but be sure to melt gently to avoid burning.
Are these cookies suitable for kids?
Yes! They’re a sweet treat that kids love, especially with the fruity strawberry ribbons and chocolate dip. Just watch out for allergy considerations like eggs or dairy.
Pin This Recipe!
Irresistible Chocolate-Covered Strawberry Ribbon Cookies
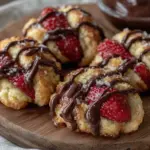
Tender cookie ribbons swirled with fresh strawberry preserves and dipped in rich semisweet chocolate, perfect for any occasion and quick to make.
- Prep Time: 15 minutes
- Cook Time: 14 minutes
- Total Time: 45 minutes
- Yield: 24 cookies 1x
- Category: Dessert
- Cuisine: American
Ingredients
- 1 cup (227 g) unsalted butter, softened
- 3/4 cup (150 g) granulated sugar
- 1 large egg, room temperature
- 1 teaspoon pure vanilla extract
- 2 1/2 cups (312 g) all-purpose flour
- 1 teaspoon baking powder
- 1/2 teaspoon salt
- 1/3 cup (about 110 g) strawberry preserves
- 1 cup (175 g) semisweet chocolate chips or melting chocolate
Instructions
- Preheat your oven to 350°F (175°C). Line baking sheets with parchment paper or silicone mats and set aside.
- In a large bowl, beat unsalted butter and granulated sugar together using an electric mixer on medium speed until light and fluffy, about 3-4 minutes.
- Beat in the large egg and pure vanilla extract until fully incorporated and dough looks smooth and creamy.
- In a separate bowl, whisk together all-purpose flour, baking powder, and salt.
- Gradually add the dry ingredients to the wet mixture, beating on low speed or folding with a spatula until just combined. Avoid overmixing.
- Gently spoon strawberry preserves on top of the dough. Using a small spatula or butter knife, carefully swirl the preserves through the dough to create ribbons without fully blending.
- Using a tablespoon or cookie scoop, drop dough onto prepared baking sheets about 2 inches apart. Gently flatten each cookie to about 1/4 inch (6 mm) thickness.
- Bake for 12-14 minutes or until edges are lightly golden. Centers will look soft but will firm up as they cool.
- Let cookies cool on the baking sheet for 5 minutes, then transfer to a wire rack to cool completely before dipping.
- Melt semisweet chocolate chips in a microwave-safe bowl or double boiler until smooth, stirring often. If microwaving, heat in 20-second intervals to prevent burning.
- Dip half of each cooled cookie into the melted chocolate, letting excess drip off. Place dipped cookies back on parchment or wire rack.
- Allow chocolate to set at room temperature or refrigerate for 10-15 minutes to speed up setting.
Notes
Use softened but not melted butter for best texture. Gently swirl preserves to create ribbons without overmixing. Flatten dough evenly to about 1/4 inch thickness. Dip cookies halfway in chocolate and tap off excess for neat coating. Chill cookies before dipping chocolate to keep shape intact. If preserves are too runny, drain excess liquid to avoid soggy dough.
Nutrition
- Serving Size: 1 cookie
- Calories: 160
- Sugar: 12
- Sodium: 90
- Fat: 9
- Saturated Fat: 5
- Carbohydrates: 20
- Fiber: 1
- Protein: 2
Keywords: chocolate-covered cookies, strawberry ribbon cookies, easy homemade cookies, chocolate dipped cookies, strawberry preserves cookies