“I wasn’t expecting to become obsessed with bread, but there I was, elbow-deep in dough at midnight, trying to get these rolls just right.” That’s how my journey with these fluffy Texas Roadhouse butter rolls began. It was a late Tuesday evening—my kitchen was a mess, flour dust everywhere, and honestly, I’d forgotten the yeast the first time around. Classic me. But after a few tweaks (and a lot of butter), these rolls turned out to be the softest, most buttery little pillows I’ve ever tasted.
You know that feeling when a simple smell or taste immediately takes you back? Well, these rolls do exactly that for me. They remind me of a cozy evening at a friend’s house, where the smell of freshly baked bread filled every corner. It’s funny how something as humble as a roll can steal the spotlight at dinner. Maybe you’ve been there—just wanting something warm and comforting to go with your meal, something that feels like a hug.
Making these rolls at home wasn’t just about replicating a restaurant favorite; it was about capturing that warm, buttery magic in a way that any home cook can manage without fuss. Sure, I had an interrupted baking session or two (life, right?), but once I nailed the technique, these rolls became my go-to for cozy nights and special dinners alike. Let me tell you, once you try making these, you’ll understand why they’ve stuck around in my kitchen—and why I keep making them again and again.
Why You’ll Love This Recipe
Honestly, these Fluffy Texas Roadhouse butter rolls have a charm all their own. After testing countless versions and getting feedback from family and friends, I can say this recipe hits just the right notes:
- Quick & Easy: Ready in under 2 hours, including rising time—perfect for busy weeknights or spontaneous dinner plans.
- Simple Ingredients: No exotic or hard-to-find items. You probably have everything in your pantry right now.
- Perfect for Cozy Dinners: Whether it’s a comforting weeknight meal or a casual weekend feast, these rolls fit right in.
- Crowd-Pleaser: Kids, picky eaters, and bread lovers alike can’t get enough of their pillowy softness.
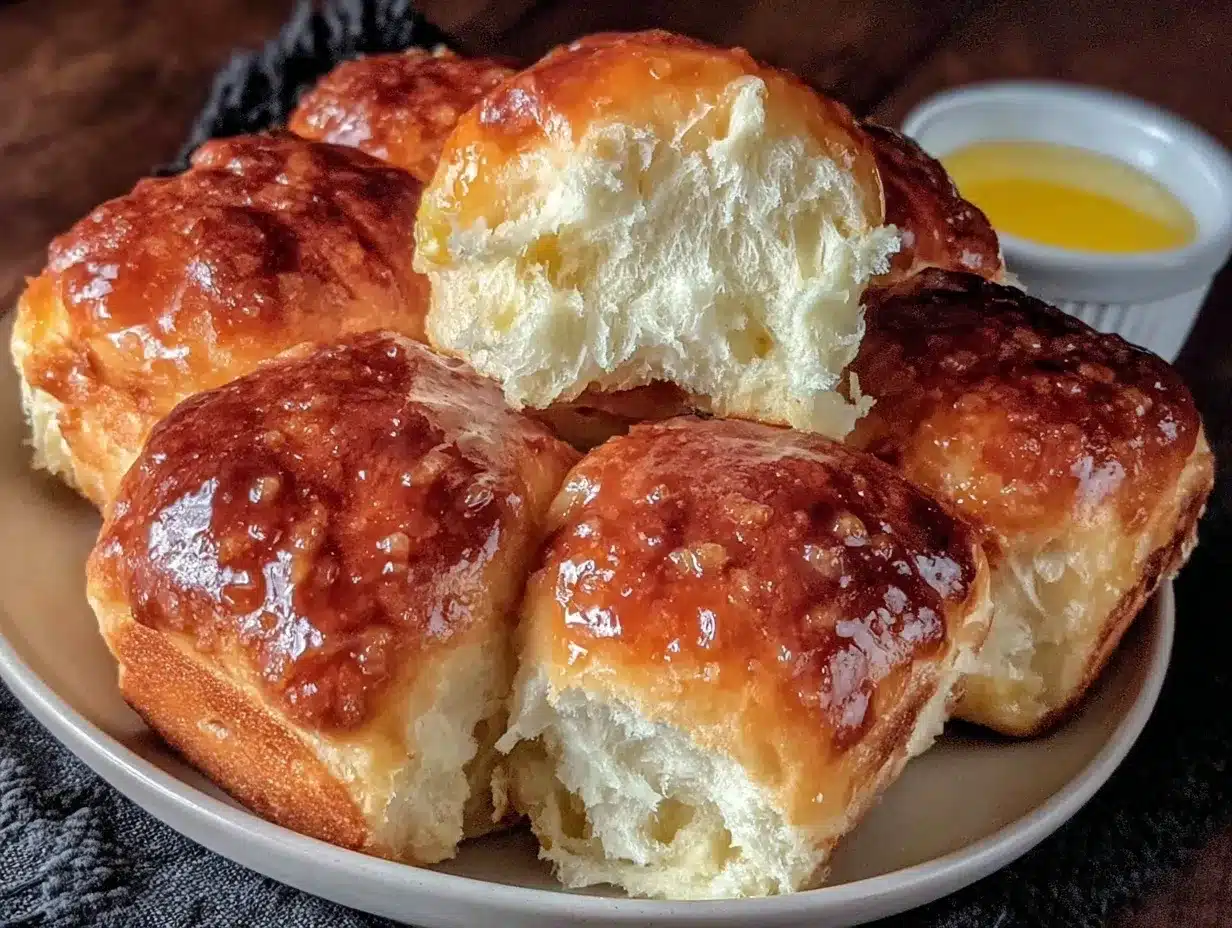
- Unbelievably Delicious: The buttery glaze and tender crumb create a mouthwatering texture that’s just right.
What sets this recipe apart? It’s the balance of buttery richness and that tender crumb texture—achieved by a simple but effective mixing method and a little patience during proofing. Plus, I like to add a touch of honey to give it a subtle sweetness that keeps you reaching for more.
You won’t find this level of fluffiness or buttery goodness in your average roll recipe. It’s comfort food that doesn’t feel heavy, but still has all that soul-soothing satisfaction. I mean, who doesn’t want a bread that tastes like it came straight from a Texas Roadhouse kitchen, but without the wait or the drive?
What Ingredients You Will Need
This recipe uses simple, wholesome ingredients to deliver bold flavor and satisfying texture without the fuss. Most are pantry staples, making it easy to whip up these rolls even on a whim. Here’s the breakdown:
- All-purpose flour (4 cups / 480g) – The backbone of the dough; I prefer King Arthur for consistent results.
- Warm whole milk (1 cup / 240ml) – Adds moisture and richness; make sure it’s about 110°F (43°C) to activate the yeast.
- Active dry yeast (2 ¼ tsp / one packet) – The magic behind the rise; proof it in warm milk for best results.
- Granulated sugar (¼ cup / 50g) – Just enough sweetness to balance the butter and create that golden crust.
- Unsalted butter (6 tbsp / 85g), melted – Half in the dough, half for brushing warm rolls; Kerrygold is my go-to.
- Large eggs (2), room temperature – Adds structure and richness.
- Salt (1 tsp) – Enhances flavor and balances sweetness.
- Honey (1 tbsp) – Optional but recommended for a subtle, natural sweetness.
Substitution tips: Use almond or oat milk for a dairy-free twist (though texture might vary a bit). For gluten-free, this recipe isn’t ideal without major adjustments, but you could try a gluten-free all-purpose blend designed for yeast breads.
Seasonally, you can mix in fresh herbs or a sprinkle of garlic powder for a savory note. But honestly, the classic version is so good, you might just want to keep it simple.
Equipment Needed
- Large mixing bowl: For combining and proofing the dough. I like glass or stainless steel for easy cleanup.
- Stand mixer with dough hook (optional): Speeds up kneading, but you can absolutely knead by hand—just plan for 8-10 minutes of elbow grease.
- Measuring cups and spoons: Accuracy matters here, especially for yeast and sugar.
- Baking sheet or round cake pan: To shape and bake the rolls. I prefer a rimmed baking sheet lined with parchment paper for easy release.
- Kitchen towel or plastic wrap: For covering the dough during rising to keep it warm and moist.
- Pastry brush: For brushing on the melted butter glaze once the rolls come out of the oven.
If you don’t have a stand mixer, no worries—I’ve made these dozens of times with just a wooden spoon and some patience. And if you’re on a budget, a simple hand whisk and a sturdy bowl will get you through. Just keep the dough covered and warm during rising, or it might take a bit longer.
Preparation Method
- Proof the yeast (10 minutes): In your large mixing bowl, stir the active dry yeast into the warm milk (about 110°F/43°C). Add a pinch of sugar to help activate it. Wait until it becomes frothy and bubbly on top. If it doesn’t foam after 10 minutes, your yeast might be old—time for fresh packets!
- Mix wet ingredients (5 minutes): To the frothy yeast mixture, add the melted butter, sugar, honey, eggs, and salt. Whisk gently until combined. The mixture will smell buttery and just a bit sweet.
- Add flour and knead (10 minutes): Gradually add the flour, about a cup at a time, stirring with a wooden spoon or your stand mixer with a dough hook on low. Once the dough comes together and pulls away from the bowl, start kneading. If by hand, flour your surface lightly and knead for 8-10 minutes until smooth and elastic. If the dough feels sticky, sprinkle a little more flour, but don’t overdo it or the rolls will be dense.
- First rise (1 hour): Shape the dough into a ball and place it in a lightly oiled bowl. Cover with a kitchen towel or plastic wrap. Leave it in a warm, draft-free spot until it doubles in size. This is a perfect time to clean up or prep your dinner sides.
- Shape the rolls (10 minutes): Punch down the risen dough gently to release air. Divide into 12 equal pieces (about 2 ounces / 57g each). Roll each piece into a smooth ball by cupping your hand and rolling on a lightly floured surface.
- Second rise (30-40 minutes): Place the dough balls on a parchment-lined baking sheet or in a greased round pan, spaced slightly apart. Cover again and let rise until puffy and nearly doubled.
- Bake (15-18 minutes): Preheat your oven to 350°F (175°C). Bake the rolls until golden brown on top—watch closely from 15 minutes onward. The smell of baking bread is the best kitchen timer!
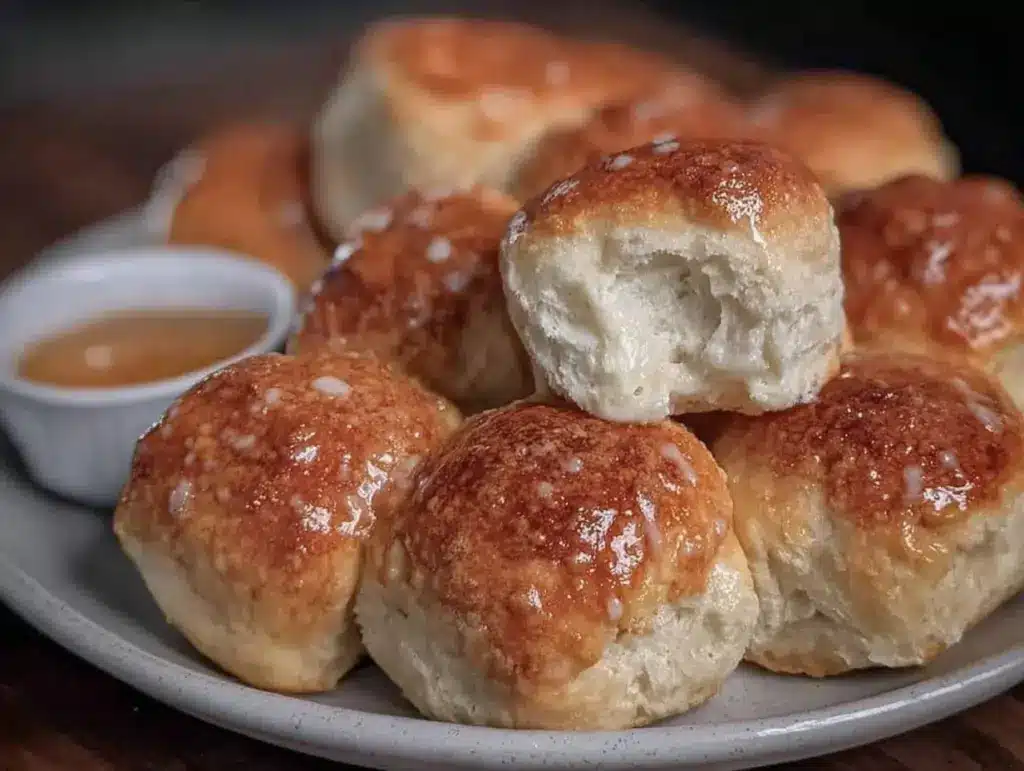
- Butter glaze (immediate): As soon as you take the rolls out, brush generously with melted butter. This step locks in moisture and adds that signature shine and richness.
- Cool & serve (10 minutes): Let the rolls rest a bit before serving. They’re best warm, but still delicious at room temperature.
Cooking Tips & Techniques
One thing I’ve learned is that the temperature of your milk can make or break the rise. Too hot, and the yeast dies; too cold, and it just won’t activate. Aim for that warm, bath-water temperature and use a thermometer if you can.
Don’t skip the first rise—it’s where the dough develops flavor and that fluffy texture. If your kitchen is cold, try placing the bowl inside a turned-off oven with just the oven light on. It creates a cozy little proofing nook.
When shaping rolls, try not to over-flour your surface. The dough should be a little tacky to the touch to keep the rolls soft. And if your dough sticks to your hands, lightly oil them instead of adding more flour.
Brush the rolls with butter right after baking while they’re hot—that buttery glaze is what makes these rolls so special. I’ve messed this part up once by waiting too long, and the butter just soaked in without the shine.
Finally, avoid overbaking. Once they turn golden, pull them out to keep them soft and tender inside. If you leave them too long, they’ll dry out—nobody wants that.
Variations & Adaptations
- Garlic Butter Rolls: Mix 1-2 teaspoons of garlic powder into the melted butter before brushing. Add a sprinkle of parsley for a savory twist.
- Whole Wheat Version: Substitute half of the all-purpose flour with whole wheat flour for a nuttier flavor and added fiber. You might need a splash more milk to keep the dough soft.
- Honey Oat Rolls: Add ½ cup of rolled oats to the dough along with an extra tablespoon of honey. Top with a sprinkle of oats before baking for a rustic look.
- Dairy-Free Adaptation: Use almond or oat milk warmed to the right temperature and swap butter with coconut oil or a dairy-free margarine. Texture varies slightly but still delicious.
- Sweet Cinnamon Rolls: Use the dough as a base, roll it out flat, spread with cinnamon sugar and butter, roll it up, slice into rounds, and bake. Glaze with icing for a treat.
I once tried adding a bit of mashed sweet potato to the dough for extra moisture and color—surprisingly tasty and perfect for fall dinners!
Serving & Storage Suggestions
These rolls are best served warm, fresh out of the oven, with an extra pat of butter melting right on top. They pair beautifully with hearty soups, stews, or even a simple salad for a cozy meal.
For a special touch, serve with honey butter or a side of jam. They’re also fantastic alongside barbecue or roasted chicken, where their softness complements smoky flavors.
To store, keep rolls in an airtight container at room temperature for up to 2 days. For longer storage, freeze them wrapped tightly in foil or plastic wrap for up to 3 months. When you want to enjoy them again, thaw at room temperature and warm briefly in the oven or microwave.
Reheating in the oven at 300°F (150°C) for 5-7 minutes restores that fresh-baked softness. You can even brush with a little melted butter after warming for an extra indulgent touch.
Over time, the flavor deepens slightly, making the rolls even more comforting the next day—though honestly, they rarely last that long in my house.
Nutritional Information & Benefits
Each fluffy Texas Roadhouse butter roll contains approximately:
| Calories | 160 |
|---|---|
| Carbohydrates | 22g |
| Protein | 4g |
| Fat | 6g |
| Fiber | 1g |
These rolls provide quick energy from carbohydrates, balanced by the richness of butter and eggs that contribute protein and healthy fats. Using whole milk adds calcium, and the optional honey offers natural sweetness without refined sugars.
While not low-carb or gluten-free, this recipe can be customized for dietary needs as noted earlier. Just note the presence of dairy, gluten, and eggs if you have allergies.
From a wellness perspective, these rolls bring comfort food with simple ingredients that you can feel good about making at home, avoiding preservatives and additives common in store-bought bread.
Conclusion
If you’re craving a soft, buttery roll that’s just as warm and inviting as a homemade hug, this Fluffy Texas Roadhouse butter rolls recipe is for you. It’s straightforward enough for beginners but satisfying enough to impress even seasoned bread lovers. Plus, it’s versatile—ready to be customized or enjoyed as is.
I love this recipe because it’s become a little ritual in my kitchen, one that turns ordinary dinners into moments worth savoring. You should definitely give it a try, tweak it to your liking, and share how it turns out.
Don’t be shy! Drop your questions, adaptations, or favorite pairings in the comments. And if you make these rolls, share the love with friends and family—they’re that good.
Remember, the best rolls come from a little patience, a touch of butter, and a whole lot of love. Happy baking!
FAQs
Can I use instant yeast instead of active dry yeast?
Yes, you can substitute instant yeast. Use about 2 teaspoons and add it directly to the flour without proofing. Adjust rising times accordingly, as instant yeast works faster.
How do I keep my rolls soft the next day?
Store them in an airtight container at room temperature. Reheat gently in the oven with a bit of foil to lock in moisture, or microwave briefly with a damp paper towel.
What if my dough is too sticky to handle?
Lightly flour your hands and work surface, but avoid adding too much extra flour. You can also oil your hands to prevent sticking without drying out the dough.
Can I make these rolls vegan?
With some tweaks—using plant-based milk, vegan butter substitutes, and egg replacers—you can make a vegan version. Texture and flavor may vary slightly.
Is it okay to freeze the dough before baking?
Absolutely! After the first rise, shape the rolls and freeze them on the baking sheet. Once frozen, transfer to a bag. Bake straight from frozen, adding a few extra minutes to baking time.
Pin This Recipe!

Fluffy Texas Roadhouse Butter Rolls

These fluffy Texas Roadhouse butter rolls are soft, buttery, and perfect for cozy dinners. Made with simple ingredients and a touch of honey, they deliver a tender crumb and a mouthwatering buttery glaze.
- Prep Time: 25 minutes
- Cook Time: 15-18 minutes
- Total Time: 2 hours
- Yield: 12 rolls 1x
- Category: Bread
- Cuisine: American
Ingredients
- 4 cups (480g) all-purpose flour
- 1 cup (240ml) warm whole milk (about 110°F / 43°C)
- 2 ¼ tsp (one packet) active dry yeast
- ¼ cup (50g) granulated sugar
- 6 tbsp (85g) unsalted butter, melted (half for dough, half for brushing)
- 2 large eggs, room temperature
- 1 tsp salt
- 1 tbsp honey (optional)
Instructions
- Proof the yeast (10 minutes): Stir active dry yeast into warm milk (about 110°F/43°C) with a pinch of sugar. Wait until frothy and bubbly.
- Mix wet ingredients (5 minutes): Add melted butter, sugar, honey, eggs, and salt to the yeast mixture. Whisk gently until combined.
- Add flour and knead (10 minutes): Gradually add flour, stirring until dough forms. Knead by hand for 8-10 minutes until smooth and elastic, adding flour if sticky but not too much.
- First rise (1 hour): Shape dough into a ball, place in lightly oiled bowl, cover, and let rise in a warm spot until doubled in size.
- Shape the rolls (10 minutes): Punch down dough, divide into 12 equal pieces (~2 oz each), and roll each into a smooth ball.
- Second rise (30-40 minutes): Place dough balls on parchment-lined baking sheet or greased round pan, spaced apart. Cover and let rise until puffy and nearly doubled.
- Bake (15-18 minutes): Preheat oven to 350°F (175°C). Bake rolls until golden brown on top.
- Butter glaze (immediate): Brush warm rolls generously with melted butter right after baking.
- Cool & serve (10 minutes): Let rolls rest before serving. Best served warm but also delicious at room temperature.
Notes
Use milk at about 110°F to activate yeast properly. Avoid over-flouring dough to keep rolls soft. Brush butter immediately after baking for best shine and moisture. Avoid overbaking to keep rolls tender. For dairy-free, substitute milk and butter with plant-based alternatives. For gluten-free, use a suitable gluten-free flour blend but expect texture changes.
Nutrition
- Serving Size: 1 roll
- Calories: 160
- Fat: 6
- Carbohydrates: 22
- Fiber: 1
- Protein: 4
Keywords: Texas Roadhouse rolls, butter rolls, homemade bread, fluffy rolls, easy bread recipe, comfort food, dinner rolls