Introduction
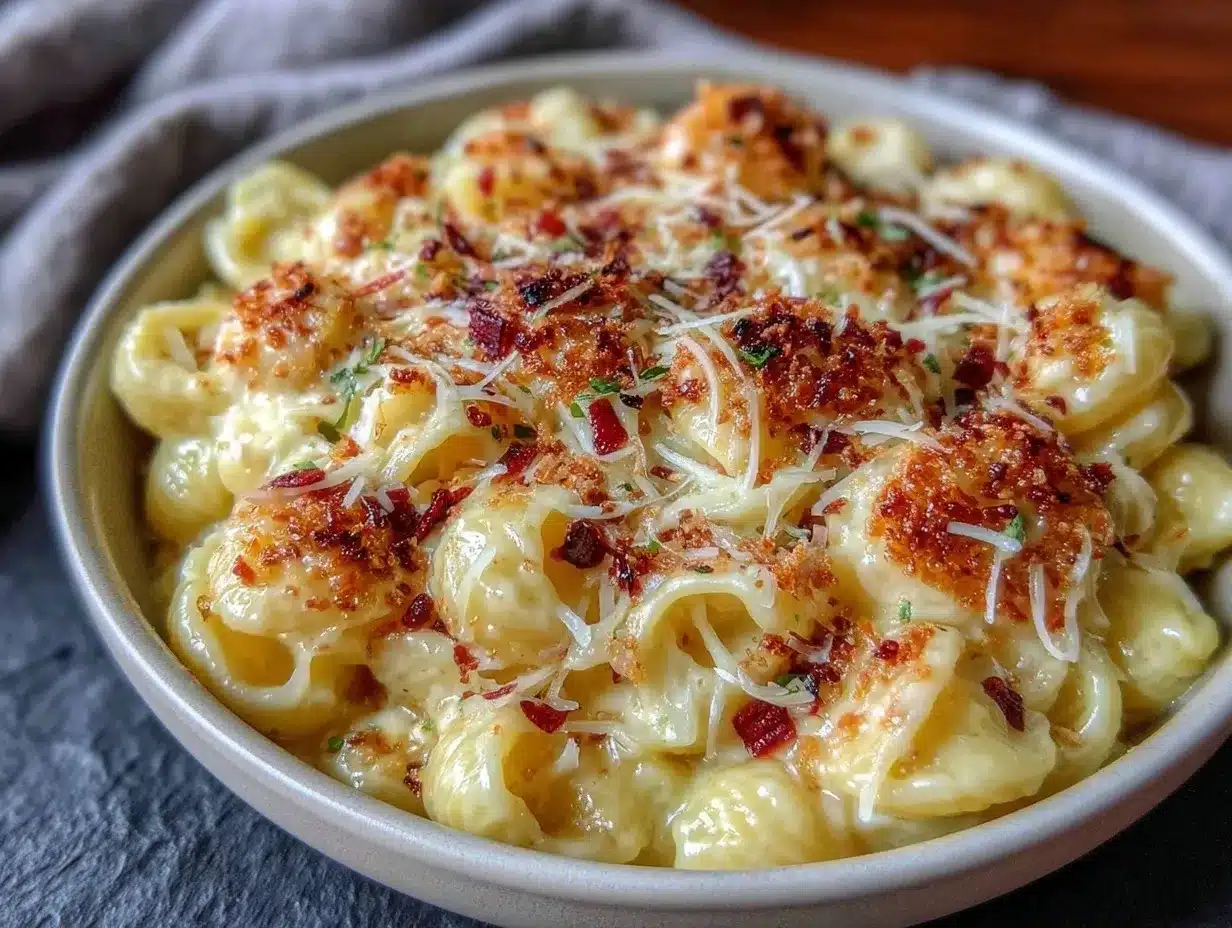
Let me just start by saying—when the nutty aroma of bubbling cheddar and Parmesan mingles with the scent of golden, buttery breadcrumbs, it’s impossible not to drift toward the kitchen. The moment my oven timer dinged the first time I made this creamy mac and cheese with crispy breadcrumbs, I found myself standing in front of the stove, spoon in hand, grinning like a kid. There’s something magical about those crunchy bits atop a blanket of velvety noodles that makes you pause, take a deep breath, and just smile because you know you’re onto something truly special.
Years ago, when I was knee-high to a grasshopper, my grandma used to whip up her own version—no fancy ingredients, just pure comfort. I tried to recreate her recipe one rainy Saturday, determined to capture that soul-warming nostalgia. Honestly, I wish I’d discovered my own twist sooner, because this dish feels like a warm hug, every single time. The creamy base comes together so easily, you’ll wonder why boxed stuff ever existed.
My family couldn’t stop sneaking spoonfuls straight from the skillet (and I can’t really blame them). It’s the kind of mac and cheese that disappears from potluck tables before you’ve even finished pouring yourself a drink. Whether you’re looking to brighten up your Pinterest feed, need a sweet treat for your kids after school, or want a fuss-free recipe for a cozy dinner, this creamy mac and cheese recipe delivers every time.
I’ve tested it more times than I can count—in the name of research, of course—and it’s become a staple for family gatherings, gifting, and those moments when only comfort food will do. So if you’re craving that classic taste with a crispy finish, you’re going to want to bookmark this one.
Why You’ll Love This Recipe
You know what? This creamy mac and cheese recipe isn’t just another bowl of noodles—it’s a full-on experience. I’ve tried dozens of recipes, and there’s always something missing until I nailed this one. With every batch, my inner chef gets a little giddy because I know I’m about to make someone’s day better. Let’s face it, comfort food should be easy, satisfying, and just a little bit fun.
- Quick & Easy: Comes together in under 45 minutes (including baking time), so you can whip it up for busy weeknights or last-minute cravings.
- Simple Ingredients: Forget those endless grocery runs—you likely have everything in your kitchen right now.
- Perfect for Every Occasion: Whether it’s a potluck, a holiday dinner, or a lazy Sunday, this dish always finds a place at the table.
- Crowd-Pleaser: Kids gobble it up, adults ask for seconds, and it’s surprisingly easy to scale up for a crowd.
- Unbelievably Delicious: The combination of creamy sauce and crispy topping makes it next-level comfort food.
What sets this creamy mac and cheese apart? It’s the way the sauce hugs every noodle—thanks to a perfectly blended mix of sharp cheddar and mellow Gruyère. The crispy breadcrumb topping isn’t just there for looks, either; it’s a little secret weapon that delivers crunch in every bite. I always get asked for the recipe (a sure sign you’ve hit the jackpot).
This isn’t just good—it’s the kind that makes you close your eyes after the first bite. You’ll taste a little nostalgia, a little ingenuity, and a whole lot of home-cooked love. I’ve spent years tweaking and testing, so you don’t have to. If you want comfort food that’s fast, soul-soothing, and guaranteed to impress, this creamy mac and cheese recipe is the one.
What Ingredients You Will Need
This recipe uses simple, wholesome ingredients to deliver bold flavor and that perfectly creamy texture without any fuss. Honestly, most are pantry staples—and a few fresh picks make all the difference. You don’t need anything fancy, but a couple of trusted brands really help.
- For the Mac and Cheese Base:
- Elbow macaroni – 16 oz (450 g) (classic shape for best sauce coverage)
- Unsalted butter – 4 tbsp (56 g), divided (for both sauce and breadcrumbs)
- All-purpose flour – 1/4 cup (30 g) (helps thicken the sauce)
- Whole milk – 3 cups (720 ml) (for creaminess; 2% works in a pinch)
- Heavy cream – 1 cup (240 ml) (adds luscious texture)
- Sharp cheddar cheese – 2 cups (200 g), shredded (I like Cabot or Tillamook)
- Gruyère cheese – 1 cup (100 g), shredded (nutty flavor, optional swap: Swiss)
- Parmesan cheese – 1/2 cup (50 g), freshly grated (for depth and saltiness)
- Salt – 1 tsp (plus more for pasta water)
- Black pepper – 1/2 tsp (freshly ground is best)
- Paprika – 1/2 tsp (adds subtle warmth)
- Dry mustard powder – 1/2 tsp (optional, but trust me—it boosts the cheesy flavor)
- For the Crispy Breadcrumb Topping:
- Panko breadcrumbs – 1 cup (60 g) (for crunch; regular breadcrumbs work too)
- Unsalted butter – 2 tbsp (28 g), melted
- Fresh parsley – 1 tbsp, chopped (optional, for freshness)
- Parmesan cheese – 2 tbsp (15 g), grated (for extra flavor)
In summer, you can swap in a handful of fresh chives or even a sprinkle of smoked paprika for the topping. If you’re looking to make this gluten-free, use your favorite gluten-free elbow pasta and swap all-purpose flour for a 1:1 gluten-free blend.
For a dairy-free twist, opt for almond milk and dairy-free cheese—just know the sauce might not be quite as rich. I’ve found that using freshly grated cheese (rather than pre-shredded) gives you the best melt and texture, so if you’ve got a block, grab your grater!
This recipe is flexible, so don’t stress if you need to make a quick substitution. Just keep the creamy base and crispy top, and you’re golden.
Equipment Needed
- Large pot – for boiling the macaroni (I use a heavy-bottomed stockpot, but any deep pot will do)
- Medium saucepan – for preparing the cheese sauce (nonstick is nice, but stainless works too)
- Whisk – for stirring the roux and smoothing out the sauce (a silicone whisk helps prevent scratching)
- Measuring cups and spoons – for precise ingredient amounts (I always keep my favorites on a magnetic strip for easy grabbing)
- Box grater – for shredding cheese (if you don’t have one, a food processor with a grater attachment does the trick)
- Baking dish – 9×13 inch (23×33 cm) glass or ceramic preferred (metal works but might brown the edges a bit more)
- Mixing bowl – for tossing the breadcrumbs with butter
- Oven mitts – because safety first!
If you don’t have a baking dish, a deep cake pan or even a cast iron skillet works in a pinch. For those on a budget, thrift store finds are great—just make sure any dish you use is oven-safe. Keep your whisk clean after making the sauce; a quick soak helps if cheese gets sticky.
Preparation Method
- Preheat & Prep: Preheat your oven to 375°F (190°C). Grease your 9×13 inch baking dish lightly with butter or nonstick spray. This keeps cleanup easy and prevents sticking.
- Cook the Pasta: Bring a large pot of salted water to a boil. Add 16 oz (450 g) elbow macaroni and cook until just al dente (about 7-8 minutes). Drain well and set aside. Don’t overcook—no one likes mushy noodles!
- Make the Breadcrumb Topping: In a small bowl, combine 1 cup (60 g) panko breadcrumbs, 2 tbsp (28 g) melted butter, 2 tbsp (15 g) grated Parmesan, and 1 tbsp chopped parsley (if using). Toss until evenly coated. Set aside. It should smell buttery and fresh.
- Prepare the Cheese Sauce: In a medium saucepan over medium heat, melt 4 tbsp (56 g) unsalted butter. Whisk in 1/4 cup (30 g) all-purpose flour and cook for 2-3 minutes, stirring constantly, until the mixture is lightly golden and smells nutty (this is your roux).
- Add Milk & Cream: Slowly add 3 cups (720 ml) whole milk and 1 cup (240 ml) heavy cream, whisking constantly to avoid lumps. Keep whisking until the mixture thickens slightly, about 5-6 minutes. It should coat the back of a spoon.
- Melt the Cheese: Lower the heat and add 2 cups (200 g) sharp cheddar, 1 cup (100 g) Gruyère, and 1/2 cup (50 g) Parmesan, stirring until smooth and melted. Sprinkle in 1 tsp salt, 1/2 tsp black pepper, 1/2 tsp paprika, and 1/2 tsp dry mustard powder. Taste and adjust seasoning as needed. The sauce should be glossy and fragrant.
- Combine Pasta & Sauce: Add drained macaroni to the cheese sauce, stirring gently to coat every noodle. The mixture should be creamy but not soupy. If it seems too thick, add a splash of milk.
- Assemble: Pour the cheesy macaroni into your prepared baking dish. Top evenly with the breadcrumb mixture, making sure every corner gets a bit of crunch.
- Bake: Bake uncovered for 20-25 minutes, until the top is golden brown and crispy (watch for bubbling around the edges!). If you like extra crunch, broil for 2-3 minutes at the end—but don’t walk away. It goes fast.
- Cool & Serve: Let the mac and cheese rest for 5 minutes before serving. This helps the sauce set slightly and gives you cleaner scoops. My family never waits, but I promise it’s worth it.
Troubleshooting tip: If the sauce is grainy, your cheese may have overheated. Lower the heat and stir gently next time. For extra creamy results, use freshly grated cheese and don’t skip the heavy cream!
Efficiency tip: While the pasta cooks, prep your cheese and toss the breadcrumbs. It saves serious time and keeps things moving.
Cooking Tips & Techniques
Years of trial and error taught me a few tricks that make this creamy mac and cheese recipe a winner every single time. First off, always cook your pasta just to al dente—it finishes cooking in the oven, and overdone noodles turn mushy. Trust me, I learned that the hard way!
- Use Freshly Grated Cheese: Pre-shredded cheese has additives that prevent melting. A block of cheddar or Gruyère will give you that silky sauce you crave.
- Don’t Rush the Roux: Give your flour and butter enough time to cook (2-3 minutes). If it’s too pale, your sauce will taste floury.
- Season Gradually: Cheese varies in saltiness. Taste the sauce before adding more salt—a bland sauce is fixable, but salty cheese isn’t.
- Bake Uncovered: This lets the breadcrumbs crisp up perfectly. I used to cover the dish, but it always came out soggy.
- Broil at the End: For extra crunch, a quick broil (2-3 minutes) makes the topping golden. Just don’t walk away—burnt breadcrumbs happen fast!
- Multitasking: Prep your cheese and breadcrumb mix while the pasta boils. It keeps the process smooth and prevents scrambling at the last minute.
Honestly, the biggest mistake I made early on was skimping on the sauce—I thought less would mean fewer calories, but it just made for dry noodles. Now I always double-check the sauce consistency before baking. If you want a super creamy texture, add an extra splash of milk or cream.
Consistency tip: Measure your ingredients carefully, especially the flour and cheese. Too much flour thickens the sauce too much; too little leaves it runny. With practice, you’ll get the feel for the perfect sauce.
Variations & Adaptations
One of my favorite things about this creamy mac and cheese recipe is how easy it is to tweak for different tastes, diets, and seasons. Here are a few tried-and-true variations:
- Gluten-Free: Use gluten-free elbow pasta and swap the all-purpose flour for a 1:1 gluten-free blend. Panko breadcrumbs are available gluten-free, too!
- Low-Carb/Keto: Substitute cooked cauliflower florets for the macaroni and use almond flour as a thickener. The cheese sauce still works beautifully.
- Spicy Kick: Add 1/2 tsp cayenne or diced pickled jalapeños to the cheese sauce. My husband swears by this version—especially for game day.
- Seasonal Veggies: Stir in roasted broccoli, sautéed mushrooms, or even a handful of sun-dried tomatoes for added color and nutrition.
- Allergen Substitutions: For dairy-free, use plant-based cheese, almond milk, and vegan butter. The texture changes a bit, but it’s still creamy and comforting.
Personally, I love tossing in smoked paprika and a handful of caramelized onions for an autumn twist. You can also switch up the cheese—try Monterey Jack, Fontina, or even a sharp blue cheese for bold flavor.
If you prefer stovetop mac and cheese, skip the baking step and serve right from the pot. The crispy topping is worth it, though, if you have time!
Serving & Storage Suggestions
For the best experience, serve this creamy mac and cheese piping hot, straight from the oven. The topping stays crisp, and the sauce is extra gooey. Present it right in the baking dish with a sprinkle of fresh parsley for color—it looks gorgeous on any table.
Pair with a simple green salad or roasted veggies to round out the meal. My kids love it with apple slices or grapes on the side, while adults might appreciate a glass of crisp white wine or lemonade.
To store leftovers, cover tightly and refrigerate for up to 4 days. For longer storage, freeze portions in airtight containers—just thaw in the fridge overnight before reheating. Reheat in the oven at 350°F (175°C) for about 15 minutes, or microwave individual servings until hot.
A little cooking secret: the flavors deepen after a day in the fridge, so leftover mac and cheese is even better for lunch the next day. If the sauce thickens up, just add a splash of milk before reheating to bring back the creaminess.
Nutritional Information & Benefits
An average serving (about 1 cup/200 g) of this creamy mac and cheese recipe provides roughly 430 calories, 23g fat, 18g protein, and 36g carbohydrates. The cheese supplies calcium and protein, while whole milk and cream add richness.
If you use gluten-free pasta or adjust the dairy, it fits vegetarian, gluten-free, or low-carb diets quite easily. Key allergens include wheat, dairy, and eggs (if you use egg-based pasta).
In my own wellness journey, I appreciate how this dish balances comfort with real ingredients—no preservatives, just wholesome goodness. As with all cheesy treats, moderation is key, but you can boost the nutrition by stirring in veggies or using whole wheat pasta.
Conclusion
So, why is this creamy mac and cheese recipe worth trying? It’s the kind of dish that turns a regular night into something memorable. Whether you stick to the classic or riff with your own twists, you’ll get big flavor and pure comfort in every spoonful.
Honestly, I love making this for friends and family—watching their faces light up with that first bite never gets old. Don’t be afraid to experiment; add your favorite cheese, sneak in some veggies, or make it spicy. It’s meant to fit your life and your tastes.
I’d love to hear how you make it your own! Drop a comment, share your best mac and cheese memories, or post your results on Pinterest. Here’s to cheesy goodness and crispy breadcrumbs—may your kitchen always smell this delicious!
FAQs
Can I use pre-shredded cheese for mac and cheese?
You can, but freshly grated cheese melts better and gives a smoother sauce. Pre-shredded cheese sometimes has anti-caking agents that affect texture.
What pasta shape works best for creamy mac and cheese?
Elbow macaroni is classic, but shells, cavatappi, or rotini also hold the sauce well. Use what you have!
How do I prevent my cheese sauce from turning grainy?
Keep the heat low when adding cheese, and use freshly grated cheese for best results. Stir gently and avoid overheating.
Can I make this recipe ahead of time?
Absolutely. Assemble, cover, and refrigerate for up to 24 hours before baking. Add a splash of milk before baking if the sauce thickens.
Is it possible to freeze homemade mac and cheese?
Yes! Cool completely, portion into airtight containers, and freeze for up to 2 months. Thaw overnight and reheat gently with a bit of milk to restore creaminess.
Pin This Recipe!
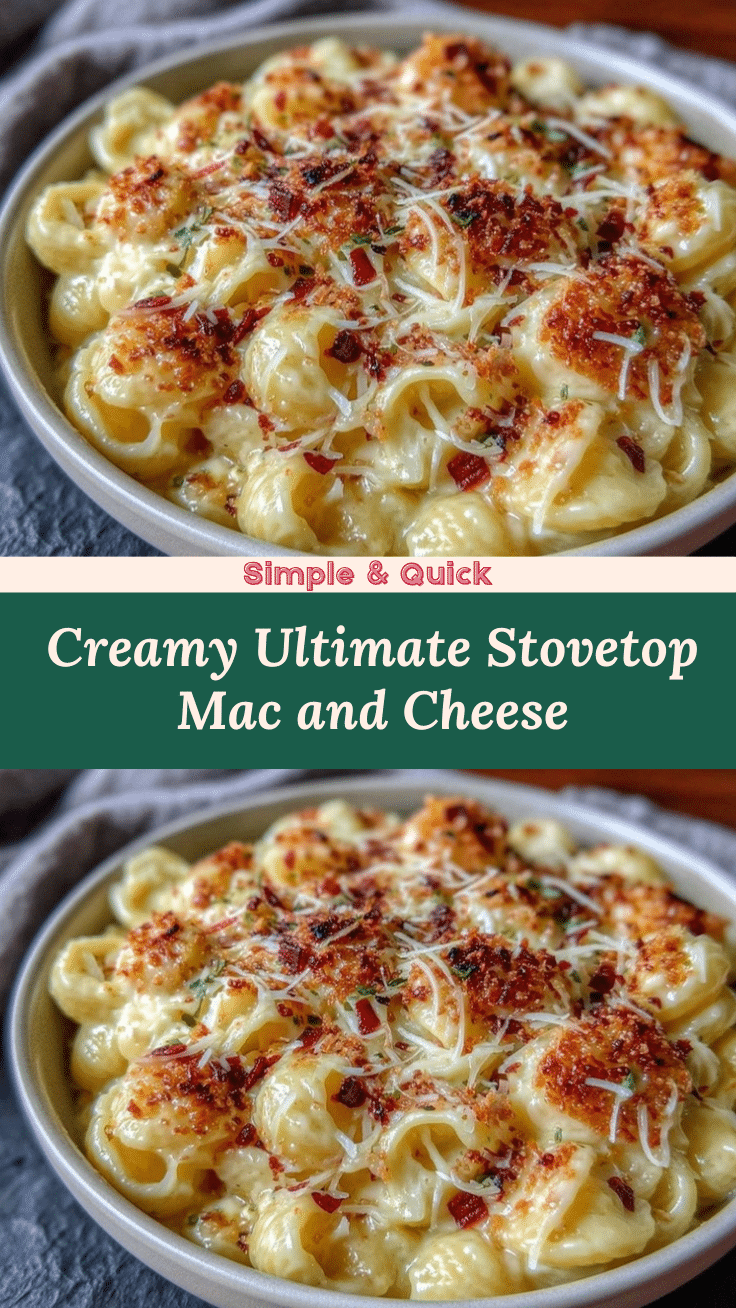
Creamy Mac and Cheese Recipe: Best Homemade with Crispy Breadcrumbs

This creamy mac and cheese features a velvety cheese sauce made with cheddar, Gruyère, and Parmesan, topped with buttery, crispy breadcrumbs for the ultimate comfort food experience. Perfect for family gatherings, potlucks, or cozy weeknight dinners.
- Prep Time: 15 minutes
- Cook Time: 30 minutes
- Total Time: 45 minutes
- Yield: 8 servings 1x
- Category: Main Course
- Cuisine: American
Ingredients
- 16 oz elbow macaroni
- 4 tbsp unsalted butter, divided
- 1/4 cup all-purpose flour
- 3 cups whole milk
- 1 cup heavy cream
- 2 cups sharp cheddar cheese, shredded
- 1 cup Gruyère cheese, shredded
- 1/2 cup Parmesan cheese, freshly grated
- 1 tsp salt (plus more for pasta water)
- 1/2 tsp black pepper
- 1/2 tsp paprika
- 1/2 tsp dry mustard powder (optional)
- 1 cup panko breadcrumbs
- 2 tbsp unsalted butter, melted
- 1 tbsp fresh parsley, chopped (optional)
- 2 tbsp Parmesan cheese, grated (for topping)
Instructions
- Preheat oven to 375°F (190°C). Grease a 9×13 inch baking dish with butter or nonstick spray.
- Bring a large pot of salted water to a boil. Add elbow macaroni and cook until just al dente (about 7-8 minutes). Drain well and set aside.
- In a small bowl, combine panko breadcrumbs, melted butter, grated Parmesan, and chopped parsley (if using). Toss until evenly coated and set aside.
- In a medium saucepan over medium heat, melt 4 tbsp unsalted butter. Whisk in flour and cook for 2-3 minutes until lightly golden and nutty.
- Slowly add whole milk and heavy cream, whisking constantly to avoid lumps. Cook until the mixture thickens slightly, about 5-6 minutes.
- Lower heat and add cheddar, Gruyère, and Parmesan cheeses. Stir until smooth and melted. Add salt, black pepper, paprika, and dry mustard powder. Taste and adjust seasoning.
- Add drained macaroni to the cheese sauce, stirring gently to coat.
- Pour cheesy macaroni into the prepared baking dish. Top evenly with the breadcrumb mixture.
- Bake uncovered for 20-25 minutes, until the top is golden brown and crispy. For extra crunch, broil for 2-3 minutes at the end, watching closely.
- Let rest for 5 minutes before serving.
Notes
For best results, use freshly grated cheese for a smoother sauce. Cook pasta just to al dente to avoid mushy noodles. You can make this gluten-free by using gluten-free pasta and flour. Add a splash of milk when reheating leftovers to restore creaminess. For extra crunch, broil the topping briefly at the end.
Nutrition
- Serving Size: About 1 cup (200 g)
- Calories: 430
- Sugar: 5
- Sodium: 650
- Fat: 23
- Saturated Fat: 14
- Carbohydrates: 36
- Fiber: 2
- Protein: 18
Keywords: mac and cheese, creamy mac and cheese, homemade mac and cheese, baked mac and cheese, comfort food, cheesy pasta, family dinner, potluck recipe, crispy breadcrumbs, easy mac and cheese