Let me tell you, the scent of warm Biscoff cookie butter melting into a rich, velvety cheesecake filling wafting from my oven is enough to make anyone’s mouth water. The first time I baked this Creamy Biscoff Cookie Butter Cheesecake with Crunchy Crust, I was instantly hooked — the kind of moment where you pause, take a deep breath, and just smile because you know you’re onto something truly special. I remember when I was knee-high to a grasshopper, my grandma used to make the most comforting desserts, and this cheesecake instantly reminded me of those cozy afternoons in her kitchen.
Honestly, this cheesecake feels like a warm hug in dessert form. My family couldn’t stop sneaking slices off the cooling rack (and I can’t really blame them). It’s dangerously easy to make yet delivers pure, nostalgic comfort. Whether you’re looking for the perfect sweet treat to brighten up your Pinterest cookie board, impress guests at a potluck, or just indulge in a little weekend baking therapy, this recipe fits the bill.
After testing this creamy Biscoff cookie butter cheesecake recipe multiple times (in the name of research, of course), it’s become a staple for family gatherings and gifting. You’re going to want to bookmark this one, trust me.
Why You’ll Love This Creamy Biscoff Cookie Butter Cheesecake Recipe
Having spent countless hours perfecting this recipe, I can confidently say it ticks all the boxes for a dessert that’s both indulgent and approachable. Here’s why this Creamy Biscoff Cookie Butter Cheesecake with Crunchy Crust stands out:
- Quick & Easy: Comes together in under 45 minutes of active prep, perfect for busy weeknights or last-minute cravings.
- Simple Ingredients: No fancy grocery trips needed; you likely already have everything in your pantry or fridge.
- Perfect for Any Occasion: Whether it’s a cozy dinner party, holiday celebration, or casual get-together, this cheesecake shines.
- Crowd-Pleaser: Always gets rave reviews from kids and adults alike — the crunchy crust and creamy filling combo is irresistible.
- Unbelievably Delicious: The smooth, buttery texture paired with Biscoff’s signature caramelized spice flavor is next-level comfort food.
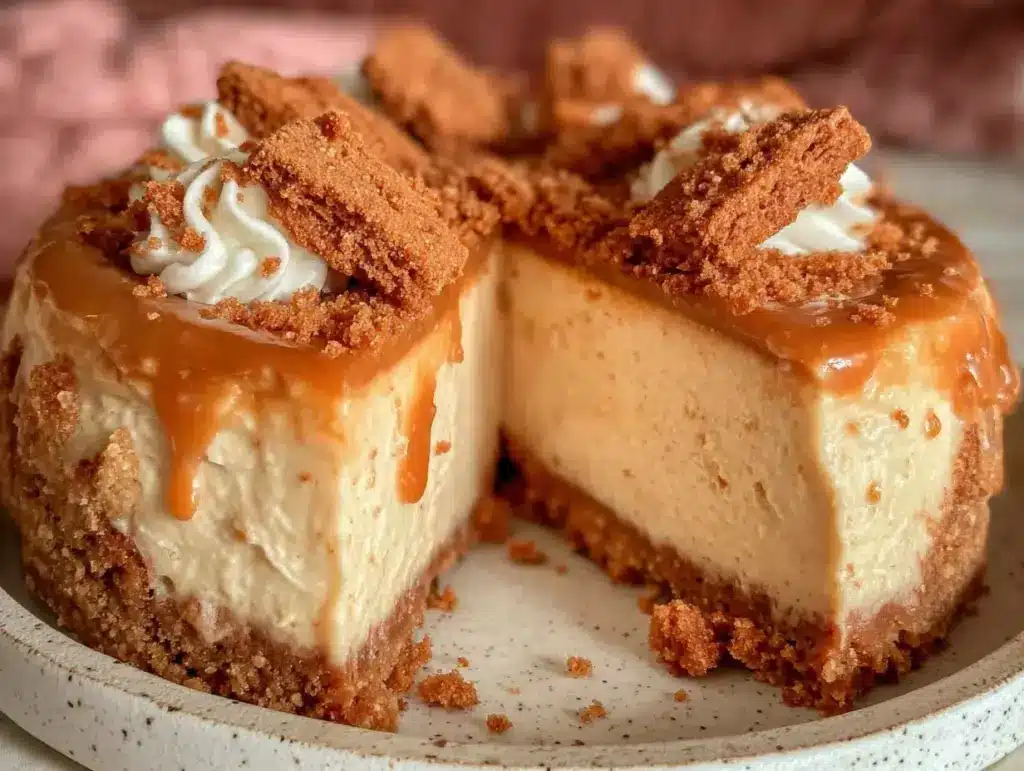
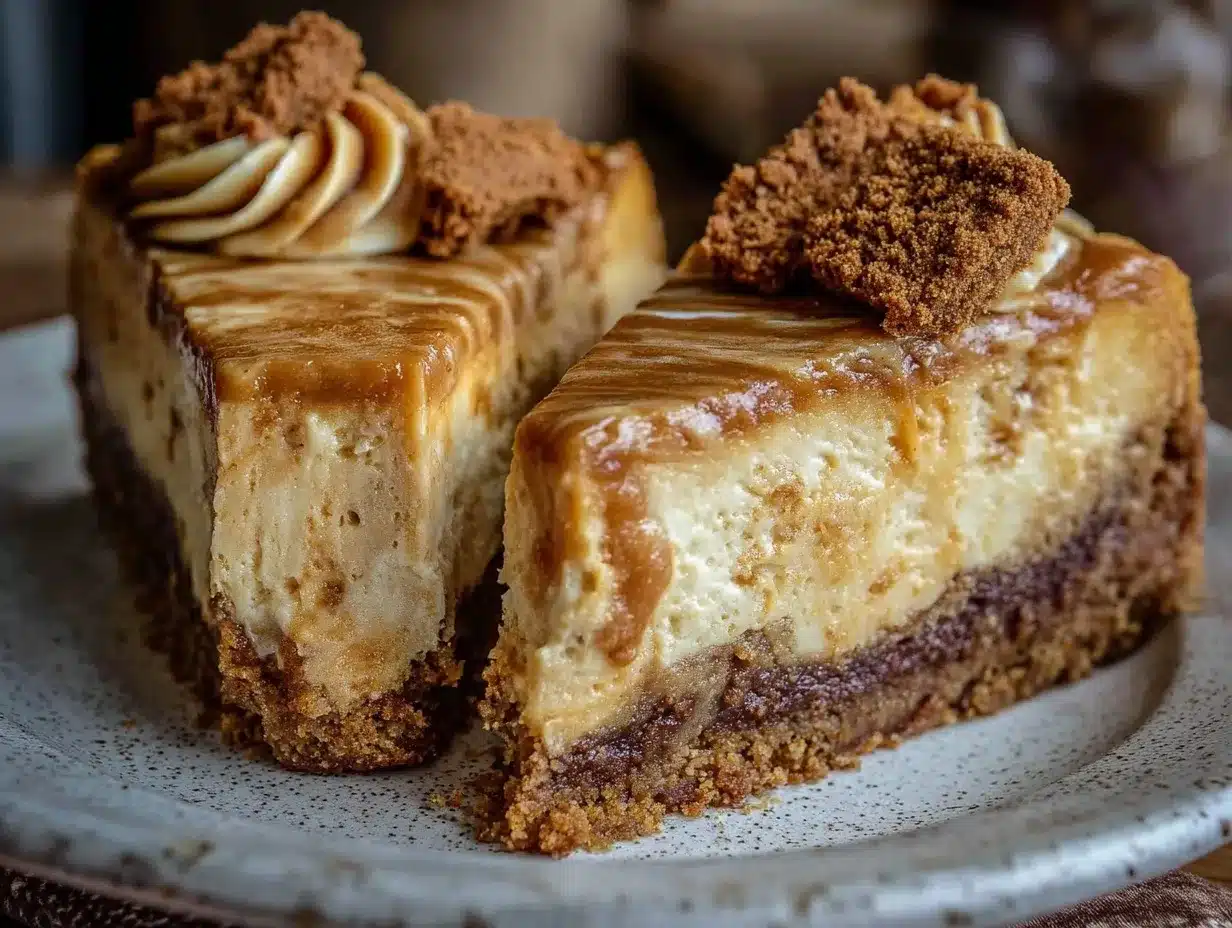
What makes this cheesecake different? It’s the way the cookie butter is folded into the cream cheese, creating an ultra-smooth, luscious filling that feels decadent but balanced. Plus, the crust isn’t just your basic graham cracker base — it’s extra crunchy with crushed Biscoff cookies mixed in for that perfect snap. This isn’t just another cheesecake; it’s the best version you’ll find anywhere.
This recipe isn’t just good—it’s the kind that makes you close your eyes after the first bite and savor every second. It’s comfort food reimagined — rich and satisfying without any fuss. Perfect for impressing guests or turning an ordinary day into something memorable.
What Ingredients You Will Need
This recipe uses simple, wholesome ingredients to deliver bold flavor and satisfying texture without the fuss. Most of these are pantry staples, and substitutions are easy if you need them.
- For the Crunchy Crust:
- 1 ½ cups (150g) Biscoff cookies, finely crushed (adds signature caramelized crunch)
- ¼ cup (50g) granulated sugar
- 6 tablespoons (85g) unsalted butter, melted (I recommend Land O’Lakes for best texture)
- Pinch of sea salt
- For the Creamy Filling:
- 24 oz (680g) cream cheese, softened (use full-fat for best creaminess)
- 1 cup (250g) creamy Biscoff cookie butter (smooth texture is key)
- 1 cup (200g) granulated sugar
- 3 large eggs, room temperature
- 1 cup (240ml) heavy cream (or coconut cream for dairy-free)
- 1 teaspoon pure vanilla extract
- 2 tablespoons all-purpose flour (or almond flour for gluten-free option)
- For Optional Topping:
- Additional Biscoff cookie crumbs for garnish
- Whipped cream or caramel drizzle
If you want to switch it up seasonally, swapping in spiced ginger snaps for Biscoff cookies adds a lovely twist. For a dairy-free version, coconut cream and dairy-free cream cheese work well. Just keep the ratios the same.
Equipment Needed
- 9-inch (23cm) springform pan — makes removing the cheesecake a breeze
- Electric mixer or stand mixer — helps achieve that perfectly smooth filling
- Mixing bowls — at least two for crust and filling
- Food processor or rolling pin — for crushing cookies finely
- Measuring cups and spoons — precision matters here
- Spatula — for folding and scraping batter cleanly
- Oven thermometer (optional) — for accurate baking temperature
If you don’t have a springform pan, a regular cake pan lined with parchment paper can work, just be gentle when unmolding. I’ve found a food processor cuts cookie crushing time significantly, but a ziplock bag and rolling pin work just fine if you’re on a budget. Keeping your cream cheese at room temp is crucial, so patience with prep tools pays off.
Preparation Method
- Preheat your oven to 325°F (160°C). Position the rack in the center to ensure even baking. (About 10 minutes prep time)
- Prepare the crust: Crush 1 ½ cups of Biscoff cookies finely using a food processor or place them in a ziplock bag and crush with a rolling pin until you get a sandy texture.
- Mix crust ingredients: In a bowl, combine crushed cookies, ¼ cup sugar, melted butter, and a pinch of sea salt. Stir until the crumbs are evenly coated and look like wet sand.
- Press crust into pan: Transfer crumb mixture into the springform pan, pressing firmly and evenly across the bottom and about an inch up the sides. Use the bottom of a glass for smooth, compact crust.
- Bake the crust: Place the pan in the oven and bake for 10 minutes. This step locks in that crunchy texture. Remove and set aside to cool slightly.
- Prepare the filling: Beat the softened cream cheese in a large bowl with an electric mixer on medium until smooth and creamy (about 2–3 minutes). Make sure there are no lumps!
- Add sugar and cookie butter: Gradually add 1 cup sugar and 1 cup creamy Biscoff cookie butter. Beat until well combined and silky.
- Incorporate eggs: Add eggs one at a time, mixing on low speed after each addition. Avoid overmixing; just enough to combine.
- Add cream, vanilla, and flour: Pour in heavy cream and vanilla extract, then sprinkle flour over the mixture. Mix gently until smooth. The flour helps the cheesecake set perfectly.
- Pour filling into crust: Carefully pour the creamy filling over the baked crust, smoothing the top with a spatula.
- Bake the cheesecake: Place the springform pan on the middle rack and bake for 50–60 minutes. The edges should be set, but the center will have a slight wobble (it firms up as it cools).
- Cool and chill: Let the cheesecake cool at room temperature for 1 hour, then refrigerate for at least 4 hours, preferably overnight, to achieve that perfect creamy texture.
- Serve: Remove the springform sides, garnish with extra Biscoff crumbs and optional whipped cream or caramel drizzle.
Pro tip: To avoid cracks, don’t overbake or open the oven door too often. Also, running a knife around the edges after baking helps the cheesecake release without cracking.
Cooking Tips & Techniques
Getting cheesecake just right can feel tricky, but here are some kitchen-tested tips that help make this Biscoff cookie butter cheesecake a winner every time:
- Room Temperature Ingredients: Make sure your cream cheese and eggs are at room temp — this prevents lumps and ensures a smooth batter.
- Don’t Overmix: Mix until combined but avoid whipping air into the batter, which can cause cracks or puffiness.
- Crust Crunch: Prebaking the crust is key for that satisfying crunch. Press crumbs tightly to avoid crumbling.
- Water Bath Alternative: Some bakers swear by a water bath to keep cheesecake moist, but I’ve found this recipe holds moisture beautifully without it.
- Timing: Keep an eye near the 50-minute mark; the center should wobble slightly but not be liquid. Overbaking dries it out.
- Cooling Slowly: Sudden temperature changes can cause cracks. Let it cool gradually at room temp before refrigerating.
I once rushed the chilling step and ended up with a cheesecake that was too soft to slice nicely. Lesson learned: patience pays off. Also, a good electric mixer really makes life easier here.
Variations & Adaptations
This Creamy Biscoff Cookie Butter Cheesecake is a versatile canvas for your dessert creativity. Here are a few variations you might enjoy:
- Chocolate Swirl: Drizzle melted dark chocolate into the batter and gently swirl before baking for a decadent twist.
- Vegan Version: Use vegan cream cheese, coconut cream, and a plant-based cookie butter. Substitute eggs with flaxseed meal (1 tablespoon flaxseed + 3 tablespoons water per egg).
- Nutty Crust: Mix crushed pecans or walnuts into the crust for added texture and flavor.
- Fruit Topping: Top with fresh sliced bananas or caramelized pears to complement the spiced cookie butter flavor.
- Low-Carb Option: Use almond flour and sugar substitutes like erythritol in both crust and filling for a keto-friendly cheesecake.
Personally, I love adding a handful of toasted hazelnuts into the crust for an extra crunch and depth of flavor — it’s a game changer!
Serving & Storage Suggestions
This cheesecake is best served chilled, straight from the fridge, to enjoy that creamy, melt-in-your-mouth texture. Slice it with a warm knife (dip in hot water and wipe dry) for clean edges.
Pair it with a cup of strong coffee or a glass of dessert wine to really bring out the Biscoff’s caramel notes. If you’re serving at a party, garnish with whipped cream and a sprinkle of cookie crumbs for extra flair.
Store leftovers covered in the refrigerator for up to 5 days. For longer storage, wrap tightly and freeze for up to 2 months. Thaw overnight in the fridge before serving. Flavors actually deepen after a day or two, so it’s perfectly fine to make ahead.
Nutritional Information & Benefits
This cheesecake is rich and indulgent but uses wholesome ingredients like real cream cheese and natural Biscoff cookie butter. A typical serving (1/12th of the cheesecake) contains approximately:
| Nutrient | Amount |
|---|---|
| Calories | 380 kcal |
| Fat | 28g |
| Carbohydrates | 25g |
| Protein | 6g |
| Sugar | 18g |
While this isn’t a low-calorie dessert, Biscoff cookie butter brings some antioxidants from its cinnamon and spice blend. Plus, cream cheese offers calcium and protein. For those with gluten sensitivities, swapping crust ingredients to gluten-free versions works well.
From my perspective, this cheesecake is a treat to enjoy mindfully — a perfect balance of indulgence and a bit of wholesome comfort.
Conclusion
So, why try this Creamy Biscoff Cookie Butter Cheesecake with Crunchy Crust? Because it’s one of those rare recipes that’s both simple to make and absolutely unforgettable to eat. You can customize it to your taste, impress your guests without stress, and enjoy a slice that feels like a cozy hug on a plate.
I love how this cheesecake brings out the warm, spiced sweetness of Biscoff in a silky smooth filling paired with a satisfyingly crunchy base. Honestly, it’s become my go-to for celebrations and quiet weekends alike.
If you give this recipe a try, please share your experience in the comments or any creative twists you make. Happy baking — you’re going to love every bite!
Frequently Asked Questions About Creamy Biscoff Cookie Butter Cheesecake
Can I make this cheesecake ahead of time?
Yes! It actually tastes better after chilling overnight. Just cover and refrigerate until ready to serve.
What if I don’t have Biscoff cookie butter?
You can use regular speculoos spread or even smooth peanut butter for a different flavor, though the signature taste will change.
How do I prevent cracks on my cheesecake?
Avoid overbaking, don’t open the oven door during baking, and cool it slowly at room temperature before chilling.
Can this cheesecake be frozen?
Absolutely. Wrap tightly and freeze for up to 2 months. Thaw in the fridge overnight before serving.
Is there a gluten-free option for the crust?
Yes, use gluten-free Biscoff cookies or substitute with almond flour mixed with crushed nuts and butter for a tasty alternative.
Pin This Recipe!
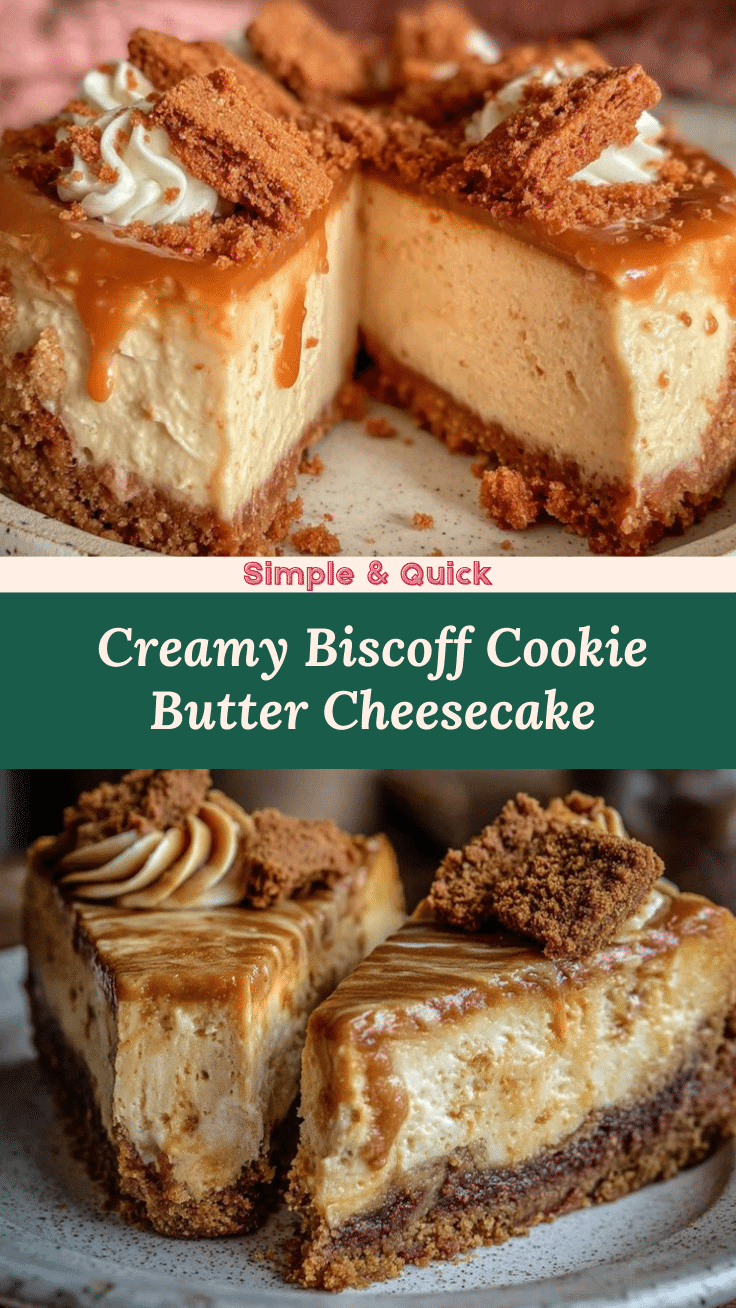
Creamy Biscoff Cookie Butter Cheesecake Recipe with Crunchy Crust

A rich, velvety cheesecake infused with Biscoff cookie butter and a crunchy Biscoff cookie crust, perfect for any occasion and easy to make.
- Prep Time: 15 minutes
- Cook Time: 1 hour 10 minutes
- Total Time: 5 hours 25 minutes
- Yield: 12 servings 1x
- Category: Dessert
- Cuisine: American
Ingredients
- 1 ½ cups (150g) Biscoff cookies, finely crushed
- ¼ cup (50g) granulated sugar
- 6 tablespoons (85g) unsalted butter, melted
- Pinch of sea salt
- 24 oz (680g) cream cheese, softened
- 1 cup (250g) creamy Biscoff cookie butter
- 1 cup (200g) granulated sugar
- 3 large eggs, room temperature
- 1 cup (240ml) heavy cream (or coconut cream for dairy-free)
- 1 teaspoon pure vanilla extract
- 2 tablespoons all-purpose flour (or almond flour for gluten-free)
- Optional toppings: additional Biscoff cookie crumbs, whipped cream, caramel drizzle
Instructions
- Preheat your oven to 325°F (160°C). Position the rack in the center.
- Crush 1 ½ cups of Biscoff cookies finely using a food processor or rolling pin.
- In a bowl, combine crushed cookies, ¼ cup sugar, melted butter, and a pinch of sea salt. Stir until evenly coated.
- Press crumb mixture firmly and evenly into the bottom and about an inch up the sides of a 9-inch springform pan.
- Bake the crust for 10 minutes. Remove and set aside to cool slightly.
- Beat softened cream cheese in a large bowl with an electric mixer on medium until smooth (2–3 minutes).
- Gradually add 1 cup sugar and 1 cup creamy Biscoff cookie butter. Beat until silky.
- Add eggs one at a time, mixing on low speed after each addition.
- Pour in heavy cream and vanilla extract, then sprinkle flour over the mixture. Mix gently until smooth.
- Pour filling over the baked crust and smooth the top with a spatula.
- Bake cheesecake for 50–60 minutes until edges are set but center slightly wobbly.
- Cool cheesecake at room temperature for 1 hour, then refrigerate for at least 4 hours or overnight.
- Remove springform sides and garnish with extra Biscoff crumbs and optional whipped cream or caramel drizzle before serving.
Notes
Use room temperature cream cheese and eggs to avoid lumps. Do not overmix to prevent cracks. Prebake crust for crunch. Cool cheesecake slowly before refrigerating. Use a warm knife dipped in hot water for clean slices. For dairy-free, substitute coconut cream and dairy-free cream cheese. Gluten-free crust option available with almond flour.
Nutrition
- Serving Size: 1 slice (1/12th of c
- Calories: 380
- Sugar: 18
- Fat: 28
- Carbohydrates: 25
- Protein: 6
Keywords: Biscoff cheesecake, cookie butter cheesecake, crunchy crust cheesecake, creamy cheesecake, easy cheesecake recipe, dessert, holiday dessert