“You won’t believe this, but it all started with a last-minute call from my neighbor, Jenna, on a sunny Saturday afternoon. She needed a celebratory dessert for her son’s graduation party in just a couple of hours. I was knee-deep in laundry, honestly debating between panic and rescue mode, when she mentioned cookie cake. Now, I’d never made one before, but something about the idea of a giant, shareable cookie covered in sweet congratulations felt just right. So, there I was, rummaging through the pantry, pulling out chocolate chips, eggs, and butter, while the kids were running circles around me.”
The idea of creating the Perfect Congrats Grad Cookie Cake was born out of necessity and a bit of chaos. I quickly realized this treat isn’t just a dessert; it’s a centerpiece that brings people together, sparking smiles and stories at every bite. Maybe you’ve been there—scrambling for a dessert that’s both impressive and doable. This cookie cake fits that bill perfectly. It’s straightforward, comforting, and honestly, a bit nostalgic, reminding me of those school celebrations where the cookie cake stole the show.
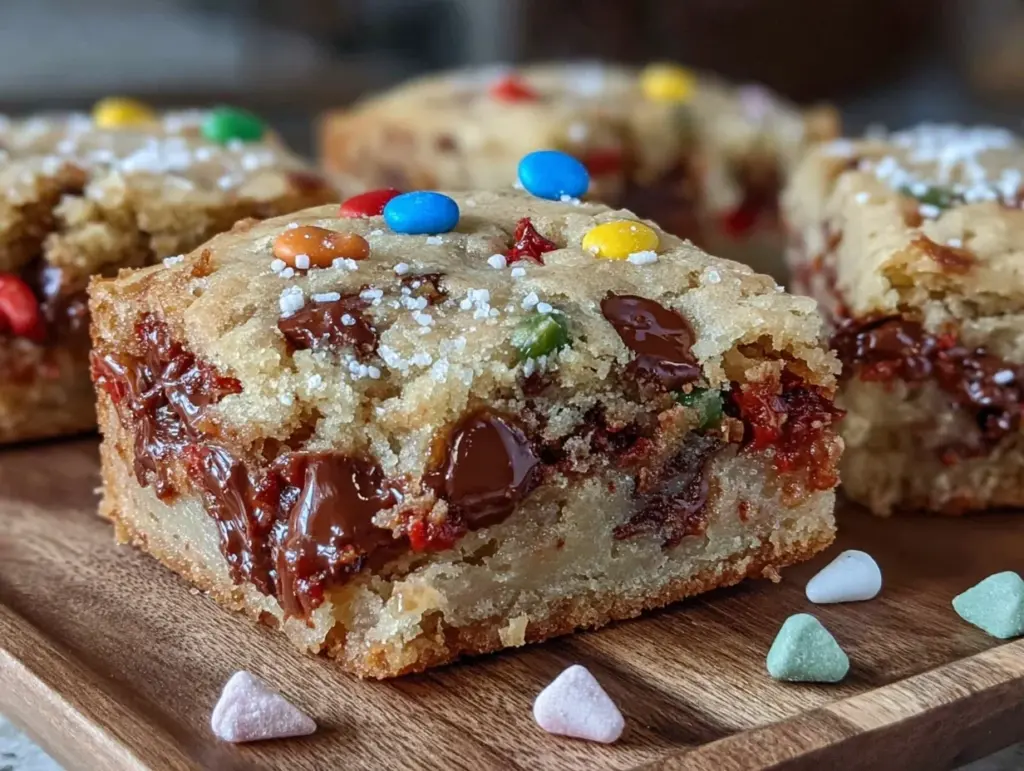
That afternoon, despite a few flour spills and a nearly forgotten egg, the cookie cake came out golden, soft in the center, and just the right touch sweet. Since then, it’s become my go-to for celebrations big and small. Let me tell you, this cookie cake doesn’t just say “congrats”—it shouts it, with sprinkles and frosting that make every grad feel like a superstar.
Why You’ll Love This Recipe
After testing this recipe countless times (and yes, sampling way too much dough), I can confidently say it’s a winner for anyone wanting a quick, crowd-pleasing celebration treat. Whether you’re a seasoned baker or just starting out, this cookie cake brings simple ingredients together in a way that feels special but doesn’t stress you out.
- Quick & Easy: Ready in under 45 minutes, perfect for last-minute party plans or spontaneous celebrations.
- Simple Ingredients: Uses pantry staples—no fancy shopping needed, which I love when time’s tight.
- Perfect for Celebrations: Ideal for graduations, birthdays, or any joyful gathering that calls for a sweet centerpiece.
- Crowd-Pleaser: Kids and adults alike can’t resist this soft, chewy cookie cake topped with colorful frosting.
- Unbelievably Delicious: The balance of buttery richness and melty chocolate chips is just next-level comforting.
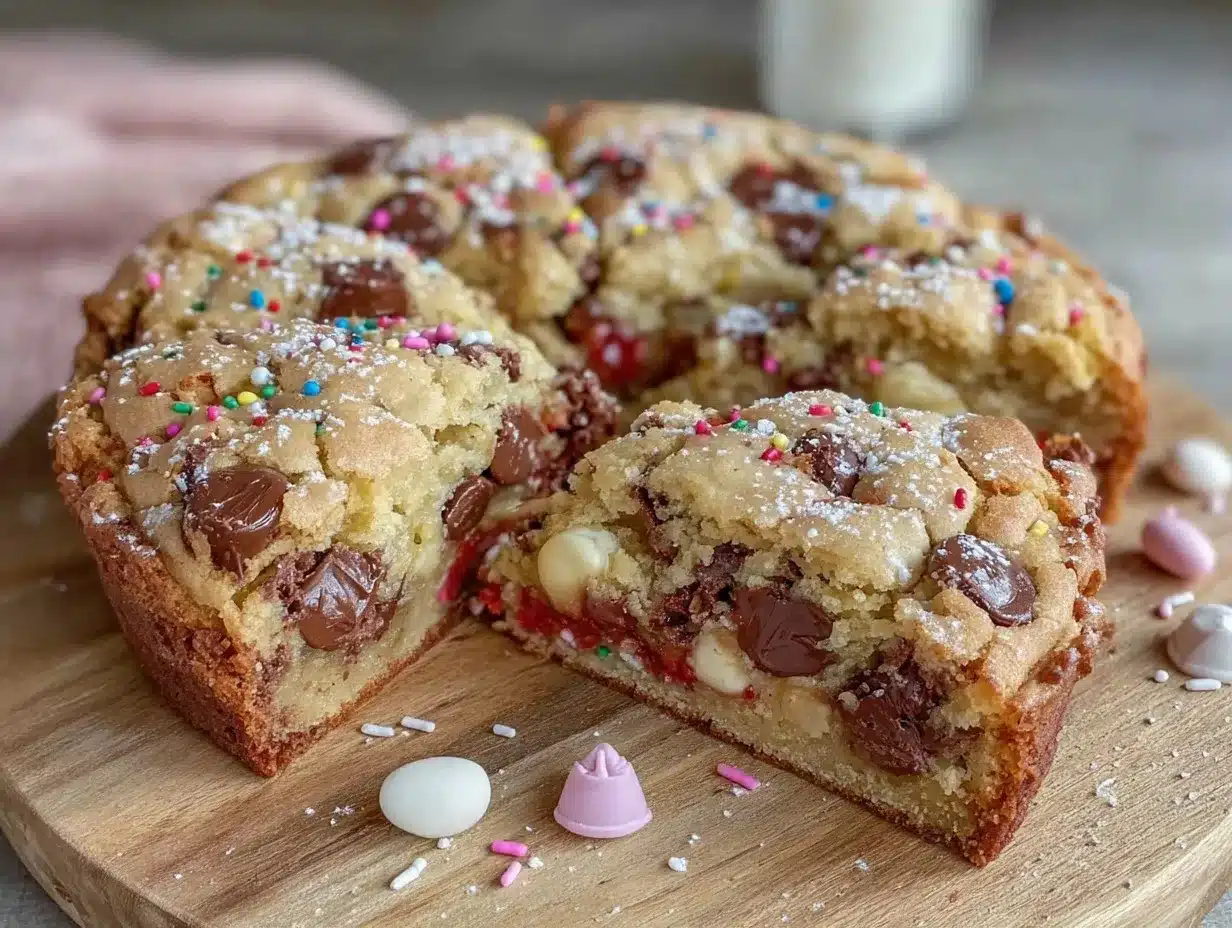
What sets this cookie cake apart? It’s the frosting technique—I blend cream cheese with butter and a hint of vanilla for a smooth, tangy topping that cuts through the sweetness. Plus, decorating with customized messages makes it personal and festive. Honestly, it’s the kind of dessert that makes you close your eyes after one bite and smile.
What Ingredients You Will Need
This recipe relies on straightforward, wholesome ingredients that come together to create that perfect texture and flavor combo. You’ll find most of these in your pantry already, and if not, they’re easy to grab at any grocery store. The chocolate chips are my favorite from Ghirardelli for their rich, melty quality, but feel free to use what you have on hand.
- For the Cookie Cake Batter:
- 1 cup (227g) unsalted butter, softened (adds richness and moisture)
- 1 cup (200g) granulated sugar
- 1 cup (220g) packed light brown sugar (for that chewy, caramel note)
- 2 large eggs, room temperature
- 2 teaspoons pure vanilla extract
- 3 cups (375g) all-purpose flour
- 1 teaspoon baking soda
- ½ teaspoon salt
- 2 cups (340g) semi-sweet chocolate chips
- For the Frosting:
- ½ cup (113g) unsalted butter, softened
- 4 oz (113g) cream cheese, softened (for tang and creaminess)
- 3 cups (360g) powdered sugar, sifted
- 1 teaspoon vanilla extract
- 2-3 tablespoons whole milk or heavy cream (adjust for desired consistency)
- Food coloring and sprinkles for decoration (optional)
Substitution tips: For a gluten-free version, swap the all-purpose flour for a 1:1 gluten-free baking flour blend. If dairy is a concern, use dairy-free butter and cream cheese alternatives and plant-based milk. In summer, fresh berries make a delightful topping instead of sprinkles!
Equipment Needed
- 9-inch (23 cm) round cake pan (a rimmed baking sheet can work in a pinch, but the pan helps keep the cookie cake thick and soft)
- Mixing bowls (one large and one medium)
- Electric hand mixer or stand mixer (makes creaming the butter and sugar much easier)
- Rubber spatula (for folding ingredients gently)
- Measuring cups and spoons (accuracy matters here!)
- Cooling rack (to let the cookie cake cool evenly and prevent sogginess)
- Offset spatula or butter knife (for smooth frosting application)
If you don’t have a mixer, no worries—just be prepared to put some muscle into creaming the butter and sugar by hand. I remember once making this while my mixer was broken, and honestly, it gave me a workout but still came out just fine. For those on a budget, a simple hand whisk and a sturdy bowl can do the trick; it just takes a little longer.
Preparation Method
- Preheat your oven to 350°F (175°C). Grease your 9-inch round cake pan with butter or line it with parchment paper. This prevents sticking and makes cleanup easier. (Prep time: 5 minutes)
- Cream the butter and sugars. In a large bowl, use your mixer to beat 1 cup softened butter with granulated and brown sugar until light and fluffy—about 3-4 minutes. You’ll notice the mixture getting pale and airy, which is a good sign. (Tip: Scrape the bowl sides halfway through.)
- Add the eggs and vanilla extract. Beat in the eggs one at a time, followed by the vanilla. The batter should be smooth and glossy. (If it looks curdled, don’t panic—keep mixing, it will come together.)
- Combine dry ingredients. In a separate bowl, whisk together the flour, baking soda, and salt. Gradually add these dry ingredients to the wet batter, mixing on low speed just until incorporated. Over-mixing can make the cookie tough, so gentle is key. (Tip: Stop when you no longer see flour.)
- Fold in the chocolate chips. Use a spatula to gently fold in the 2 cups of chocolate chips, ensuring even distribution without overworking the batter.
- Transfer batter to the prepared pan. Spread it evenly using your spatula, smoothing the top. It should be about 1½ inches thick for the perfect soft center and chewy edges.
- Bake in the preheated oven for 25-30 minutes. The edges should be golden brown, and the center set but still soft to the touch. A toothpick inserted should come out with a few moist crumbs but not wet batter. (Watch closely after 20 minutes to avoid overbaking.)
- Cool completely on a wire rack. This step is crucial before frosting; a warm cookie cake will cause the frosting to melt and slide right off.
- Prepare the frosting. Beat together ½ cup softened butter and cream cheese until smooth. Gradually add powdered sugar, beating until fluffy. Stir in vanilla and enough milk or cream to reach spreadable consistency.
- Frost your cookie cake. Using an offset spatula, spread the frosting evenly over the cooled cookie cake. Then, decorate with food coloring or sprinkles and write your congratulatory message. (Pro tip: Use a piping bag or a plastic bag with a small corner snipped for neat lettering.)
- Chill for 15-20 minutes. This helps set the frosting and makes slicing easier.
And there you have it — a perfectly soft and festive cookie cake ready to celebrate your grad or any special moment!
Cooking Tips & Techniques
Let me share a few lessons I picked up from my early cookie cake adventures. First, the key to that soft, chewy texture lies in the ratio of brown sugar to granulated sugar, which adds moisture and depth of flavor.
Don’t skip softening your butter and eggs to room temperature; this ensures everything blends smoothly, giving you a tender crumb. When mixing dry ingredients in, do it slowly and avoid overbeating—overworked batter can turn your cookie dense and tough, and nobody wants that.
Also, keep an eye on your oven. Ovens vary, and what’s golden in mine might be burnt in yours. If you smell something toasty or see dark edges before the timer’s up, check early. And always cool your cookie cake completely before frosting; it’s a common mistake I made once that ended with a frosting mess and a sticky kitchen counter.
When decorating, using a piping bag really helps with neat messages, but if you don’t have one, a zip-top bag with a tiny corner cut works just as well. I find that chilling the frosted cake briefly before slicing keeps the pieces clean and pretty, perfect for snapping those Instagram-worthy shots.
Variations & Adaptations
This cookie cake recipe is a flexible canvas for a variety of tastes and dietary needs. Here are some ways to make it your own:
- Gluten-Free Version: Use a gluten-free all-purpose flour blend. Just make sure it contains xanthan gum to help with texture. The result is just as delicious and perfect for guests with sensitivities.
- Flavor Twists: Swap half the chocolate chips for white chocolate or peanut butter chips. Adding a teaspoon of cinnamon or orange zest to the batter adds a subtle, unexpected depth.
- Vegan Adaptation: Replace butter with a plant-based margarine and use flax eggs (1 tablespoon ground flaxseed mixed with 3 tablespoons water per egg). Use dairy-free cream cheese and milk for the frosting, and you’re good to go.
- Seasonal Flair: In spring or summer, top with fresh sliced strawberries and a dusting of powdered sugar instead of traditional frosting.
One time, I tried adding chopped toasted pecans and a drizzle of caramel sauce on top—it was a hit and gave the cookie cake a lovely crunch contrast. Don’t be afraid to experiment a little; the base is forgiving and welcoming to creativity.
Serving & Storage Suggestions
Serve your cookie cake slightly chilled or at room temperature. The frosting tastes best when it’s cool but soft enough to melt in your mouth. Presentation-wise, a simple platter decorated with fresh berries or edible flowers makes for an eye-catching display.
This cookie cake pairs wonderfully with cold milk, coffee, or even a scoop of vanilla ice cream for an indulgent twist. For celebrations, think about serving alongside finger foods and colorful drinks to complement the festive vibe.
To store, cover the cookie cake with plastic wrap or keep it in an airtight container in the refrigerator for up to 4 days. For longer storage, wrap tightly in plastic and foil, then freeze for up to 2 months. When ready to enjoy, thaw overnight in the fridge and bring to room temperature before serving.
Reheating is generally not necessary, but if you prefer a warm slice, pop it in the microwave for about 15 seconds—just watch out for melted frosting! Over time, the flavors meld nicely, so sometimes a day-old slice tastes even better.
Nutritional Information & Benefits
Each serving of this cookie cake (assuming 12 slices) contains approximately:
| Nutrient | Amount |
|---|---|
| Calories | 320 kcal |
| Total Fat | 16 g |
| Saturated Fat | 8 g |
| Carbohydrates | 42 g |
| Sugar | 28 g |
| Protein | 3 g |
This recipe includes wholesome ingredients like real butter and eggs, which provide essential fats and proteins. Chocolate chips, while sweet, also offer small amounts of antioxidants. Using cream cheese in the frosting adds a bit of calcium and a tangy flavor that balances the sweetness.
For those mindful of allergens, this recipe contains gluten, dairy, and eggs, but as mentioned earlier, substitutions can make it suitable for gluten-free or vegan diets. From a wellness perspective, it’s a treat meant for celebration and joy, so I always encourage enjoying it mindfully and with good company!
Conclusion
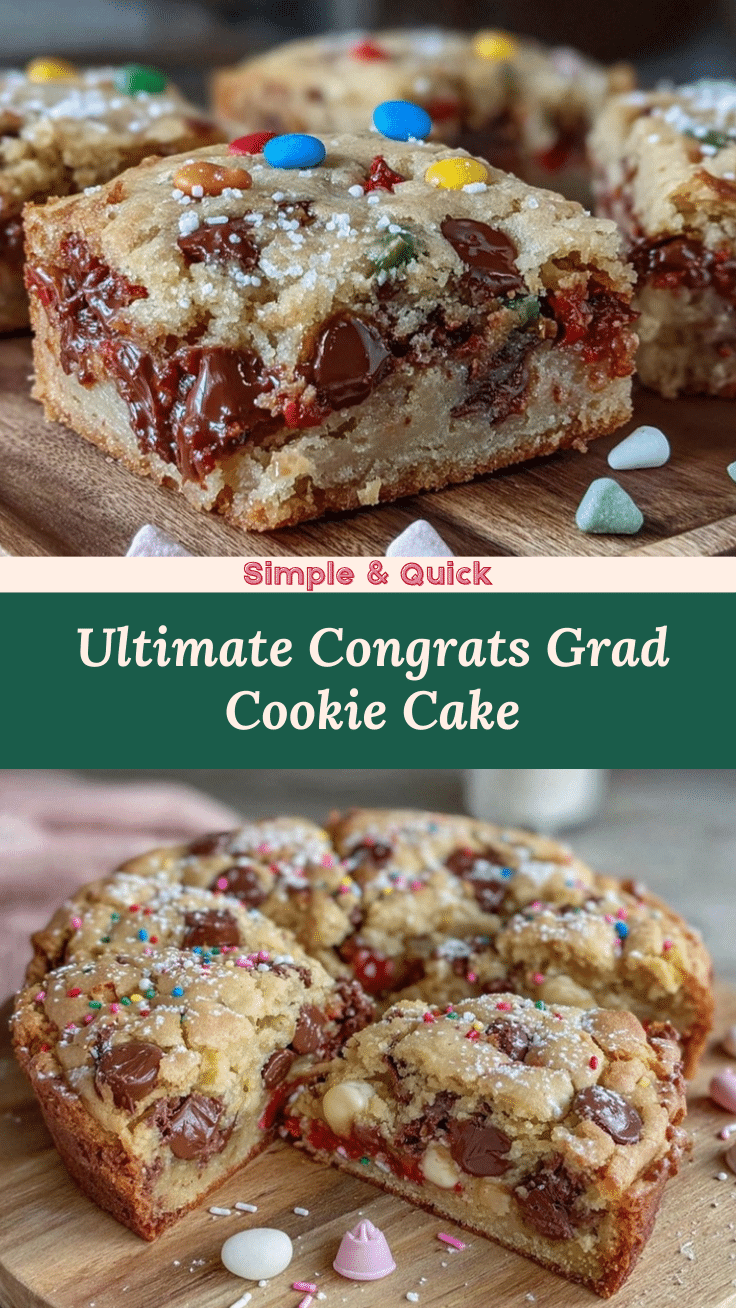
There you have it—the Perfect Congrats Grad Cookie Cake that’s as fun to make as it is to eat. This recipe brings together simple ingredients and straightforward steps to create a dessert that feels special without the fuss. Whether you’re celebrating a big milestone or just want to surprise someone with a sweet hug on a plate, this cookie cake is a solid choice.
Feel free to tweak the flavors, decorations, or even the size—after all, celebrations come in all shapes and sizes, right? Honestly, I love how this cookie cake turns ordinary moments into memorable ones, and I hope it brings that same joy to your table.
If you try it out, I’d love to hear how it goes—drop a comment below or share your own fun twists. Here’s to many sweet celebrations ahead. Happy baking!
FAQs
Can I make the cookie cake ahead of time?
Yes! You can bake it a day in advance, keep it covered in the fridge, and add the frosting the next day for the freshest taste and texture.
What if I don’t have cream cheese for the frosting?
You can make a simple buttercream using just butter, powdered sugar, vanilla, and milk. It won’t have the tangy flavor, but it’s still delicious.
How do I store leftover cookie cake?
Store leftovers in an airtight container in the fridge for up to 4 days or freeze wrapped tightly for up to 2 months.
Can I use different mix-ins besides chocolate chips?
Absolutely! Try white chocolate, peanut butter chips, nuts, or even dried fruit to customize your cookie cake.
What’s the best way to write messages on the cookie cake?
Using a piping bag with a small round tip is ideal, but a plastic sandwich bag with a tiny corner cut off works in a pinch. Practice on parchment paper first if you’re nervous!
Pin This Recipe!
Perfect Congrats Grad Cookie Cake Recipe Easy Homemade Celebration Treats

A quick and easy cookie cake recipe perfect for celebrations like graduations, featuring a soft, chewy texture and a tangy cream cheese frosting with customizable decorations.
- Prep Time: 10 minutes
- Cook Time: 25-30 minutes
- Total Time: 40 minutes
- Yield: 12 servings 1x
- Category: Dessert
- Cuisine: American
Ingredients
- 1 cup (227g) unsalted butter, softened
- 1 cup (200g) granulated sugar
- 1 cup (220g) packed light brown sugar
- 2 large eggs, room temperature
- 2 teaspoons pure vanilla extract
- 3 cups (375g) all-purpose flour
- 1 teaspoon baking soda
- ½ teaspoon salt
- 2 cups (340g) semi-sweet chocolate chips
- ½ cup (113g) unsalted butter, softened (for frosting)
- 4 oz (113g) cream cheese, softened
- 3 cups (360g) powdered sugar, sifted
- 1 teaspoon vanilla extract (for frosting)
- 2–3 tablespoons whole milk or heavy cream
- Food coloring and sprinkles for decoration (optional)
Instructions
- Preheat your oven to 350°F (175°C). Grease a 9-inch round cake pan with butter or line it with parchment paper.
- In a large bowl, cream 1 cup softened butter with granulated and brown sugar using a mixer until light and fluffy, about 3-4 minutes. Scrape the bowl sides halfway through.
- Beat in the eggs one at a time, then add 2 teaspoons vanilla extract. Mix until smooth and glossy.
- In a separate bowl, whisk together flour, baking soda, and salt. Gradually add dry ingredients to the wet batter, mixing on low speed just until incorporated. Avoid over-mixing.
- Fold in the chocolate chips gently with a spatula.
- Transfer batter to the prepared pan and spread evenly, about 1½ inches thick.
- Bake for 25-30 minutes until edges are golden brown and center is set but soft. A toothpick should come out with a few moist crumbs.
- Cool completely on a wire rack before frosting.
- For the frosting, beat ½ cup softened butter and cream cheese until smooth. Gradually add powdered sugar, beating until fluffy.
- Stir in vanilla extract and enough milk or cream to reach spreadable consistency.
- Spread frosting evenly over the cooled cookie cake using an offset spatula. Decorate with food coloring or sprinkles and write your message.
- Chill the frosted cake for 15-20 minutes to set the frosting before slicing.
Notes
Use room temperature butter and eggs for best texture. Avoid over-mixing the batter to keep the cookie cake soft and chewy. Cool completely before frosting to prevent melting. Use a piping bag or plastic bag with a small corner cut for neat lettering. For gluten-free or vegan versions, substitute ingredients as suggested.
Nutrition
- Serving Size: 1 slice (1/12th of c
- Calories: 320
- Sugar: 28
- Fat: 16
- Saturated Fat: 8
- Carbohydrates: 42
- Protein: 3
Keywords: cookie cake, graduation dessert, celebration treat, easy cookie recipe, chocolate chip cookie cake, cream cheese frosting


