
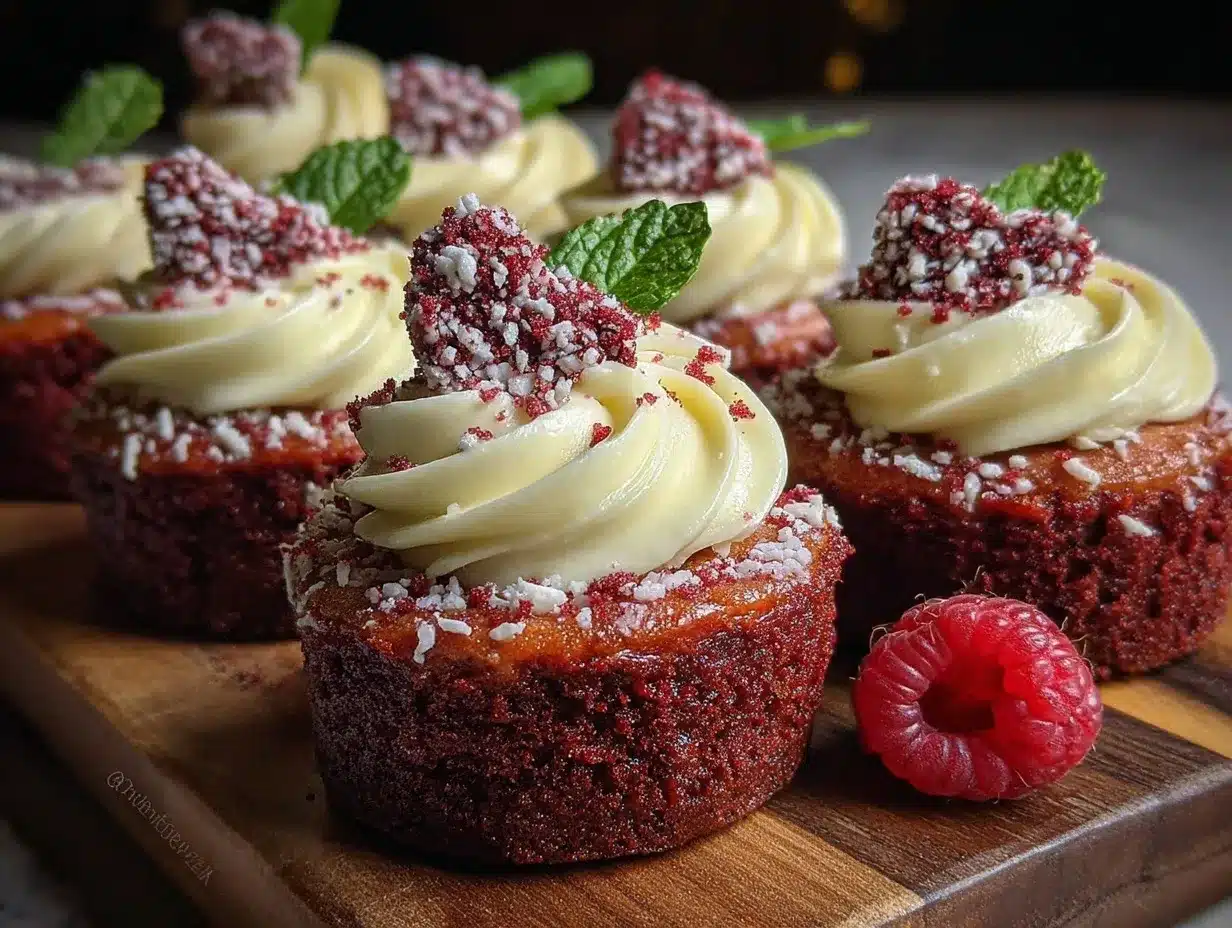
Let me tell you, the scent of rich cocoa mingling with sweet cream cheese wafting from my oven is enough to make anyone’s mouth water, especially when shaped into adorable little hearts. The first time I baked these Perfect Valentine’s Mini Red Velvet Heart Cheesecakes, I was instantly hooked—the kind of moment where you pause, take a deep breath, and just smile because you know you’re onto something truly special. Years ago, when I was knee-high to a grasshopper, Valentine’s Day desserts meant boxed chocolates or store-bought cookies, but stumbling upon this charming recipe changed everything.
I remember that rainy weekend when I decided to try a twist on classic red velvet cake, turning it into bite-sized cheesecakes shaped like hearts. My family couldn’t stop sneaking them off the cooling rack (and I can’t really blame them). Honestly, these mini red velvet heart cheesecakes are dangerously easy to make, delivering pure, nostalgic comfort wrapped up in a cute, festive package. Whether you’re looking for a sweet treat for your kids, a romantic dessert for date night, or a way to brighten up your Pinterest cookie board, these cheesecakes fit the bill perfectly.
I’ve tested this recipe more times than I can count (in the name of research, of course), and it’s become a staple for family gatherings, gifting, and those cozy Valentine’s evenings that feel like a warm hug on a chilly night. Trust me, you’re going to want to bookmark this one.
Why You’ll Love This Recipe
After countless batches and tweaks, I’m confident this recipe hits all the right notes. Here’s why you’ll fall for these mini cheesecakes as much as I have:
- Quick & Easy: Comes together in under an hour, perfect for busy weeknights or last-minute Valentine’s Day plans.
- Simple Ingredients: No fancy grocery runs needed; you probably already have everything in your kitchen pantry.
- Perfect for Date Night: These little heart-shaped cheesecakes add a touch of romance without the fuss.
- Crowd-Pleaser: Loved by kids and adults alike—guaranteed to get rave reviews.
- Unbelievably Delicious: The cream cheese filling is silky smooth, with a subtle tang that balances the sweet red velvet base.
What sets this recipe apart? It’s the perfect balance of flavors and textures. The red velvet crust is tender and just a bit cakey, while the cheesecake filling is creamy and rich without being overly heavy. Plus, using a mini heart-shaped pan makes these irresistibly cute—no extra work required! This isn’t just another cheesecake recipe; it’s a charming little dessert that feels like a thoughtful hug on a plate.
Honestly, this recipe isn’t just good—it’s the kind that makes you close your eyes after the first bite and smile. It’s comfort food reimagined for Valentine’s Day, healthier and faster, but with all the soul-soothing satisfaction you crave. Whether you want to impress your sweetheart or just treat yourself, these mini red velvet heart cheesecakes will do the trick with zero stress.
What Ingredients You Will Need
This recipe uses simple, wholesome ingredients to deliver bold flavor and satisfying texture without the fuss. Most are pantry staples, and a few are easy to find at any grocery store.
- For the Red Velvet Crust:
- All-purpose flour, 1 cup (125g) – I prefer King Arthur for consistency
- Unsweetened cocoa powder, 2 tablespoons (15g) – use Dutch-processed for a richer color
- Granulated sugar, 3/4 cup (150g)
- Unsalted butter, 1/2 cup (113g), softened (adds richness)
- Egg, 1 large, room temperature
- Buttermilk, 1/4 cup (60ml) – can substitute with milk plus 1 tsp vinegar if needed
- Red food coloring, 1 1/2 teaspoons (adjust for intensity)
- Vanilla extract, 1 teaspoon
- Baking powder, 1/2 teaspoon
- Salt, 1/4 teaspoon
- For the Cheesecake Filling:
- Cream cheese, 8 oz (225g), softened – Philadelphia brand works great
- Granulated sugar, 1/3 cup (65g)
- Large egg, 1 room temperature
- Sour cream, 1/4 cup (60g) (use dairy-free yogurt for a vegan twist)
- Vanilla extract, 1 teaspoon
- All-purpose flour, 1 tablespoon (8g) – helps set the filling
- Optional Toppings:
- Whipped cream
- Fresh raspberries or strawberries
- White chocolate shavings
If you want to swap for gluten-free, almond flour works nicely in the crust, though texture will be slightly different. For a dairy-free version, try coconut cream cheese and non-dairy yogurt in the filling.
Equipment Needed
- Mini heart-shaped silicone or metal muffin pan (12-cavity) – I have both and honestly silicone makes cleanup a breeze.
- Electric hand mixer or stand mixer – helps get that silky smooth cheesecake filling.
- Mixing bowls, medium and large sizes.
- Measuring cups and spoons – accurate measurements are key here.
- Rubber spatula – perfect for scraping down sides.
- Oven thermometer (optional) – ovens vary, so this helps with baking precision.
If you’re on a budget, a regular muffin pan works fine; just line with heart-shaped parchment cutouts or silicone liners. For small kitchens, a handheld mixer and one good mixing bowl will do just fine.
Preparation Method
- Preheat your oven to 325°F (163°C). Grease your mini heart pan lightly with butter or non-stick spray. This little step saves you from a baking disaster later.
- Prepare the red velvet crust: In a medium bowl, whisk together 1 cup all-purpose flour, 2 tablespoons cocoa powder, 1/2 teaspoon baking powder, and 1/4 teaspoon salt. Set aside.
- In a large bowl, cream 1/2 cup softened unsalted butter with 3/4 cup sugar using an electric mixer until fluffy (about 2 minutes). Add 1 large egg and 1 teaspoon vanilla extract, beating well.
- Mix in the red food coloring (start with 1 1/2 teaspoons) and 1/4 cup buttermilk until fully combined.
- Slowly add the dry ingredients to the wet, mixing until just combined. The batter should be thick but spreadable. If it feels too stiff, add a splash more buttermilk.
- Spoon about 1 tablespoon of red velvet batter into each mini heart cavity, spreading it evenly to form a thin base layer. This crust will bake up tender and slightly cakey—just right.
- Prepare the cheesecake filling: In a clean bowl, beat 8 oz softened cream cheese until smooth. Add 1/3 cup sugar, 1 large egg, 1/4 cup sour cream, 1 teaspoon vanilla extract, and 1 tablespoon flour. Beat until creamy and lump-free.
- Carefully spoon the cheesecake filling over the red velvet crust in each heart mold, filling almost to the top but leaving a tiny gap to prevent overflow.
- Bake in the preheated oven for 22-25 minutes, or until the edges are set but the center still jiggles slightly when you shake the pan gently. Overbaking will cause cracks; underbaking means too gooey.
- Remove from oven and let cool on a wire rack for 15 minutes, then refrigerate for at least 2 hours to fully set and chill.
- Once chilled, carefully pop the mini cheesecakes out of the molds. Serve as is or top with whipped cream, fresh berries, or white chocolate shavings for an extra touch.
Pro tip: If you notice the filling puffing up too much, gently tap the pan on the counter before baking to release air bubbles. You can also line a baking sheet with foil under the mini pan to catch any drips.
Cooking Tips & Techniques
Getting perfect mini red velvet heart cheesecakes is all about technique and timing. Here are some tips I’ve learned the hard way:
- Room temperature ingredients: Make sure butter, eggs, and cream cheese are at room temp for smooth mixing and no lumps.
- Don’t overmix the batter: Overworking the red velvet batter or cheesecake filling can create a dense texture. Mix just until combined.
- Watch baking time closely: Mini cheesecakes bake faster than regular ones. Set a timer and check a few minutes before the minimum time.
- Use an oven thermometer: Oven temps can vary wildly. This helps avoid under- or over-baking.
- Chill thoroughly: The cheesecake filling needs time in the fridge to set perfectly. I never skip this step.
- Prevent cracking: Baking at a moderate temperature and not overbaking helps. Also, a water bath isn’t necessary for minis but is for larger cheesecakes.
- Silicone molds rock: They make unmolding these tiny hearts a breeze without breaking.
One time, I forgot to soften the cream cheese and ended up with lumps that no amount of mixing could fix. Lesson learned—patience is key here! Also, multitasking by prepping the crust and filling concurrently saves time and avoids batter mishaps.
Variations & Adaptations
These mini red velvet heart cheesecakes are a fantastic base for creativity. Here are some fun ways you can switch things up:
- Dietary swaps: Use gluten-free flour blend for the crust to make it gluten-free. Swap cream cheese with cashew-based vegan cream cheese for dairy-free options.
- Flavor twists: Add a teaspoon of orange zest to the crust for a citrusy pop, or swirl in raspberry puree into the cheesecake filling for a fruity surprise.
- Seasonal toppings: In summer, top with fresh berries; in winter, sprinkle with crushed peppermint candy or drizzle with warm chocolate sauce.
- Baking methods: If you don’t have mini heart pans, use regular muffin tins and press heart-shaped cookie cutters into the crust after baking for a similar effect.
- Personal variation: I once added a teaspoon of espresso powder to the crust for a subtle mocha undertone—totally unexpected but incredible.
Serving & Storage Suggestions
Serve these mini cheesecakes chilled or slightly warmed. Personally, I love them straight from the fridge, topped with a dollop of fresh whipped cream and a few raspberries for color and brightness. They make a perfect dessert for Valentine’s dinner or a sweet addition to brunch.
Pair them with a light sparkling wine or a cup of rich coffee to balance the sweetness.
To store, keep them refrigerated in an airtight container for up to 4 days. For longer storage, freeze individual cheesecakes wrapped tightly in plastic wrap and foil. Thaw in the refrigerator overnight before serving.
Reheating is optional—just a quick 10 seconds in the microwave can soften them slightly if you prefer a creamier texture, but honestly, they’re delightful cold. Over time, the flavors meld beautifully, making leftovers even better the next day.
Nutritional Information & Benefits
Each mini red velvet heart cheesecake contains roughly 180 calories, with about 12 grams of fat, 15 grams of carbohydrates, and 3 grams of protein. The cream cheese provides a good dose of calcium, and the recipe uses moderate sugar to keep sweetness balanced.
Using real butter and cream cheese means you get some healthy fats, which are satisfying and help keep blood sugar stable. For those watching gluten intake, swapping the flour makes this treat accessible to many diets.
These cheesecakes are an indulgence but also a comforting source of joy—because let’s face it, sometimes happiness is the best ingredient.
Conclusion
So there you have it—Perfect Valentine’s Mini Red Velvet Heart Cheesecakes that are as charming as they are delicious. You can customize them any way you like, whether it’s tweaking the flavors or adjusting for dietary needs. I love this recipe because it blends sweetness, texture, and that warm, fuzzy feeling of love into every bite.
If you try making these, please let me know how they turn out! Share your photos, tips, or any fun twists you tried. This little recipe is meant to bring smiles, so I hope it becomes a favorite in your kitchen too.
Happy baking, and may your Valentine’s Day be as sweet as these mini hearts!
FAQs
Can I make these mini red velvet heart cheesecakes ahead of time?
Absolutely! You can prepare them the day before and keep them chilled in the fridge. They actually taste even better after the flavors have melded overnight.
What can I use if I don’t have red food coloring?
Beet juice or powder can be a natural alternative, though the color might be a bit more muted. Adjust the amount to get your desired shade.
How do I prevent the cheesecake filling from cracking?
Bake at a moderate temperature, don’t overbake, and let them cool gradually. Also, avoid opening the oven door during baking to keep the temperature steady.
Can I double this recipe for a larger batch?
Yes, just double all ingredients and bake in multiple mini pans or larger pans. Adjust baking time slightly if using bigger molds.
What’s the best way to remove mini cheesecakes from silicone molds?
Gently press from the bottom of the silicone mold to pop each cheesecake out. If stuck, a quick dip in warm water (mold only) helps loosen them.
Pin This Recipe!
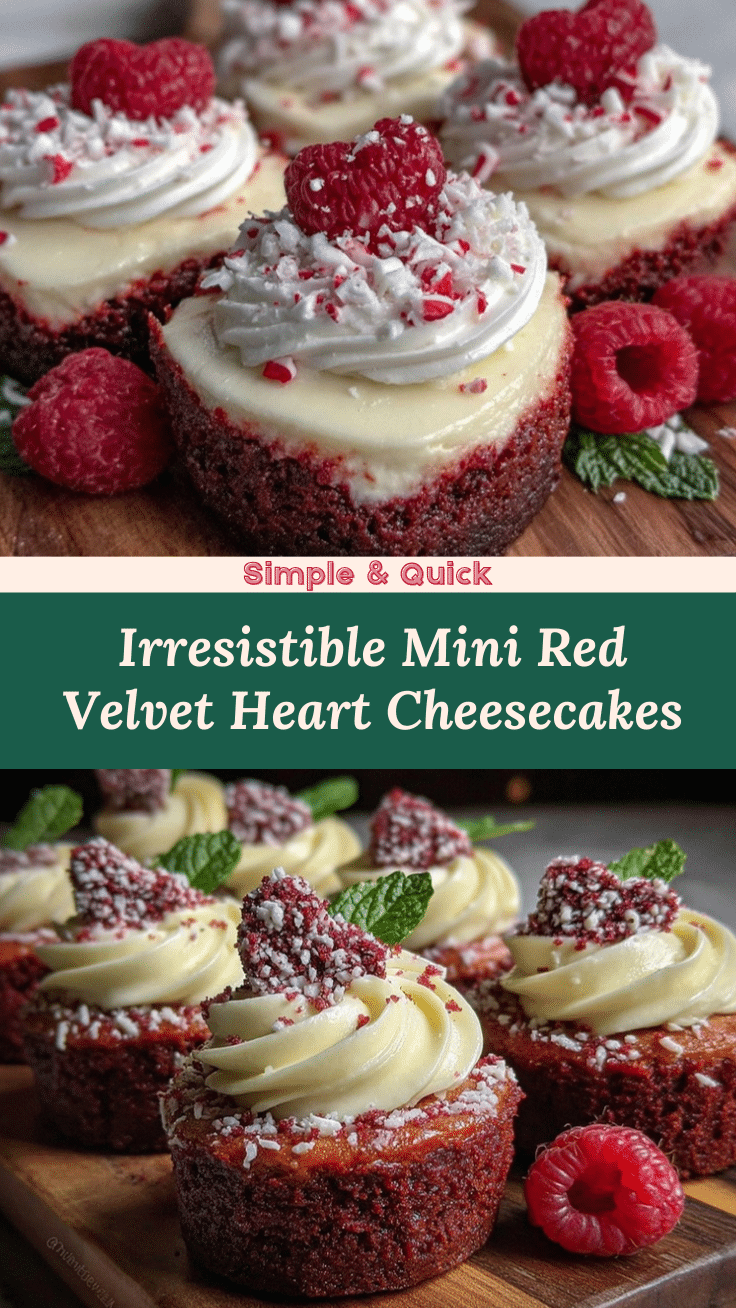
Perfect Valentine’s Mini Red Velvet Heart Cheesecakes

These mini red velvet heart cheesecakes are easy to make, adorable, and perfect for Valentine’s Day or any romantic occasion. They feature a tender red velvet crust and a silky smooth cream cheese filling.
- Prep Time: 20 minutes
- Cook Time: 25 minutes
- Total Time: 2 hours 45 minutes
- Yield: 12 mini cheesecakes 1x
- Category: Dessert
- Cuisine: American
Ingredients
- 1 cup all-purpose flour (125g)
- 2 tablespoons unsweetened cocoa powder (15g), Dutch-processed
- 3/4 cup granulated sugar (150g)
- 1/2 cup unsalted butter (113g), softened
- 1 large egg, room temperature
- 1/4 cup buttermilk (60ml) (or milk plus 1 tsp vinegar)
- 1 1/2 teaspoons red food coloring
- 1 teaspoon vanilla extract
- 1/2 teaspoon baking powder
- 1/4 teaspoon salt
- 8 oz cream cheese (225g), softened
- 1/3 cup granulated sugar (65g)
- 1 large egg, room temperature
- 1/4 cup sour cream (60g) (or dairy-free yogurt for vegan)
- 1 teaspoon vanilla extract
- 1 tablespoon all-purpose flour (8g)
- Optional toppings: whipped cream, fresh raspberries or strawberries, white chocolate shavings
Instructions
- Preheat oven to 325°F (163°C). Lightly grease mini heart pan with butter or non-stick spray.
- In a medium bowl, whisk together flour, cocoa powder, baking powder, and salt.
- In a large bowl, cream softened butter with sugar using an electric mixer until fluffy (about 2 minutes). Add egg and vanilla extract; beat well.
- Mix in red food coloring and buttermilk until fully combined.
- Slowly add dry ingredients to wet ingredients, mixing until just combined. Batter should be thick but spreadable; add more buttermilk if too stiff.
- Spoon about 1 tablespoon of red velvet batter into each mini heart cavity, spreading evenly to form a thin base layer.
- In a clean bowl, beat cream cheese until smooth. Add sugar, egg, sour cream, vanilla extract, and flour; beat until creamy and lump-free.
- Carefully spoon cheesecake filling over red velvet crust in each mold, filling almost to the top but leaving a small gap.
- Bake for 22-25 minutes until edges are set but center jiggles slightly when shaken gently.
- Remove from oven; cool on wire rack for 15 minutes, then refrigerate at least 2 hours to set and chill.
- Once chilled, carefully remove cheesecakes from molds. Serve as is or topped with whipped cream, fresh berries, or white chocolate shavings.
Notes
Use room temperature ingredients for smooth mixing. Avoid overmixing batter to prevent dense texture. Watch baking time closely to avoid cracks or gooey centers. Silicone molds make unmolding easier. Tap pan gently before baking to release air bubbles. For gluten-free, substitute almond flour in crust; for dairy-free, use coconut cream cheese and non-dairy yogurt.
Nutrition
- Serving Size: 1 mini cheesecake
- Calories: 180
- Fat: 12
- Carbohydrates: 15
- Protein: 3
Keywords: red velvet, mini cheesecakes, Valentine’s Day dessert, heart-shaped, easy dessert, date night dessert


