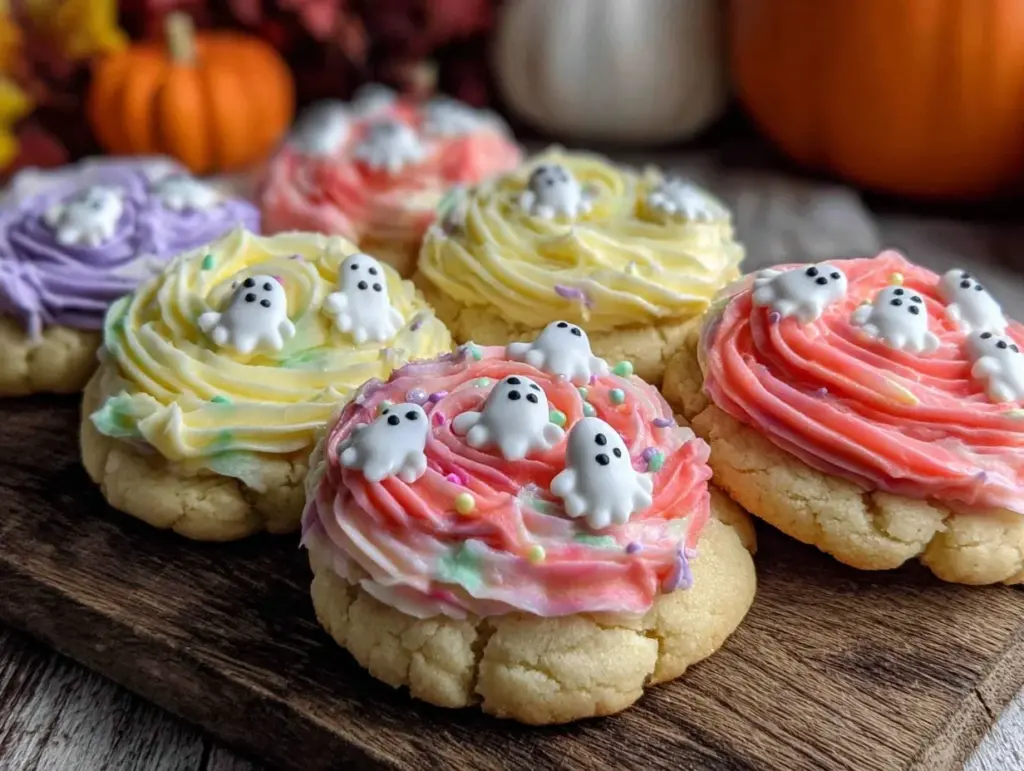
For a while, I just accepted that Halloween sugar cookies wouldn’t taste quite right when they leaned too heavily on the usual orange and black color schemes. They often ended up overly sweet or too dense, with icing that felt stiff or, honestly, a little dull. I was craving something that looked festive but didn’t scream the same tired Halloween clichés. The idea of pastel colors swirling together on a cookie was something I hadn’t seen much before—something soft, a little unexpected, yet unmistakably festive. It wasn’t about flashy or scary; it was about subtle charm that would make you want to nibble just one more.
One chilly October afternoon, I found myself experimenting with a sugar cookie dough that held its shape perfectly but stayed tender enough to melt in your mouth. The royal icing needed to be just right — smooth, glossy, and with a swirl that felt effortless but looked like a little work of art. I remember the quiet satisfaction of seeing those delicate pastel swirls come to life, the way the colors blurred gently into each other, like a soft October sunset. Those cookies didn’t just fill a gap in my baking—they quietly became a new favorite, a reason to slow down and enjoy the little moments of Halloween without the usual sugar overload.
Since then, whenever I bake these Perfect Pastel Halloween Swirl Sugar Cookies with Royal Icing, there’s a calm sense that the season can be sweet without being over the top. It’s a recipe that stuck around because it felt right—simple, pretty, and just a little bit special, like a soft-spoken nod to the holiday. No frills, no fuss, just cookies that make you smile quietly and keep you coming back for more.
Why You’ll Love This Recipe
Honestly, I’ve tried plenty of sugar cookie recipes over the years, but this one nails the balance between classic and creative in a way I didn’t expect. It’s not just another sugar cookie; it’s the kind you want to make again because it’s so reliably good. Here’s why it holds up so well:
- Quick & Easy: You can whip up the dough and royal icing in under an hour, perfect for when Halloween sneaks up on you like it always does.
- Simple Ingredients: No strange extras—just pantry staples and a few food colors to get those dreamy pastel swirls.
- Perfect for Parties: Whether it’s a neighborhood gathering or a cozy family night, these cookies bring a soft Halloween vibe that works for all ages.
- Crowd-Pleaser: Kids and adults alike tend to reach for seconds—probably because the texture is tender but still holds up to the royal icing’s crisp finish.
- Unbelievably Delicious: The sugar cookie base is buttery without being greasy, and the royal icing dries with just the right snap and melt-in-your-mouth feel.
What sets this recipe apart is the swirl technique for the royal icing. Instead of stiff, single-color blobs, the pastel colors merge gently, creating a subtle watercolor effect. It’s not just about looks, though—the icing recipe is tested for smoothness and a perfect drying time, thanks to a little trick with meringue powder that I always keep on hand (I prefer the Wilton brand for consistent results). This approach helps the cookies keep their charm day after day without cracking or getting too sticky.
When you bite into these, it’s comfort food with a twist—no heavy pumpkin spice overload, just a gentle sweetness that feels like a fresh take on Halloween treats. They’re the kind of cookies you can make alongside a batch of creamy buffalo chicken dip or after a satisfying dinner like honey mustard glazed chicken thighs, rounding out the evening with something pretty and tasty.
What Ingredients You Will Need
This recipe uses simple, wholesome ingredients to deliver bold flavor and satisfying texture without the fuss. Most of these are probably already in your pantry or fridge, which makes it great for a last-minute bake session.
- For the Sugar Cookie Dough:
- All-purpose flour – 3 cups (360g), sifted for light texture
- Baking powder – 1 teaspoon (4g), for a subtle lift
- Salt – ½ teaspoon (3g), balances sweetness
- Unsalted butter – 1 cup (227g), softened (I like using European-style butter for richness)
- Granulated sugar – 1 ¼ cups (250g), for that classic sugar cookie sweetness
- Large eggs – 2, room temperature (helps dough bind smoothly)
- Pure vanilla extract – 2 teaspoons, for warmth and depth
- Almond extract – ½ teaspoon (optional but recommended for a subtle nutty note)
- For the Royal Icing:
- Powdered sugar – 4 cups (480g), sifted for smoothness
- Meringue powder – 3 tablespoons (24g), key for stable, glossy icing
- Warm water – 7 to 8 tablespoons (105-120ml), adjust for desired consistency
- Fresh lemon juice – 1 tablespoon (15ml), adds brightness
- Pastel gel food colors – assorted (pink, lavender, mint green, soft orange)
Substitution tips: For a gluten-free version, use a 1-to-1 gluten-free baking flour blend that includes xanthan gum. If you need a dairy-free cookie, swap the butter for vegan margarine or coconut oil, but note the flavor will shift slightly. For the royal icing, if meringue powder isn’t handy, pasteurized egg whites can work, but I find meringue powder more reliable and safer.
Equipment Needed
- Stand mixer or hand mixer – essential for creaming butter and whipping royal icing
- Mixing bowls – at least two, for dough and icing separately
- Measuring cups and spoons – accurate measurement is key for sugar cookies
- Rolling pin – a smooth, sturdy one works best for even dough thickness
- Cookie cutters – Halloween-themed shapes like pumpkins, ghosts, or bats, or simple circles for swirl impact
- Baking sheets – non-stick or lined with parchment paper for easy cleanup
- Cooling racks – to cool cookies evenly and prevent sogginess
- Squeeze bottles or piping bags with small round tips – for controlling the royal icing flow in swirls
- Toothpicks or small skewers – perfect for creating the swirl effect in the icing
If you don’t have a stand mixer, a hand mixer works just fine, though it takes a little more elbow grease when creaming the butter. For budget-friendly options, silicone baking mats can replace parchment paper and are reusable. I learned early on that investing in a good rolling pin really helps with even cookie thickness, which means they bake uniformly without some edges burning while others stay doughy.
Preparation Method
- Mix the Dry Ingredients: In a medium bowl, whisk together 3 cups (360g) of sifted all-purpose flour, 1 teaspoon (4g) baking powder, and ½ teaspoon (3g) salt. Set aside. This ensures the leavening and salt are evenly distributed for tender cookies. (5 minutes)
- Cream the Butter and Sugar: In your mixer bowl, beat 1 cup (227g) softened unsalted butter with 1 ¼ cups (250g) granulated sugar on medium speed until light and fluffy, about 3-4 minutes. This step is critical for the right cookie texture—don’t rush it. (4 minutes)
- Add Eggs and Extracts: Beat in 2 room temperature eggs one at a time, then add 2 teaspoons vanilla extract and ½ teaspoon almond extract. Mix until combined but don’t overmix. The dough should feel soft yet manageable. (2 minutes)
- Combine Wet and Dry: Gradually add the dry ingredients to the wet mixture on low speed, mixing just until combined. Scrape down the bowl to avoid lumps. The dough will be slightly sticky but firm enough to roll out. (3 minutes)
- Chill the Dough: Divide the dough into two discs, wrap each tightly in plastic wrap, and chill in the fridge for at least 1 hour or up to overnight. This helps the dough relax and prevents spreading during baking. (1 hour or overnight)
- Roll and Cut: Preheat your oven to 350°F (175°C). On a lightly floured surface, roll one dough disc to about ¼ inch (6mm) thickness. Use your cookie cutters to cut shapes, placing them 1 inch (2.5cm) apart on parchment-lined baking sheets. Collect scraps, re-roll gently, and repeat. (15 minutes)
- Bake: Bake cookies for 8-10 minutes until edges are just starting to turn golden. They’ll seem a little soft but will firm up as they cool. Remove from oven and let rest on baking sheets for 5 minutes before transferring to cooling racks. (10-15 minutes)
- Prepare Royal Icing: While cookies cool, whisk 4 cups (480g) powdered sugar with 3 tablespoons (24g) meringue powder. Gradually add 7-8 tablespoons (105-120ml) warm water and 1 tablespoon (15ml) lemon juice, beating on high until stiff peaks form and icing is glossy—about 7-10 minutes. Adjust water slightly if icing is too thick or thin. (10 minutes)
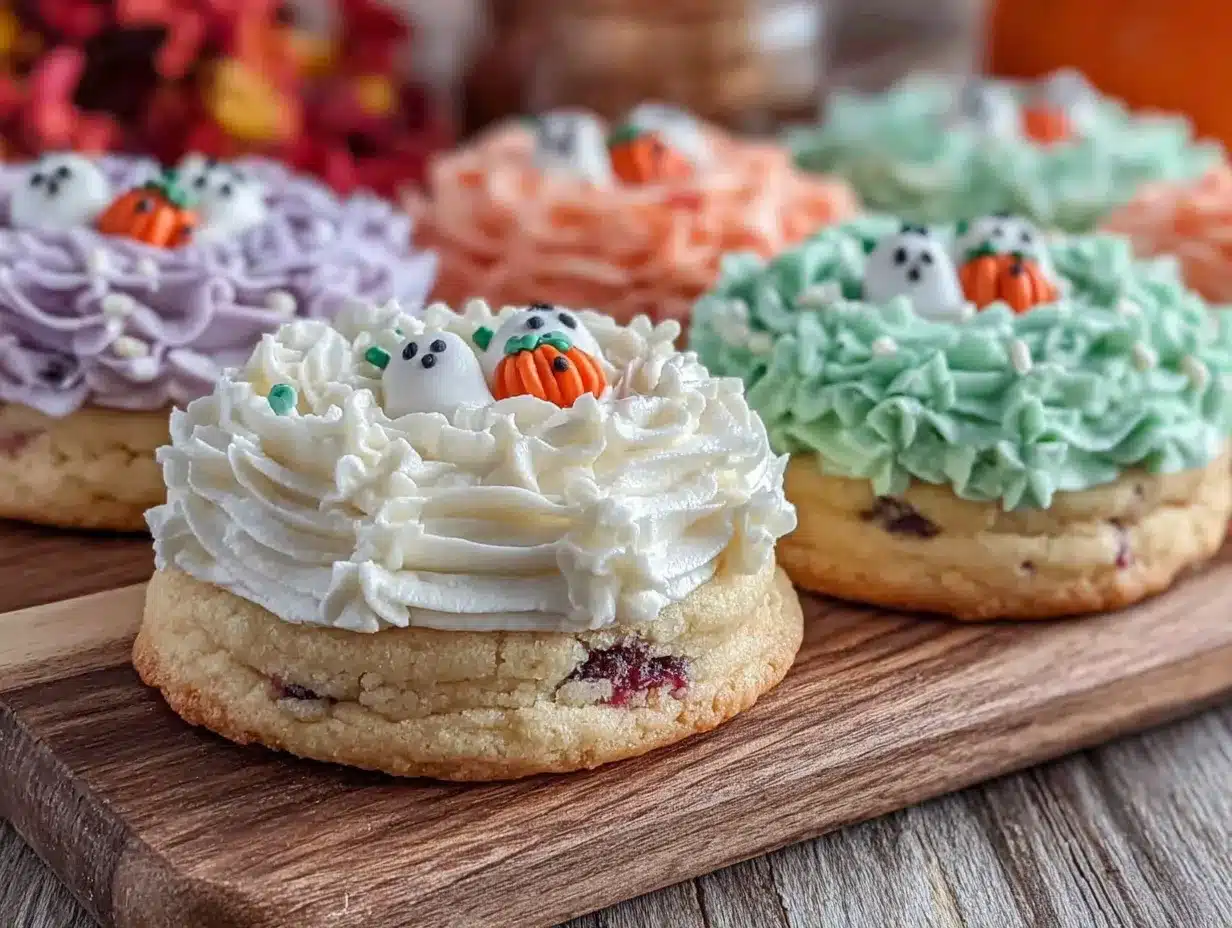
- Color and Swirl: Divide icing into 4 small bowls. Tint each with pastel gel colors to your liking. Transfer icing to squeeze bottles or piping bags. On each cookie, pipe small dots or lines of different colors close together. Use a toothpick to gently swirl the colors, creating a soft marbled effect. Let dry at room temperature for at least 4 hours or overnight until fully set. (15-20 minutes active, plus drying time)
Note: If your icing cracks while swirling, it might be too stiff. Add a tiny splash of water to soften it. Also, don’t over-swirl or the colors will muddy—light, gentle strokes work best. This method took me a few tries to perfect, but once you get the hang of it, it’s a smooth and relaxing process.
Cooking Tips & Techniques
One of the trickiest parts of making these Perfect Pastel Halloween Swirl Sugar Cookies is balancing the cookie texture with royal icing that’s soft enough to swirl but firm enough to hold its shape. Here are some tips I picked up along the way:
- Chill the dough thoroughly: I can’t stress this enough. If the dough is too warm, cookies spread and lose their shape. A good rest in the fridge makes rolling much easier.
- Use gel food coloring: It’s concentrated, so you get vibrant pastel shades without watering down the icing. Liquid colors can make the icing too runny.
- Swirling technique: Pipe small dots or lines close together, then drag a toothpick through them in one smooth motion. Less is more here—overdoing it blends colors into brownish mush.
- Consistency matters: Royal icing should be thick enough to hold a peak but smooth enough to pipe easily. If it’s too stiff, it won’t swirl nicely; if too thin, it’ll run off the cookie.
- Drying time: Don’t rush the drying. Leaving the cookies uncovered in a dry room overnight is best to get that crisp finish.
- Practice patience: These cookies aren’t a quick dump-and-bake. Taking the time with chilling, rolling, and icing pays off in results that look like you spent hours on them.
From experience, I’ve seen that rushing the icing step often leads to messier patterns, and cookies can crack if the dough isn’t cold enough. I also learned that letting the cookies cool completely before icing helps avoid melting or bleeding colors. This little patience pays off big time.
Variations & Adaptations
While the pastel swirl is the star here, you can twist this recipe in several fun directions:
- Seasonal colors: Swap pastel tones for classic Halloween colors like deep purples and rich oranges for a more traditional look without losing the swirl effect.
- Flavor twists: Add a teaspoon of pumpkin spice or orange zest to the dough for a subtle autumn flavor. I tried orange zest once and it gave a fresh zing that paired well with the sweet icing.
- Vegan version: Use vegan butter and flax eggs (1 tablespoon flaxseed meal + 3 tablespoons water per egg) and replace meringue powder with aquafaba (chickpea brine) whipped to stiff peaks for the icing.
- Alternative shapes: Instead of Halloween-themed cutters, use circles or squares to let the swirl pattern take center stage—great for a more understated look.
- Gluten-free adaptation: Use a gluten-free all-purpose blend with xanthan gum. The texture will be slightly different but still tender and delicious.
Personally, I once experimented by adding a hint of lavender extract to the icing, which paired surprisingly well with the pastel colors—just a tiny drop to keep it from overpowering the classic vanilla flavor. It was an unexpected delight at a small gathering.
Serving & Storage Suggestions
These cookies are best served at room temperature when the royal icing has fully set. The pastel colors and delicate swirls make them ideal for Halloween-themed tea parties or as a sweet finish to a cozy fall dinner.
Pair them with a warm cup of spiced cider, or for a contrasting savory note, after a meal like the savory sausage and peppers skillet.
For storage, keep the cookies in an airtight container layered with parchment paper to prevent sticking. They stay fresh for up to 5 days at room temperature, though the icing may soften slightly in humid conditions.
If you want to store longer, freeze undecorated cookies in a single layer wrapped tightly, then decorate after thawing. Decorated cookies freeze well too if wrapped carefully, but I recommend letting them come to room temperature fully before enjoying.
Reheating isn’t necessary, but if you prefer a warm cookie, pop them in a low oven (250°F/120°C) for 5 minutes, watching closely to avoid softening the icing too much. Flavors tend to mellow and deepen after a day, so sometimes waiting a bit before serving brings out the best.
Nutritional Information & Benefits
Each sugar cookie (without icing) has roughly 150-170 calories, with about 7 grams of fat and 20 grams of carbohydrates. The royal icing adds sweetness and texture but is relatively low in fat, mainly powdered sugar and meringue powder.
The use of real butter and fresh eggs means you’re getting richer flavor and natural ingredients rather than artificial substitutes. Almond extract adds a hint of nutty aroma without extra calories.
While these cookies are an indulgence, making them at home lets you control the quality of ingredients—avoiding preservatives and artificial dyes often found in store-bought Halloween treats.
For those mindful of allergens, the recipe can be adjusted to be gluten-free and dairy-free as noted, making it accessible for many dietary needs. The pastel colors come from gel food dyes, which tend to be less sugary and more vibrant than liquid alternatives.
Conclusion
These Perfect Pastel Halloween Swirl Sugar Cookies with Royal Icing offer a fresh take on seasonal treats—soft, buttery cookies paired with glossy, beautifully swirled icing that feels both festive and understated. They’re a recipe worth trying not only for their taste but for the quiet joy of making something pretty and delicious with your own hands.
Feel free to tweak the colors, shapes, or even the flavorings to suit your mood or occasion. I love how these cookies bring a little calm and sweetness to the often hectic Halloween rush, making them a personal favorite year after year.
If you give this recipe a go, I’d love to hear how your swirls turned out or what variations you tried. Sharing those moments makes the whole baking adventure better. Happy baking, and here’s to cookies that look as good as they taste!
FAQs
How long do sugar cookies with royal icing take to dry?
Royal icing usually needs at least 4 hours to dry to a firm finish at room temperature, but for best results, let the cookies dry overnight.
Can I make the dough ahead of time?
Yes, you can make the dough and refrigerate it for up to 2 days or freeze it for up to 3 months. Just thaw overnight in the fridge before rolling out.
What if my royal icing is too runny or too thick?
Adjust consistency by adding a little powdered sugar to thicken or a few drops of water to thin. Icing should hold a peak but still pipe smoothly.
Can I use food coloring other than gels?
Gel food coloring is recommended because it doesn’t thin the icing. Liquid colors can make icing too runny and affect drying.
How do I store decorated cookies to keep the icing intact?
Store in an airtight container at room temperature, layering with parchment paper. Avoid stacking cookies with wet icing to prevent sticking.
Pin This Recipe!
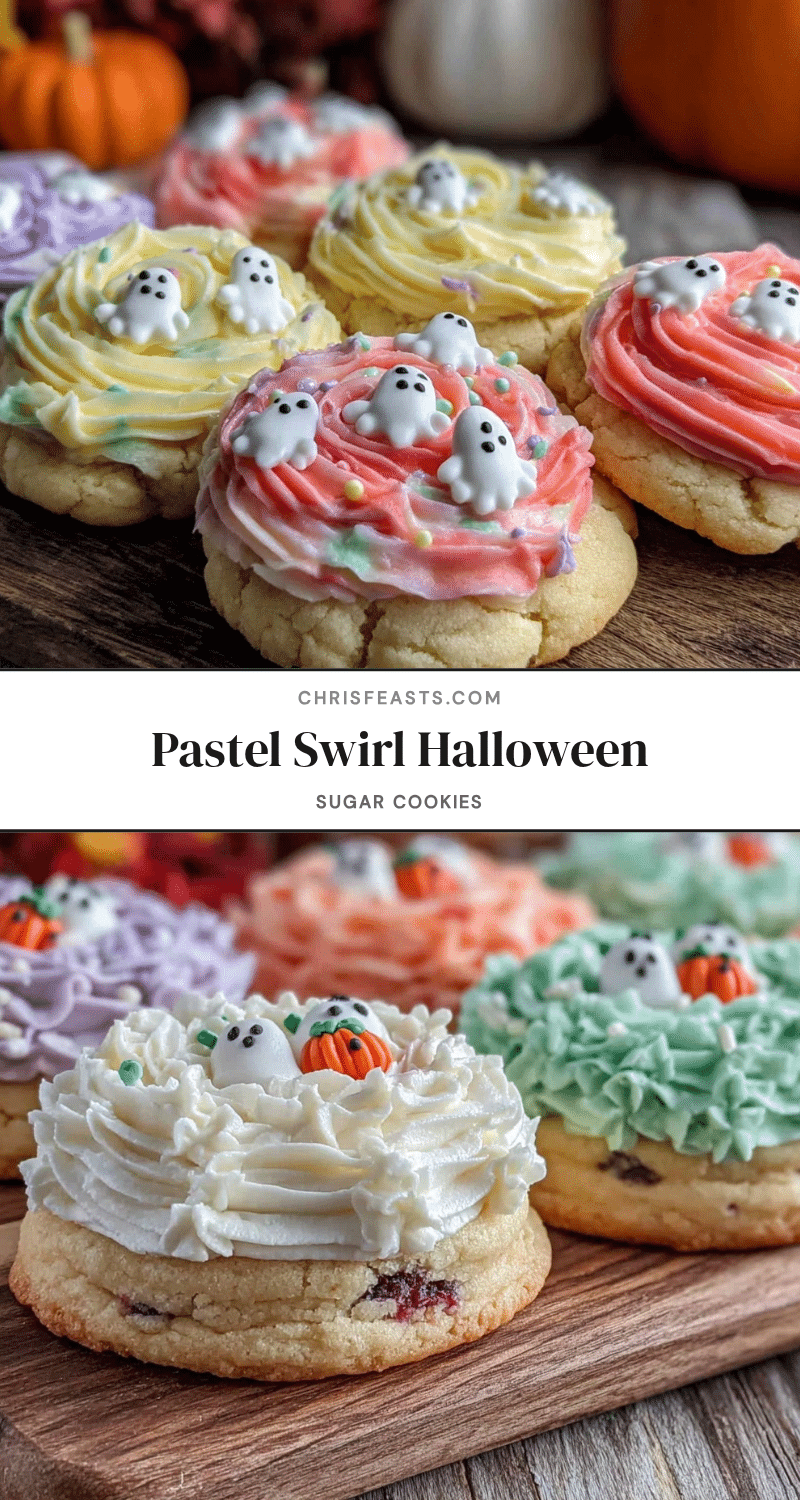
Perfect Pastel Halloween Swirl Sugar Cookies Recipe Easy Homemade Royal Icing Tutorial

Soft, tender sugar cookies with beautifully swirled pastel royal icing, offering a subtle and festive Halloween treat that balances classic flavor with creative presentation.
- Prep Time: 20 minutes
- Cook Time: 10 minutes
- Total Time: 1 hour 30 minutes (including chilling and drying time)
- Yield: 24 servings 1x
- Category: Dessert
- Cuisine: American
Ingredients
- 3 cups (360g) all-purpose flour, sifted
- 1 teaspoon (4g) baking powder
- ½ teaspoon (3g) salt
- 1 cup (227g) unsalted butter, softened (European-style recommended)
- 1 ¼ cups (250g) granulated sugar
- 2 large eggs, room temperature
- 2 teaspoons pure vanilla extract
- ½ teaspoon almond extract (optional)
- 4 cups (480g) powdered sugar, sifted
- 3 tablespoons (24g) meringue powder
- 7 to 8 tablespoons (105-120ml) warm water
- 1 tablespoon (15ml) fresh lemon juice
- Pastel gel food colors (pink, lavender, mint green, soft orange)
Instructions
- Mix the dry ingredients: whisk together flour, baking powder, and salt in a medium bowl. Set aside. (5 minutes)
- Cream the butter and sugar: beat softened butter with granulated sugar on medium speed until light and fluffy, about 3-4 minutes. (4 minutes)
- Add eggs and extracts: beat in eggs one at a time, then add vanilla and almond extracts. Mix until combined but do not overmix. (2 minutes)
- Combine wet and dry ingredients: gradually add dry ingredients to wet mixture on low speed, mixing just until combined. Scrape down bowl as needed. (3 minutes)
- Chill the dough: divide dough into two discs, wrap tightly in plastic wrap, and chill in fridge for at least 1 hour or up to overnight.
- Roll and cut: preheat oven to 350°F (175°C). Roll dough to ¼ inch (6mm) thickness on lightly floured surface. Cut shapes with cookie cutters and place 1 inch apart on parchment-lined baking sheets. Re-roll scraps and repeat. (15 minutes)
- Bake: bake cookies for 8-10 minutes until edges start to turn golden. Let rest on baking sheets for 5 minutes, then transfer to cooling racks. (10-15 minutes)
- Prepare royal icing: whisk powdered sugar and meringue powder. Gradually add warm water and lemon juice, beating on high until stiff peaks form and icing is glossy, about 7-10 minutes. Adjust water for consistency. (10 minutes)
- Color and swirl: divide icing into 4 bowls, tint with pastel gel colors. Transfer to squeeze bottles or piping bags. Pipe dots or lines of different colors close together on each cookie. Use toothpick to gently swirl colors creating a marbled effect. Let dry at room temperature for at least 4 hours or overnight until fully set. (15-20 minutes active plus drying time)
Notes
Chill dough thoroughly to prevent spreading. Use gel food coloring for vibrant pastel shades without thinning icing. Pipe small dots or lines and swirl gently with a toothpick to avoid muddy colors. Let cookies dry uncovered overnight for best crisp finish. Adjust royal icing consistency by adding powdered sugar to thicken or water to thin. Store cookies in airtight container layered with parchment paper to prevent sticking. For gluten-free, use a 1-to-1 gluten-free flour blend with xanthan gum. For dairy-free, substitute butter with vegan margarine or coconut oil. Meringue powder preferred for royal icing stability; pasteurized egg whites can be used as alternative.
Nutrition
- Serving Size: 1 cookie
- Calories: 180
- Sugar: 15
- Sodium: 90
- Fat: 7
- Saturated Fat: 4
- Carbohydrates: 22
- Protein: 2
Keywords: Halloween sugar cookies, pastel swirl cookies, royal icing cookies, easy sugar cookies, festive cookies, homemade Halloween treats