There’s something about the crackle of fireworks and the smell of grilling that sets the mood right for summer celebrations, you know? One particular Fourth of July, I found myself staring at a bare cake pan, a box of cake mix, and a vague plan that somehow turned into this show-stopping patriotic flag cake with cream cheese frosting. Honestly, I wasn’t aiming for perfection at first—just something quick and festive to share with neighbors during a last-minute block party invite. But what started as a rushed experiment ended up being the centerpiece everyone asked about, from kids debating over the blue star section to adults marveling at the creamy frosting that wasn’t too sweet.
I remember sneaking bites while no one was looking, the tangy cream cheese frosting perfectly balancing the moist layers of red and blue. It was one of those rare moments where a simple recipe turns into a tradition without much effort. It stuck around because it’s fun, approachable, and the kind of dessert that brings out smiles without fuss. That’s why this recipe feels more like a friendly handshake than a formal dinner invitation—comfort food with a festive twist you’ll want to make again and again.
So, if you’re wondering how to create a show-stopping patriotic flag cake with cream cheese frosting that wows without stress, you’re in the right spot. Let me share the little details and tips that make this dessert unforgettable and maybe even your go-to for summer celebrations.
Why You’ll Love This Recipe
This show-stopping patriotic flag cake with cream cheese frosting isn’t just eye candy—it’s genuinely a crowd favorite that’s tried and tested in my kitchen more times than I can count. Here’s why it’s worth your time:
- Quick & Easy: You can whip this up in under 90 minutes, perfect for those spontaneous summer gatherings or when you want dessert without the all-day commitment.
- Simple Ingredients: No exotic purchases required. Most of the ingredients are pantry staples, so you likely have what you need already, which is a huge win when you’re in a rush.
- Perfect for Patriotic Occasions: Whether it’s Independence Day, Memorial Day, or Veterans Day, this cake brings the spirit of the flag to your table in a fun, edible form.
- Crowd-Pleaser: Kids love the vibrant colors and adults appreciate the balance of sweet and tangy from the cream cheese frosting.
- Unbelievably Delicious: The moist cake layers paired with a smooth, slightly tangy frosting make each bite a little celebration.
What makes this recipe stand out a bit more is the way the cream cheese frosting is whipped to a silky consistency without being overly sweet—something I honed after trying several versions. Plus, the layering technique gives you a clean, recognizable flag pattern that feels special but isn’t intimidating to assemble. Honestly, it’s the kind of dessert that invites compliments and second helpings, whether you’re serving it alongside a platter of grilled favorites or after a cozy dinner like the honey mustard glazed chicken thighs.
What Ingredients You Will Need
This recipe uses simple, wholesome ingredients to bring bold color and flavor to your celebration without complicated steps. Most are pantry staples, and substitutions are easy if you have dietary preferences.
- For the Cake Layers:
- 2 ½ cups all-purpose flour (or gluten-free 1-to-1 blend for GF option)
- 2 ½ teaspoons baking powder
- ½ teaspoon salt
- 1 cup unsalted butter, softened (I like Land O Lakes for creaminess)
- 2 cups granulated sugar
- 4 large eggs, room temperature
- 1 tablespoon pure vanilla extract
- 1 cup whole milk (or almond milk for dairy-free)
- Red and blue gel food coloring (gel colors give vibrant hues without thinning the batter)
- For the Cream Cheese Frosting:
- 16 oz cream cheese, softened (use full fat for best texture)
- 1 cup unsalted butter, softened
- 4 cups powdered sugar, sifted (to avoid lumps)
- 1 teaspoon vanilla extract
- Pinch of salt (balances the sweetness)
When picking your cream cheese, I recommend Philadelphia brand—it’s consistent and blends smoothly. For the milk, whole milk keeps the cake moist, but I’ve swapped in almond milk with success, especially when paired with the lemon garlic butter cod for a light, fresh meal before dessert.
Feel free to swap out gel colors for natural alternatives like beet powder for red or blueberry juice concentrate for blue if you prefer, but the gel colors give the brightest flag effect.
Equipment Needed
- Two 9-inch round cake pans (non-stick or well-greased and floured)
- Mixing bowls (one large for batter, one medium for frosting)
- Electric mixer or stand mixer (helps whip the frosting perfectly)
- Measuring cups and spoons (accurate measurements matter here)
- Spatulas and offset spatula (for smoothing frosting)
- Sifter for powdered sugar (optional but recommended for smooth frosting)
- Toothpicks or small offset knife (to help create the star pattern)
If you don’t have two cake pans, you can bake in batches, but I’ve found that having two pans speeds things up and keeps layers even. Also, a stand mixer makes frosting a breeze, but a hand mixer works just fine—just don’t skip the softening step for butter and cream cheese to avoid lumps. For budget-friendly options, silicone spatulas and pans from discount stores work well, just keep an eye on even heat distribution.
Preparation Method
- Preheat your oven to 350°F (175°C). Grease and flour two 9-inch round cake pans or line them with parchment paper for easy removal. This usually takes about 10 minutes.
- Mix dry ingredients: In a medium bowl, whisk together 2 ½ cups all-purpose flour, 2 ½ teaspoons baking powder, and ½ teaspoon salt. Set aside. This step ensures even leavening and no surprises in texture.
- Cream butter and sugar: In a large mixing bowl, beat 1 cup softened unsalted butter with 2 cups granulated sugar on medium speed until light and fluffy, about 3-4 minutes. The mixture should look pale and airy—this traps air for a tender crumb.
- Add eggs and vanilla: Beat in 4 large eggs one at a time, making sure each is fully incorporated before adding the next. Stir in 1 tablespoon vanilla extract. This keeps the batter smooth and emulsified.
- Alternate adding dry ingredients and milk: With the mixer on low speed, add dry ingredients in three parts, alternating with 1 cup whole milk in two parts. Start and finish with dry ingredients. Mix just until combined to avoid a tough cake.
- Divide batter and color: Pour the batter evenly into two bowls. Add red gel food coloring to one bowl and blue gel to the other, stirring gently until vibrant colors appear. I usually add about 1 tablespoon gel per bowl for a rich shade but adjust to your liking.
- Bake: Pour red batter into one cake pan and blue batter into the other. Bake for 25-30 minutes or until a toothpick inserted in the center comes out clean. Rotate pans halfway through baking for even color and rise.
- Cool cakes: Let cakes cool in pans for 10 minutes, then turn out onto wire racks to cool completely. You want the cakes fully cooled before frosting to avoid melting the cream cheese frosting.
- Prepare frosting: Beat 16 oz softened cream cheese with 1 cup softened butter until smooth and creamy. Gradually add 4 cups sifted powdered sugar and mix on low until combined. Add 1 teaspoon vanilla extract and a pinch of salt, then beat on medium-high speed for 2-3 minutes until fluffier.
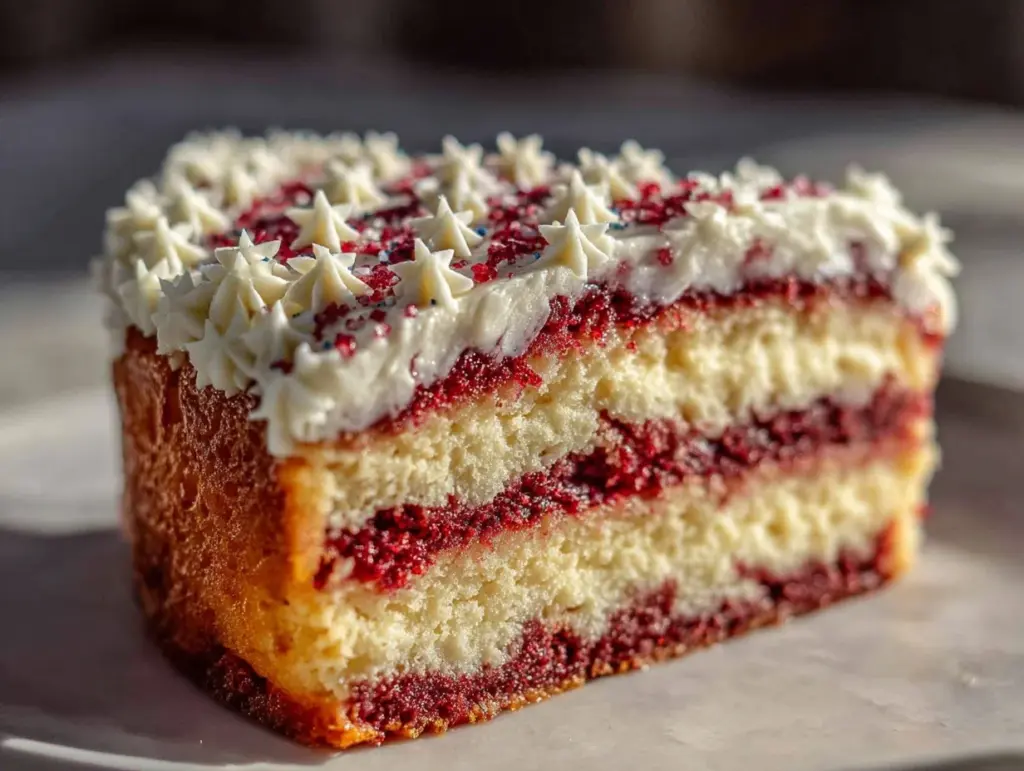
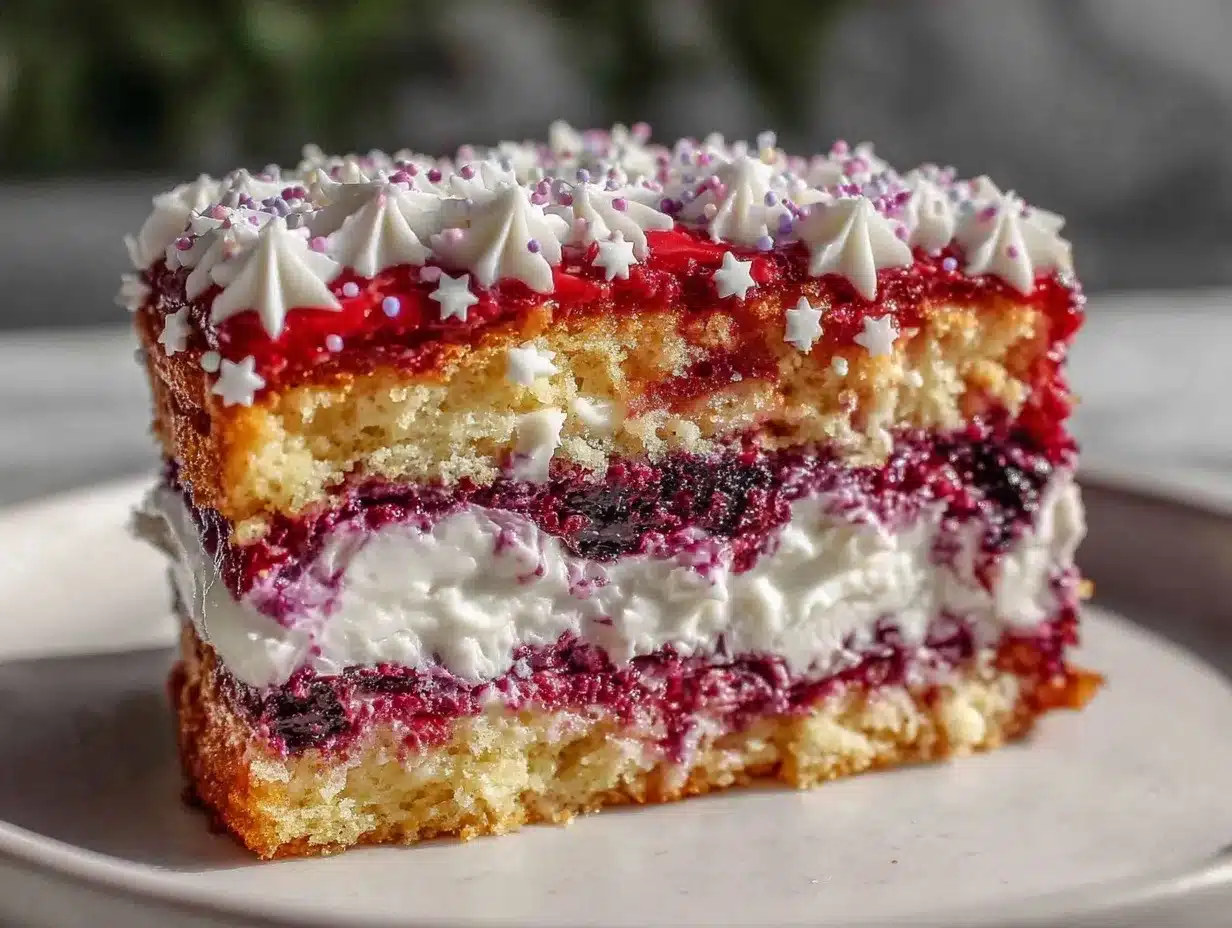
- Assemble the flag cake: Place the red cake layer on your serving plate. Spread a thin layer of cream cheese frosting on top. Cut the blue cake layer into a square for the “blue field” of the flag (about one-third width). Position it on the top left corner of the red layer. Frost the entire cake with the remaining frosting, smoothing edges carefully. Use a toothpick or small knife to outline white “stars” by piping small dots or stars of frosting on the blue section.
Pro tip: If frosting feels too soft, chill it for 15 minutes before spreading. Also, keep the assembled cake refrigerated if not serving immediately to maintain cream cheese frosting’s fresh tang.
Cooking Tips & Techniques
Making a show-stopping patriotic flag cake with cream cheese frosting is easier when you know a few tricks. First, always use gel food coloring instead of liquid—it keeps your batter thick and vibrant without watering down the texture. I learned the hard way trying to fix a runny batter once!
When frosting, make sure your cream cheese and butter are softened but not melted. Cold ingredients will clump, and overheated ones turn greasy. If your frosting starts to look curdled, a quick spin in the mixer usually fixes it.
For even cake layers, I like to weigh my batter portions or use a measuring cup to divide evenly. Uneven layers make assembling the flag tricky. Also, let the cakes cool fully before frosting—warm cake melts the frosting, and that’s a messy flag disaster.
When it comes to piping the stars, keep it simple. You don’t have to be perfect—just little dollops of frosting on the blue section give the patriotic vibe without stress. If you want to get fancy, use a star tip, but honestly, a toothpick dab works just fine.
Multitasking tip: While cakes bake, start whipping your frosting and prepping your tools. It helps shave off some time and keeps you moving efficiently.
Variations & Adaptations
You can easily customize this patriotic flag cake to suit your needs or preferences. Here are some tried-and-true variations:
- Gluten-Free Version: Swap the all-purpose flour with your favorite 1-to-1 gluten-free baking flour. I recommend brands like Bob’s Red Mill for reliable results. The cake may be slightly denser but still delicious.
- Vegan Adaptation: Use a vegan butter substitute and dairy-free cream cheese (like Kite Hill). Replace eggs with flax eggs (1 tablespoon ground flaxseed + 3 tablespoons water per egg). The frosting stays tangy and rich with these swaps.
- Flavor Twists: Add a teaspoon of lemon zest to the batter for a subtle citrus note that brightens the cake. Or mix in a handful of white chocolate chips into the batter for extra sweetness.
- Alternative Shapes: Instead of layering, try making cupcakes with red, white, and blue swirls and a mini cream cheese frosting star on top for easy portioning and serving.
Personally, I once added a layer of fresh strawberries inside the cake for a juicy surprise—it was a hit at a family picnic! Feel free to experiment with seasonal berries or even edible glitter for a festive sparkle.
Serving & Storage Suggestions
This patriotic flag cake is best served chilled or at room temperature. If you’re bringing it to a party, keep it refrigerated until about 30 minutes before serving so the cream cheese frosting softens slightly for that melt-in-your-mouth feel.
Pair this cake with a cold glass of lemonade or an iced tea with fresh mint for a refreshing summer treat. It also complements hearty dishes like the savory sausage and peppers skillet perfectly after a day of grilling and outdoor fun.
Store any leftovers tightly wrapped in plastic wrap or an airtight container in the refrigerator for up to 4 days. The flavors actually meld beautifully over time, though the frosting may firm up a bit. To re-soften, let the cake sit at room temperature for 20 minutes before serving.
For longer storage, this cake freezes well without the frosting. Wrap layers in plastic and foil, freeze up to 3 months, and thaw overnight in the fridge. Then, frost fresh with cream cheese frosting before serving.
Nutritional Information & Benefits
While this show-stopping patriotic flag cake is an indulgence, it carries some nutritional perks worth mentioning. The cream cheese adds a bit of protein and calcium, while using real butter and whole milk contributes to a richer mouthfeel and satisfaction, which helps avoid overeating.
Per serving (1/12th of cake), you’re looking at roughly 350 calories, 18g fat, 45g carbohydrates, and 3g protein. Of course, this varies with ingredient swaps.
If you’re mindful of allergens, note this recipe contains dairy, eggs, and gluten (unless gluten-free flour is used). For a lighter twist, you might try swapping half the butter for Greek yogurt, which adds tang and moisture.
Overall, this cake is about celebration and togetherness, not strict dieting. It pairs nicely with balanced meals, like a vibrant Mediterranean quinoa bowl, so you can enjoy dessert without guilt.
Conclusion
This show-stopping patriotic flag cake with cream cheese frosting is one of those recipes that’s as fun to make as it is to eat. Its vibrant colors and balanced flavor have made it a favorite around my kitchen, especially when I want to bring a little extra joy and festivity to a summer gathering. The best part? You can tweak it to your taste, whether that means making it gluten-free, vegan, or adding your favorite flavor twist.
I love how this cake manages to look impressive without the fuss and how the cream cheese frosting adds that perfect tang to keep things fresh and exciting. If you try it, I’d love to hear how you customize it or what occasion you made it for—sharing those stories always brightens my day. Here’s to sweet celebrations and making memories, one slice at a time.
FAQs
Can I use homemade cake instead of box mix for this patriotic flag cake?
Absolutely! This recipe is designed from scratch with simple ingredients, but if you prefer a box mix, go for a white or vanilla base and add gel food coloring for the flag colors. Just be sure to adjust baking times as needed.
How do I make the cream cheese frosting less sweet?
Try reducing the powdered sugar by ½ cup or adding a pinch more salt to balance the sweetness. The tanginess of the cream cheese naturally cuts through the sugar, so it’s easy to customize.
What’s the best way to store the assembled cake if I’m making it ahead?
Keep the cake covered tightly and refrigerated. Remove from fridge about 30 minutes before serving to let the frosting soften for a better texture.
Can I use natural food coloring instead of gel colors?
Yes, but keep in mind natural colors may be less vibrant and could slightly change the batter’s texture. Beet juice for red and blueberry powder for blue work well as natural alternatives.
How do I pipe the stars on the blue section if I don’t have a piping bag?
No piping bag? No problem! Use a small zip-top bag with a tiny corner snipped off or even a toothpick to dot small star shapes with frosting. It’s simple and effective.
Pin This Recipe!
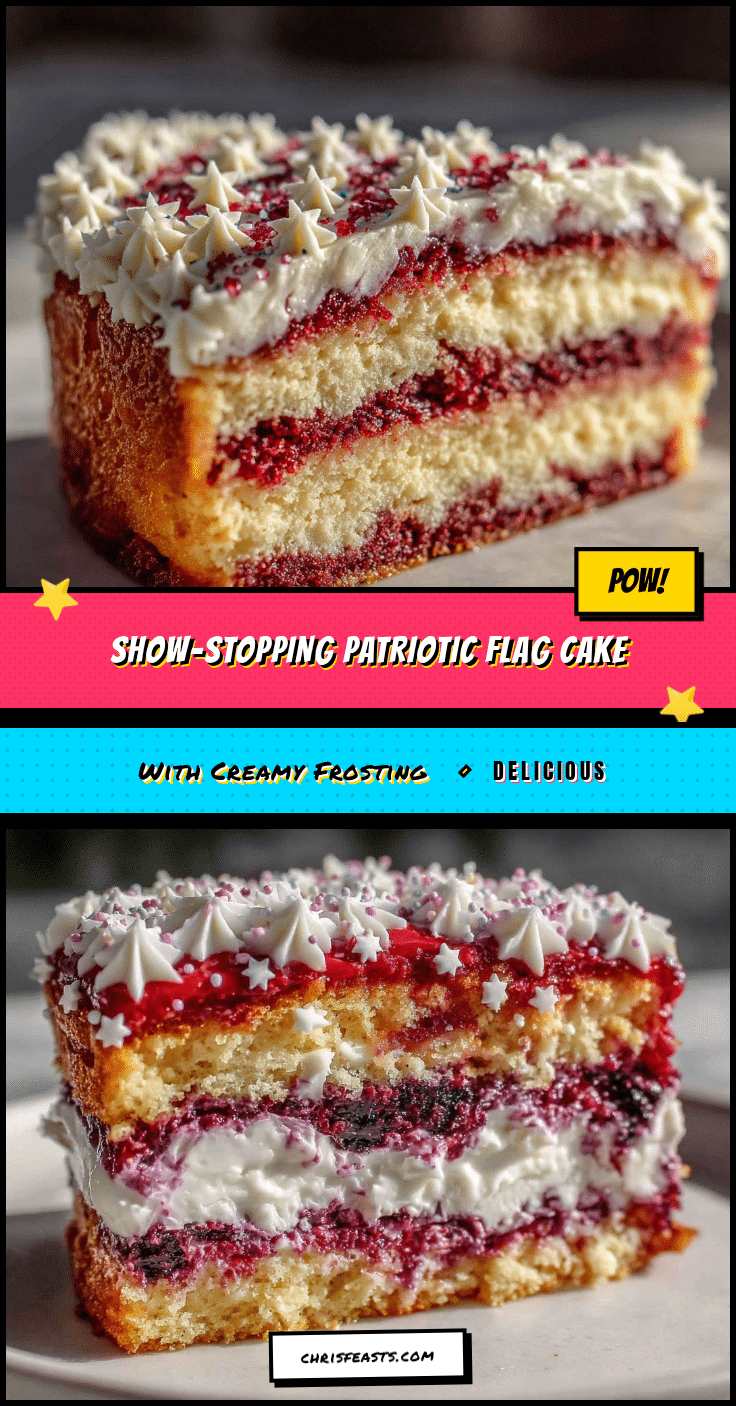
Show-Stopping Patriotic Flag Cake Recipe with Easy Cream Cheese Frosting

A quick and festive patriotic flag cake with moist red and blue layers and a tangy cream cheese frosting, perfect for summer celebrations and patriotic occasions.
- Prep Time: 20 minutes
- Cook Time: 30 minutes
- Total Time: 50 minutes
- Yield: 12 servings 1x
- Category: Dessert
- Cuisine: American
Ingredients
- 2 ½ cups all-purpose flour (or gluten-free 1-to-1 blend for GF option)
- 2 ½ teaspoons baking powder
- ½ teaspoon salt
- 1 cup unsalted butter, softened
- 2 cups granulated sugar
- 4 large eggs, room temperature
- 1 tablespoon pure vanilla extract
- 1 cup whole milk (or almond milk for dairy-free)
- Red gel food coloring
- Blue gel food coloring
- 16 oz cream cheese, softened
- 1 cup unsalted butter, softened
- 4 cups powdered sugar, sifted
- 1 teaspoon vanilla extract
- Pinch of salt
Instructions
- Preheat your oven to 350°F (175°C). Grease and flour two 9-inch round cake pans or line them with parchment paper.
- In a medium bowl, whisk together 2 ½ cups all-purpose flour, 2 ½ teaspoons baking powder, and ½ teaspoon salt. Set aside.
- In a large mixing bowl, beat 1 cup softened unsalted butter with 2 cups granulated sugar on medium speed until light and fluffy, about 3-4 minutes.
- Beat in 4 large eggs one at a time, ensuring each is fully incorporated before adding the next. Stir in 1 tablespoon vanilla extract.
- With the mixer on low speed, add dry ingredients in three parts, alternating with 1 cup whole milk in two parts, starting and finishing with dry ingredients. Mix just until combined.
- Divide the batter evenly into two bowls. Add red gel food coloring to one bowl and blue gel to the other, stirring gently until vibrant colors appear.
- Pour red batter into one cake pan and blue batter into the other. Bake for 25-30 minutes or until a toothpick inserted in the center comes out clean. Rotate pans halfway through baking.
- Let cakes cool in pans for 10 minutes, then turn out onto wire racks to cool completely.
- Beat 16 oz softened cream cheese with 1 cup softened butter until smooth and creamy. Gradually add 4 cups sifted powdered sugar and mix on low until combined.
- Add 1 teaspoon vanilla extract and a pinch of salt, then beat on medium-high speed for 2-3 minutes until fluffy.
- Place the red cake layer on your serving plate. Spread a thin layer of cream cheese frosting on top.
- Cut the blue cake layer into a square about one-third width for the ‘blue field’ of the flag and position it on the top left corner of the red layer.
- Frost the entire cake with the remaining frosting, smoothing edges carefully.
- Use a toothpick or small knife to outline white ‘stars’ by piping small dots or stars of frosting on the blue section.
- Chill frosting for 15 minutes before spreading if it feels too soft. Keep the assembled cake refrigerated if not serving immediately.
Notes
Use gel food coloring for vibrant colors without thinning the batter. Ensure cream cheese and butter are softened but not melted to avoid lumps in frosting. Let cakes cool completely before frosting to prevent melting. For piping stars, a toothpick or small zip-top bag with a snipped corner works well if you don’t have a piping bag. Refrigerate assembled cake if not serving immediately and remove 30 minutes before serving for best texture.
Nutrition
- Serving Size: 1 slice (1/12th of c
- Calories: 350
- Fat: 18
- Carbohydrates: 45
- Protein: 3
Keywords: patriotic cake, flag cake, cream cheese frosting, Fourth of July dessert, red white and blue cake, easy cake recipe, summer celebration dessert


