“Wait, are you sure this is gelatin?” my friend asked, squinting at the colorful mosaic patterns in my latest dessert experiment. Honestly, I wasn’t sure either when I first tried making this vibrant perfect class colors layered gelatin mosaic cake. It started as a last-minute idea during a chaotic afternoon when I had some leftover gelatin packets in the fridge and a craving for something fun and colorful. I wasn’t expecting much, but after a few attempts and some stubborn tweaking, this cake became a little showstopper that people actually asked me to bring again and again.
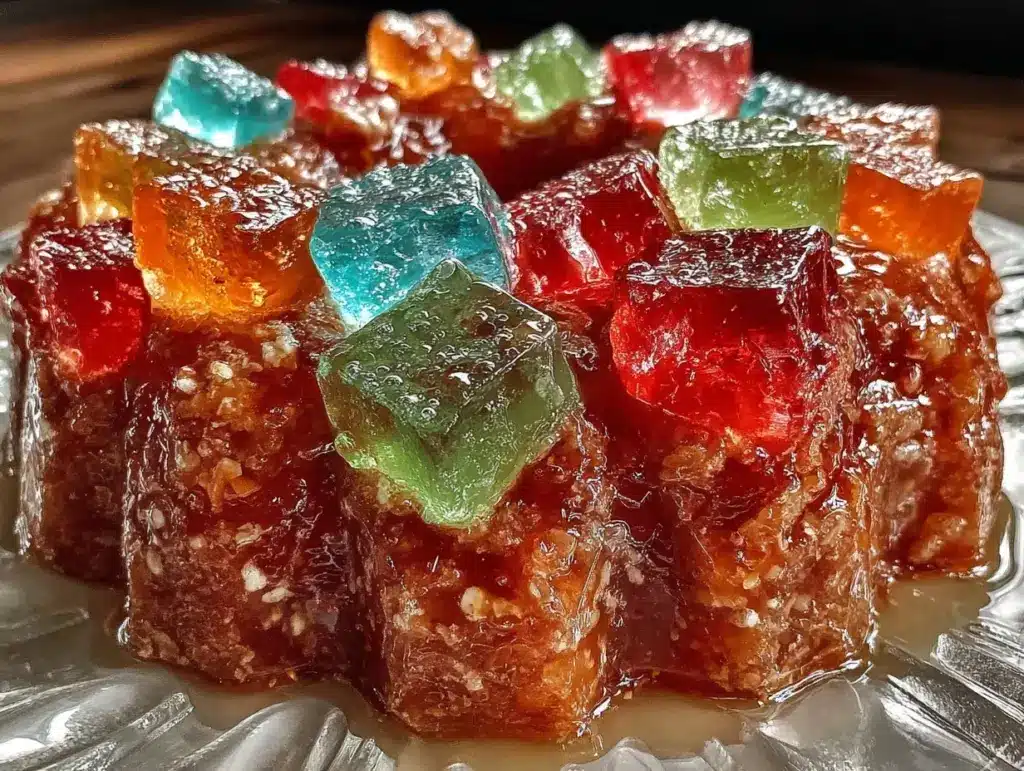
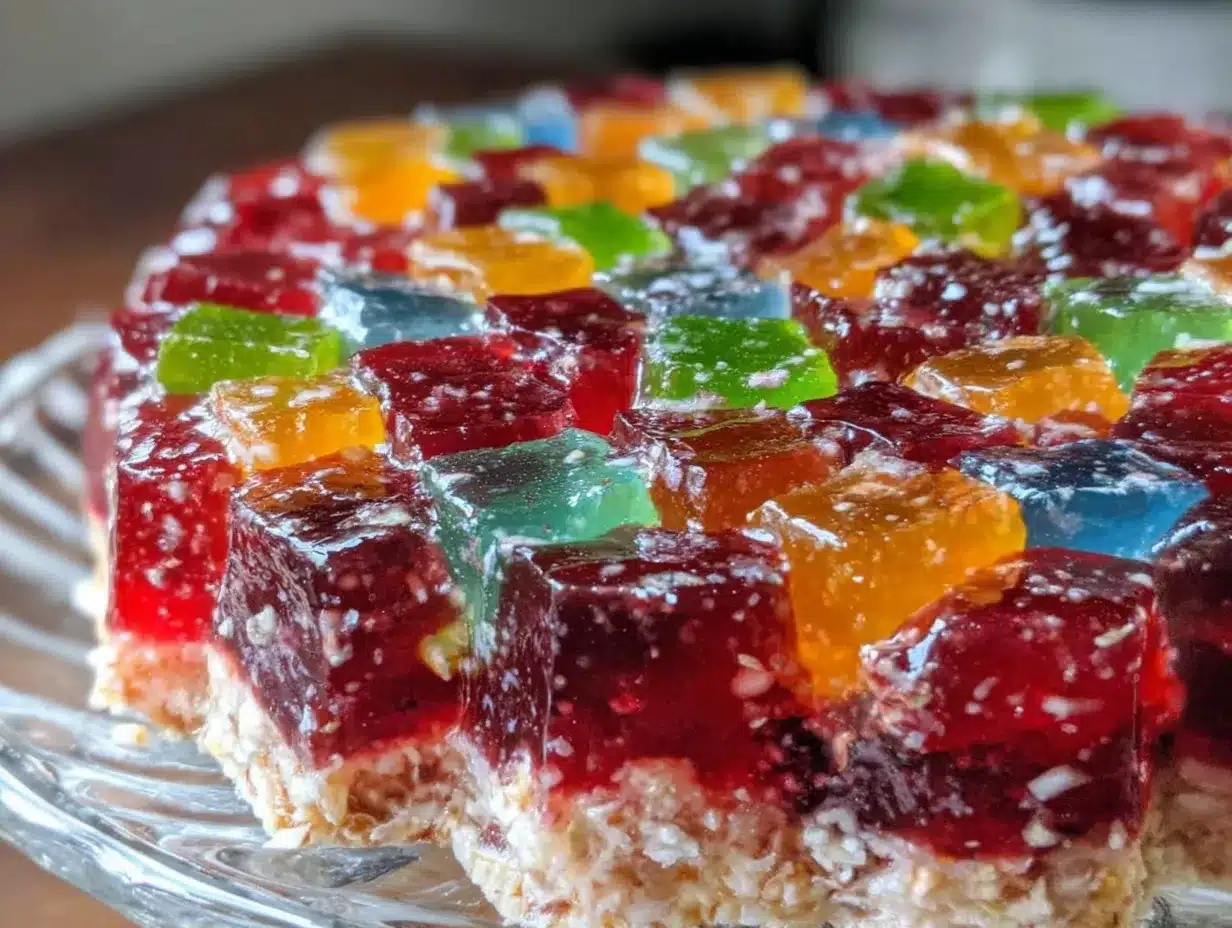
The layers of translucent, jewel-like colors remind me of stained glass windows in an old cathedral — each piece shining with its own bright hue, but coming together in a perfect, edible mosaic. The smooth gelatin layers contrast beautifully with the creamy, opaque white base that holds everything together. I’ve found myself making this cake multiple times a week during that obsession phase, just because it’s so satisfying to slice through and reveal those stunning layers.
It’s not just the look that makes this gelatin mosaic cake special. The texture is light and refreshing, and it’s honestly one of those desserts that feels festive without any fuss. Whether you’re hosting a casual get-together or want a unique centerpiece for a holiday table, this recipe quietly promises to impress without the stress. After all, who doesn’t love a dessert that looks complicated but is pretty straightforward once you get the hang of it?
There’s something quietly comforting about how the flavors and colors come together — like a little edible celebration you can savor slice after slice. I think that’s why this vibrant perfect class colors layered gelatin mosaic cake sticks around in my recipe box, patiently waiting for the next occasion to shine.
Why You’ll Love This Recipe
Having tested countless gelatin desserts over the years, this vibrant perfect class colors layered gelatin mosaic cake stands out for several reasons. It’s a recipe that’s been refined through plenty of trial and error, but once you know the ropes, it’s surprisingly easy to make and reliably gorgeous every time.
- Quick & Easy: The whole cake comes together in about 3 hours, including chilling time. Perfect for when you want something impressive but don’t want to spend all day in the kitchen.
- Simple Ingredients: No need to hunt for anything exotic — just basic gelatin packets, cream, sugar, and a few food colorings or natural juices you probably already have.
- Perfect for Parties: This gelatin mosaic cake is a real hit at birthdays, brunches, or even casual potlucks. It’s a conversation starter and a crowd-pleaser.
- Crowd-Pleaser: Kids love the bright colors, and adults appreciate the light, creamy texture — it’s a dessert that satisfies all ages.
- Unique Technique: Unlike your typical gelatin dessert, this recipe uses a creamy milk gelatin base that sets the colorful cubes beautifully and makes the cake feel more substantial.
- Unbelievably Delicious: The balance between the sweet, fruity cubes and the smooth, slightly vanilla-flavored cream layer makes this more than just a pretty face — it’s truly enjoyable to eat.
What really makes this vibrant perfect class colors layered gelatin mosaic cake different is the way the colors pop with a glass-like clarity, yet the creamy base softens the whole thing into a smooth, melt-in-your-mouth experience. I’ve tried other gelatin mosaic cakes before, but this version’s texture and flavor combination kept me coming back. It’s the kind of recipe that you can make your own — swapping in different colors or flavors depending on the season or mood, but always ending up with a stunning dessert that leaves people asking for the recipe.
What Ingredients You Will Need
This vibrant perfect class colors layered gelatin mosaic cake uses simple, wholesome ingredients to deliver bold visual impact and a satisfying creamy texture without any complicated steps. Most of these are pantry staples, and you can play around with colors and flavors to suit your taste or occasion.
- For the Colored Gelatin Cubes:
- Gelatin packets (unflavored or flavored) – I like using Knox for consistent results
- Water (cold and boiling) for dissolving gelatin
- Food coloring gels or natural juice concentrates (e.g., blueberry, raspberry, orange) for vibrant colors
- Sugar (optional, depending on gelatin flavor)
- For the Creamy Milk Gelatin Layer:
- Sweetened condensed milk (14 oz / 396 g can) – adds richness and sweetness
- Whole milk (2 cups / 480 ml) – for creaminess
- Unflavored gelatin powder (about 2 teaspoons / 7 g) – to set the creamy layer
- Vanilla extract (1 teaspoon) – for subtle flavor depth
When picking gelatin packets for the colored cubes, I recommend using flavored gelatin if you want to skip adding extra sugar. Otherwise, plain gelatin with added sugar and natural juices creates fresher flavors and more control over sweetness. You can swap whole milk with dairy-free alternatives like almond or oat milk for a vegan-friendly twist, but the texture might be a little less silky.
For natural color sources, blueberry juice gives a lovely deep blue, while raspberry or strawberry juice turns bright red or pink. If you want a green layer, a hint of lime juice or matcha powder works well. Feel free to experiment! Just remember, the more concentrated the juice or coloring, the more vibrant your cake will look.
Equipment Needed
Making this vibrant perfect class colors layered gelatin mosaic cake requires some basic kitchen tools that you probably already have, plus a few optional items that can make the process smoother.
- Mixing Bowls: At least two medium bowls — one for the colored gelatin cubes and one for the creamy milk gelatin mix.
- Measuring Cups and Spoons: Precision matters here to get the gelatin to set perfectly. Use digital scales if you have them for best accuracy.
- Whisk or Spoon: For combining ingredients smoothly without lumps.
- Loaf Pan or Square Baking Dish: A 9×5 inch (23×13 cm) loaf pan works great to create neat layers. Glass pans are ideal to see the colors as they set.
- Sharp Knife: For cutting the gelatin into neat cubes. A serrated knife can help if your gelatin is very firm.
- Plastic Wrap or Lid: To cover the cake while it chills to avoid condensation on the surface.
If you don’t have a loaf pan, a shallow square or rectangular dish will work similarly, though your layers might be thinner. A silicone spatula is helpful for gently folding ingredients without deflating the gelatin. Personally, I’ve found that using glass containers for setting the colored gelatin cubes gives the best clarity and makes cutting easier later on.
Cleaning gelatin residue can be sticky, so warm soapy water works best. Avoid metal utensils directly on glass pans to keep your equipment scratch-free and long-lasting.
Preparation Method
- Prepare the Colored Gelatin Cubes (about 1.5 hours active time, plus chilling):
- In separate bowls, dissolve each gelatin packet in 1/2 cup (120 ml) boiling water, stirring until completely dissolved.
- Add 1/4 cup (60 ml) cold water and your chosen food coloring or natural juice concentrate to each bowl. Stir well.
- Pour each colored gelatin mixture into shallow glass dishes or pans, spreading evenly to about 1/2-inch (1.3 cm) thickness for easy cutting later.
- Refrigerate until fully set, about 2 hours or overnight if preferred.
Tip: While waiting, prepare the creamy milk gelatin base to save time.
- Cut the Gelatin Cubes:
- Once set, use a sharp knife to cut the colored gelatin sheets into 1/2-inch (1.3 cm) cubes.
- Place the cubes into a large bowl and mix gently to combine the different colors.
Note: Keep the cubes chilled until ready to assemble to prevent melting.
- Prepare the Creamy Milk Gelatin Base:
- Sprinkle 2 teaspoons (7 g) of unflavored gelatin over 1/4 cup (60 ml) cold milk. Let it bloom for 5 minutes.
- Heat the remaining 1 3/4 cups (420 ml) milk gently in a saucepan until warm but not boiling.
- Add the bloomed gelatin to the warm milk and stir until completely dissolved.
- Remove from heat and stir in sweetened condensed milk and 1 teaspoon vanilla extract until smooth.
- Let the mixture cool to room temperature, but don’t let it start setting.
- Assemble the Mosaic Cake:
- Lightly grease your loaf pan or baking dish with a neutral oil or spray to prevent sticking.
- Pour a thin layer of the creamy milk gelatin base into the pan, about 1/4-inch (0.6 cm) deep. Chill for 15 minutes until slightly set but still tacky.
- Gently fold the gelatin cubes and spread them evenly over the semi-set creamy layer.
- Pour the remaining creamy milk gelatin mixture over the cubes, covering them completely.
- Chill the whole cake for at least 4 hours or until fully set.
- Serve:
- Run a thin knife around the edges to loosen the cake from the pan.
- Invert onto a serving plate or slice directly in the pan.
- Cut into neat slices to reveal the colorful mosaic layers inside.
Pro tip: If your gelatin cubes start to melt or stick together during assembly, work quickly and keep everything cold. You can also briefly chill the assembled cake between layering for extra firmness.
Cooking Tips & Techniques
Getting the perfect set and vibrant colors in this layered gelatin mosaic cake takes some patience and a few tricks I’ve picked up along the way. First off, blooming your gelatin properly is key — never skip that step or add gelatin straight to hot liquids, or you might end up with a grainy texture.
When dissolving gelatin, stirring gently but thoroughly helps avoid lumps. And yes, the timing of chilling is crucial! Pouring the creamy layer over the colored cubes when they’re still too soft can cause color bleeding, which messes up the mosaic effect. On the other hand, if the creamy base is too cold or starting to set, it won’t spread evenly.
I learned the hard way by rushing the layering process and ending up with a blurry mess instead of crisp, vibrant cubes. Now, I wait for that slightly tacky stage on the creamy base before adding the cubes and pour the rest carefully to avoid cracking or breaking the pattern.
For a smooth cut, use a hot, wet knife and wipe it clean between slices. This prevents sticking and helps maintain neat, clean edges.
Planning ahead is also a big help. Since chilling times add up, you can prepare the colored gelatin cubes a day before and keep them refrigerated until you’re ready to assemble. This flexibility makes it easier if you’re juggling dinner plans or other recipes like honey mustard glazed chicken thighs for the main course.
Variations & Adaptations
This vibrant perfect class colors layered gelatin mosaic cake is surprisingly adaptable. Here are a few ideas I’ve tried or want to try next:
- Dietary Adaptations: Swap sweetened condensed milk with coconut condensed milk for a dairy-free version. Use agar-agar powder instead of gelatin for a vegan option, but note the setting and texture differences.
- Seasonal Flavors: In summer, I like using fresh fruit juices like watermelon or mango for the colored cubes. During holidays, try cranberry or pomegranate juice for a festive red layer.
- Flavor Twists: Add a bit of citrus zest or a splash of liqueur (like orange or raspberry) to the creamy milk gelatin base to boost flavor complexity.
- Cooking Method Variations: Instead of layering in a loaf pan, try making individual servings in clear glass jars or cups for a fun presentation and easier portion control.
- Personal Variation: Once, I stirred in finely chopped fresh mint into the creamy layer for a refreshing twist. It was subtle but added a nice herbal note that balanced the sweetness.
Serving & Storage Suggestions
This gelatin mosaic cake is best served well-chilled — it holds its shape beautifully and tastes refreshingly light. I usually slice it into neat, finger-sized pieces for easy sharing at parties. The colorful layers naturally draw people in, making it a fun dessert to serve alongside simple coffee or a light herbal tea.
Pairing this cake with a fresh fruit salad or a tangy sorbet works nicely to balance the creaminess. For a casual lunch or dinner, it can be a bright finish after something savory like the shredded beef burrito bowl.
Store leftovers covered tightly in the refrigerator for up to 3 days. The flavors mellow slightly over time, which some people prefer, but the colors remain vivid. Avoid freezing, as gelatin desserts don’t freeze well and can become watery or grainy when thawed.
To re-serve, let slices sit at room temperature for 10 minutes before enjoying — this softens the gelatin slightly for a more pleasant mouthfeel.
Nutritional Information & Benefits
This vibrant perfect class colors layered gelatin mosaic cake is a relatively light dessert. A typical slice contains roughly 150-180 calories depending on portion size, mostly from the sweetened condensed milk and sugar content in the gelatin cubes.
Gelatin itself is a good source of protein and supports skin, joint, and gut health. Using natural juices or food coloring avoids artificial additives, making this dessert a cleaner option compared to many processed sweets.
The dairy content provides calcium and some vitamins, while the modest sugar content means it’s not overly sweet — perfect for those who want an indulgence without going overboard.
For gluten-free eaters, this recipe is naturally free of gluten, making it a safe choice for many diets.
Conclusion
There’s something quietly magical about this vibrant perfect class colors layered gelatin mosaic cake — it blends simple ingredients with a fun, creative technique to produce a dessert that’s both beautiful and delicious. Whether you’re a seasoned home cook or someone who’s just trying out gelatin recipes, this cake offers a sweet reward that’s as impressive to look at as it is to eat.
Feel free to tweak the colors, flavors, or even presentation to make it your own. I still love how this recipe brings a little sparkle to any occasion, quietly stealing the show without needing fancy ingredients or hours of work. It’s a dessert that invites a smile with every slice.
Have you tried this recipe or added your own twist? I’d love to hear how your vibrant perfect class colors layered gelatin mosaic cake turned out—drop a comment or share your variations!
FAQs
- Can I use flavored gelatin instead of unflavored for the colored cubes?
Yes, flavored gelatin works well and adds extra flavor, but be mindful of the sweetness level and adjust sugar accordingly. - How long can I store the gelatin mosaic cake?
Store it covered in the fridge for up to 3 days. Avoid freezing as gelatin texture changes when frozen. - What if I don’t have a loaf pan?
You can use any shallow glass or plastic dish. Just adjust the layering thickness to fit your pan. - Can I prepare this cake ahead of time?
Absolutely! You can make the colored gelatin cubes a day ahead and assemble the cake the next day for easier timing. - How do I get the best vibrant colors?
Use concentrated natural juices or gel food coloring instead of liquid dyes for the brightest, clearest colors.
Pin This Recipe!
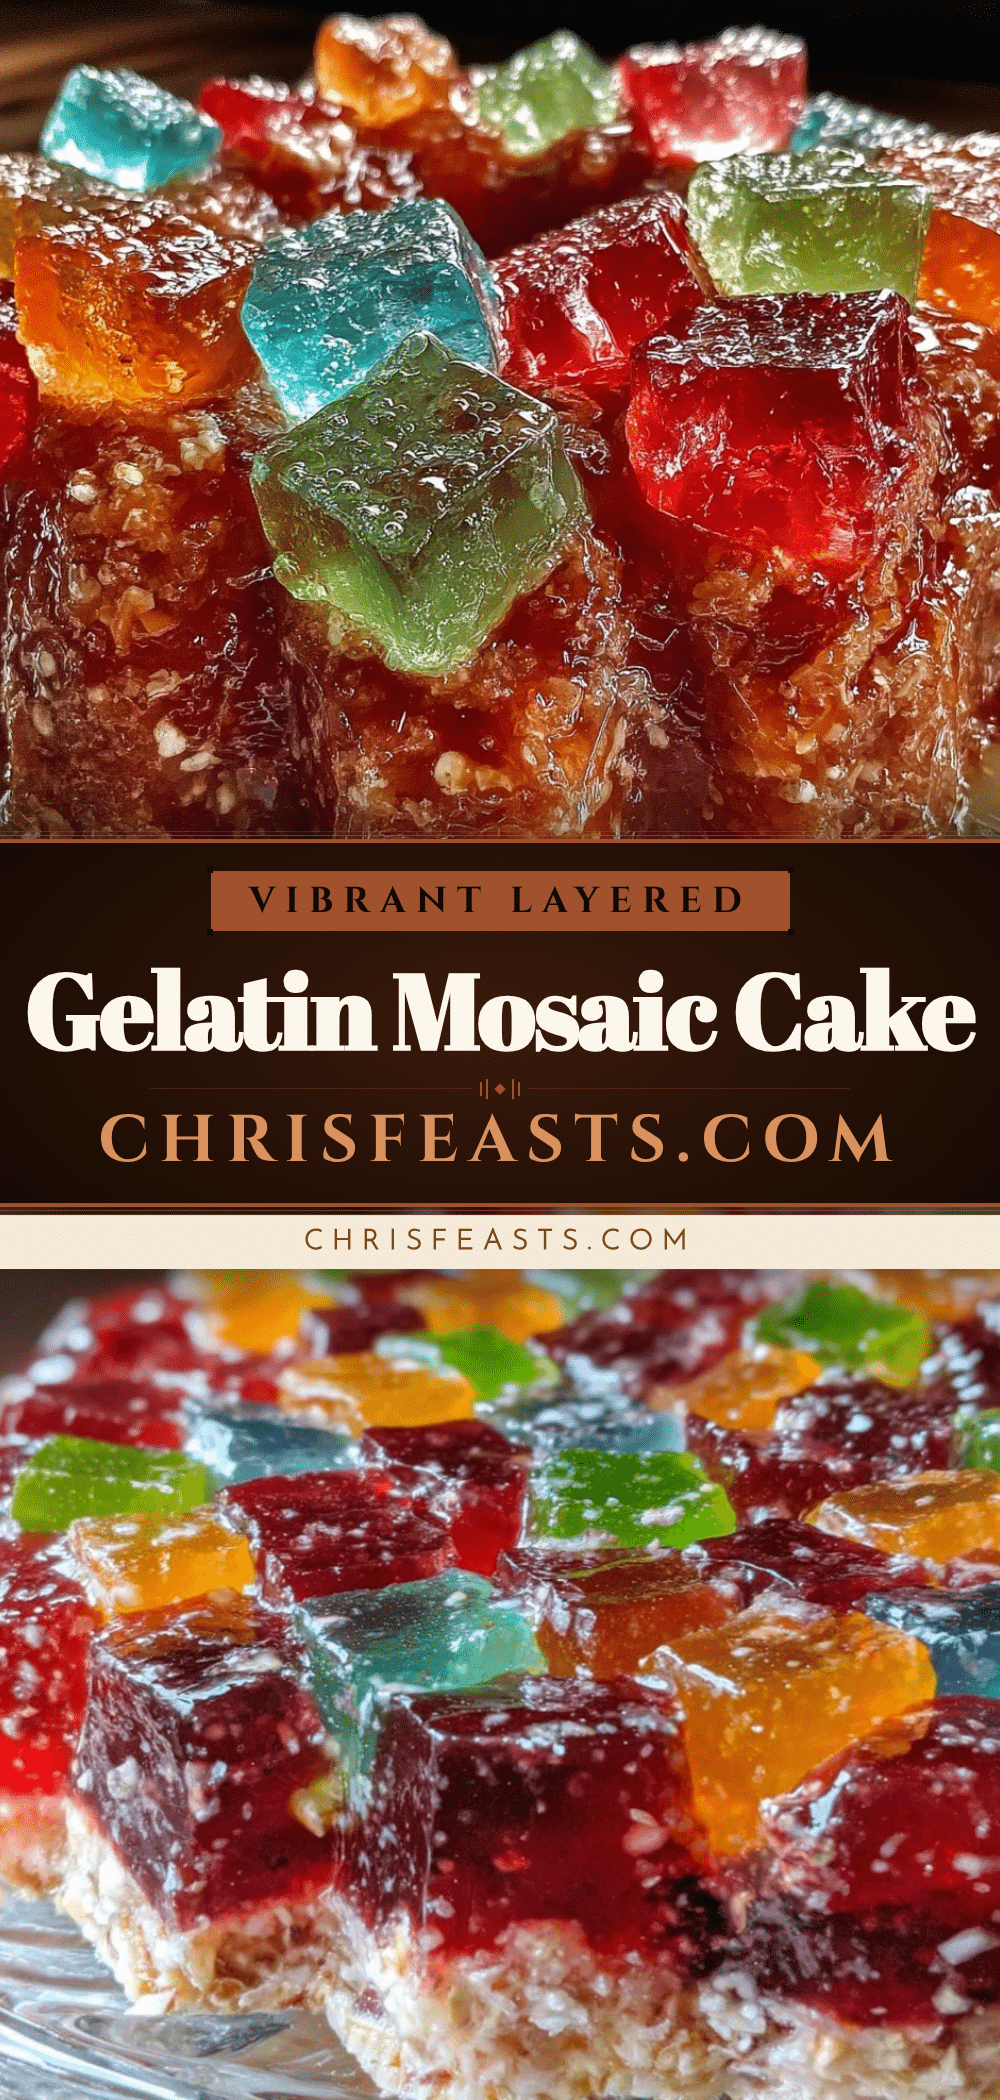
Perfect Vibrant Class Colors Layered Gelatin Mosaic Cake

A stunning gelatin mosaic cake featuring vibrant colored gelatin cubes set in a creamy milk gelatin base, creating a light, refreshing, and visually impressive dessert perfect for parties and special occasions.
- Prep Time: 30 minutes active plus chilling time
- Cook Time: 0 minutes
- Total Time: 3 hours including chilling
- Yield: 8 servings
- Category: Dessert
- Cuisine: American
Ingredients
- Gelatin packets (unflavored or flavored) – for colored gelatin cubes
- Water (cold and boiling) – for dissolving gelatin
- Food coloring gels or natural juice concentrates (e.g., blueberry, raspberry, orange) – for vibrant colors
- Sugar (optional, depending on gelatin flavor)
- Sweetened condensed milk (14 oz / 396 g can) – for creamy milk gelatin layer
- Whole milk (2 cups / 480 ml) – for creaminess
- Unflavored gelatin powder (about 2 teaspoons / 7 g) – to set the creamy layer
- Vanilla extract (1 teaspoon) – for subtle flavor
Instructions
- Prepare the Colored Gelatin Cubes: Dissolve each gelatin packet in 1/2 cup (4 fl oz) boiling water, stir until dissolved.
- Add 1/4 cup (2 fl oz) cold water and chosen food coloring or natural juice concentrate to each bowl, stir well.
- Pour each colored gelatin mixture into shallow glass dishes, spreading evenly to about 1/2-inch thickness.
- Refrigerate until fully set, about 2 hours or overnight.
- Cut the Gelatin Cubes: Once set, cut the gelatin sheets into 1/2-inch cubes and mix gently in a large bowl. Keep chilled.
- Prepare the Creamy Milk Gelatin Base: Sprinkle 2 teaspoons gelatin over 1/4 cup cold milk, let bloom 5 minutes.
- Heat remaining 1 3/4 cups milk until warm, add bloomed gelatin and stir until dissolved.
- Remove from heat, stir in sweetened condensed milk and vanilla extract until smooth. Cool to room temperature without setting.
- Assemble the Mosaic Cake: Lightly grease a 9×5 inch loaf pan.
- Pour a thin 1/4-inch layer of creamy milk gelatin base into pan, chill 15 minutes until tacky.
- Fold gelatin cubes gently and spread evenly over the creamy layer.
- Pour remaining creamy milk gelatin mixture over cubes to cover completely.
- Chill the cake at least 4 hours or until fully set.
- Serve: Run a knife around edges to loosen, invert onto plate or slice in pan, cut into neat slices to reveal mosaic layers.
Notes
Bloom gelatin properly before adding to liquids to avoid grainy texture. Chill creamy layer until tacky before adding gelatin cubes to prevent color bleeding. Use a hot, wet knife for clean slicing. Prepare colored gelatin cubes a day ahead for convenience. Avoid freezing the cake as gelatin texture will degrade.
Nutrition
- Serving Size: One slice (approxima
- Calories: 150180
- Sugar: 25
- Sodium: 90
- Fat: 4
- Saturated Fat: 2.5
- Carbohydrates: 28
- Protein: 4
Keywords: gelatin mosaic cake, layered gelatin dessert, colorful gelatin cake, creamy gelatin dessert, party dessert, easy gelatin recipe


