“Wait, are you seriously making that cake again?” my sister groaned over the phone, half amused and half exasperated. I couldn’t help it — once I landed on this waterfall drip cake with cascading sprinkles, it became my go-to for every milestone. Honestly, the first time I whipped it up for a graduation party, I was skeptical. Drip cakes always seemed so intimidating, like something reserved for fancy bakeries with endless patience. But there I was, late at night in a quiet kitchen, testing the chocolate ganache drip for the third time that week because, well, I just couldn’t get enough of the way the sprinkles flowed down like a colorful waterfall.
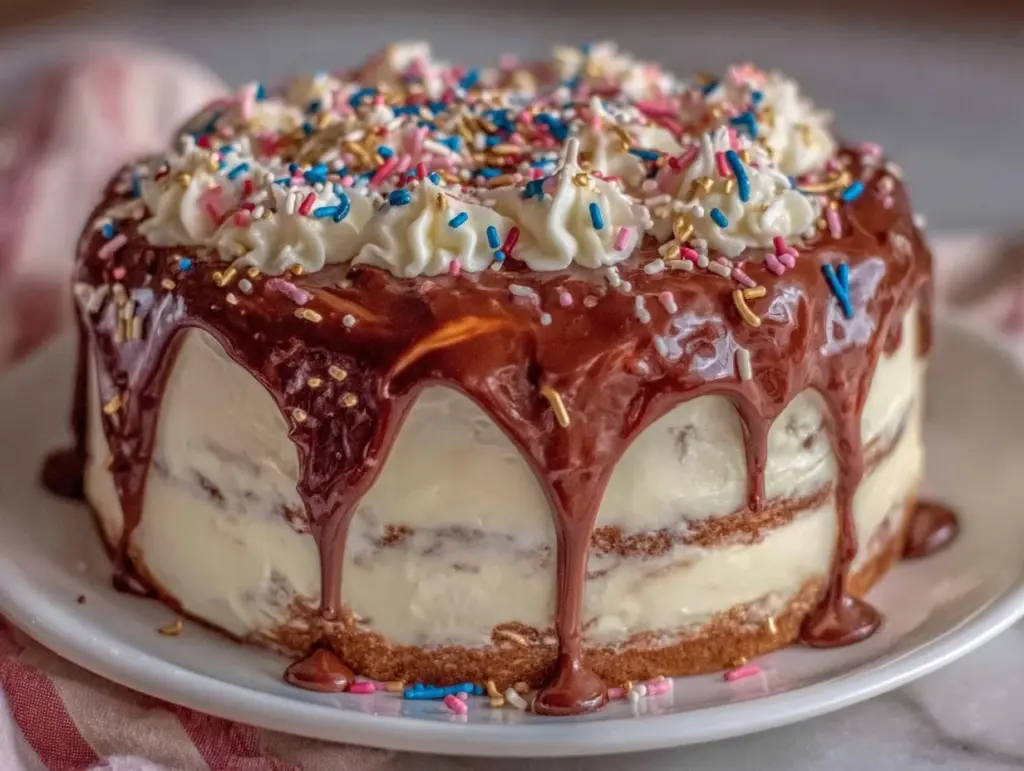
The recipe came from a mix of trial and error, some accidental spills, and a whole lot of frosting smudges. I remember the moment I realized this cake was a winner: the way the sprinkles tumbled down the side, catching the light just right, and how the buttery cake felt perfectly soft and moist under the glossy drip. It wasn’t just a cake; it was a celebration in every bite — perfect for that graduation vibe when everything feels big and hopeful and a little bit sweet.
What really makes this waterfall drip cake stick with me is how it brings that effortless wow factor without needing hours of fuss. There’s something quietly satisfying in setting up that cascade of sprinkles and watching it turn a simple dessert into a centerpiece. Whether it’s for a last-minute grad party or a well-planned celebration, this cake has a way of making the day feel special, like a little edible trophy for whatever you’re proud of.
So yeah, I might have made this cake more times than anyone else in my circle, but I don’t mind. It’s the kind of recipe that grows on you — no fancy tools, just good ingredients, and a little patience with the drip. It’s become my trusted way to mark moments when words aren’t enough. And that’s why it’s still my favorite graduation cake, hands down.
Why You’ll Love This Recipe
This Perfect Waterfall Drip Cake with Cascading Sprinkles isn’t just pretty — it’s been tested and tweaked until it hits just the right note between show-stopping and doable. From my own kitchen experiments and feedback from friends at graduations, here’s why this recipe stands out:
- Quick & Easy: You can have this cake ready in about 90 minutes total, making it great for last-minute celebrations or casual get-togethers.
- Simple Ingredients: No hunting for obscure items here. Most are pantry staples or easy to find at any grocery store.
- Perfect for Graduation Parties: The festive sprinkles and elegant drip look like you put in hours, but it’s surprisingly forgiving and fun to make.
- Crowd-Pleaser: The balance of moist cake, creamy frosting, and that irresistible drip always gets compliments from kids and adults alike.
- Unbelievably Delicious: The silky ganache drip blends perfectly with the light buttercream frosting, adding rich flavor without overwhelming sweetness.
- Unique Twist: The cascading sprinkles create a waterfall effect that’s playful yet chic — not your average drip cake. Plus, the trick of chilling the cake before dripping helps control the flow perfectly.
It’s not just any drip cake; it’s the kind you remember because it manages to feel both celebratory and cozy at the same time. Honestly, it’s the recipe that makes you close your eyes for a second after the first bite — a little moment of happy graduation magic.
What Ingredients You Will Need
This recipe calls for straightforward ingredients that come together to create a moist, flavorful cake and a luscious drip effect. Most are probably already in your kitchen, making it an easy pick for spontaneous celebrations or planned parties.
- For the Cake:
- All-purpose flour – 2 ½ cups (320 g), sifted for lightness
- Granulated sugar – 2 cups (400 g), for that perfect sweetness
- Baking powder – 2 ½ teaspoons, to give the cake a nice rise
- Baking soda – ½ teaspoon, helps balance acidity
- Salt – ½ teaspoon, to enhance flavor
- Unsalted butter – ¾ cup (170 g), softened (I recommend Land O’Lakes for best texture)
- Whole milk – 1 cup (240 ml), room temperature (can swap for almond milk if needed)
- Large eggs – 3, room temperature
- Vanilla extract – 2 teaspoons, the secret to that warm aroma
- For the Buttercream Frosting:
- Unsalted butter – 1 cup (225 g), softened
- Powdered sugar – 4 cups (480 g), sifted for smooth frosting
- Heavy cream – 2-3 tablespoons (30-45 ml), adds creaminess
- Vanilla extract – 1 teaspoon
- Pinch of salt, balances the sweetness
- For the Chocolate Ganache Drip:
- Dark chocolate chips or chopped dark chocolate – 1 cup (170 g), I prefer Ghirardelli for smooth melt
- Heavy cream – ½ cup (120 ml)
- Light corn syrup – 1 tablespoon (optional, for shine)
- For the Cascading Sprinkles:
- Assorted colorful sprinkles – about 1 cup (choose a mix of jimmies, nonpareils, and confetti shapes)
- Edible glitter or shimmer dust (optional, for extra sparkle)
Pro tip: For the sprinkles, I like to mix a few brands to get different shapes and sizes, which really enhances the waterfall effect. And if you’re celebrating in warmer weather, using a light, non-melting buttercream helps keep everything in place.
Equipment Needed
- Two 8-inch (20 cm) round cake pans – non-stick or well-greased
- Mixing bowls – at least two, for batter and frosting
- Electric mixer – stand or hand, helps achieve fluffy buttercream
- Offset spatula – great for smooth frosting application
- Bench scraper or cake scraper – for crisp edges on frosting
- Medium saucepan – to heat heavy cream for ganache
- Heatproof bowl – for melting chocolate
- Spoon or small ladle – to pour ganache drip
- Cooling racks – allows cakes to cool evenly
- Turntable (optional) – makes frosting easier but not required
If you don’t have a turntable, no worries — a lazy Susan or simply rotating the cake carefully with your hands can do the trick. I’ve also found that a good offset spatula is worth the splurge; it makes frosting smoothness a breeze. For the ganache, I usually melt chocolate over a double boiler, but you can microwave in short bursts if pressed for time. Just keep an eye on it.
Preparation Method

- Preheat and Prep: Set your oven to 350°F (175°C). Grease and flour your two 8-inch pans or line them with parchment paper. This prevents sticking and helps the cake release cleanly.
- Mix Dry Ingredients: In a large bowl, whisk together 2 ½ cups (320 g) all-purpose flour, 2 cups (400 g) granulated sugar, 2 ½ teaspoons baking powder, ½ teaspoon baking soda, and ½ teaspoon salt. This ensures even distribution of the leavening agents.
- Cream Butter and Sugar: Using an electric mixer, beat ¾ cup (170 g) softened unsalted butter until creamy (about 2 minutes). Gradually add dry ingredients and mix on low speed.
- Add Wet Ingredients: Slowly pour in 1 cup (240 ml) room temp milk, 3 eggs, and 2 teaspoons vanilla extract. Beat on medium speed until smooth and well combined (about 2-3 minutes). Batter should be thick but pourable.
- Divide and Bake: Split batter evenly between pans. Tap pans on the counter to release bubbles. Bake 30-35 minutes or until a toothpick inserted in center comes out clean. Avoid opening the oven door often to keep cakes from sinking.
- Cool Completely: Let cakes cool in pans for 10 minutes, then transfer to cooling racks. Cooling fully (at least 1 hour) is crucial for frosting to hold up well.
- Prepare Buttercream: Beat 1 cup (225 g) softened butter until fluffy. Gradually add 4 cups (480 g) powdered sugar. Add 2-3 tablespoons (30-45 ml) heavy cream, 1 teaspoon vanilla, and a pinch of salt. Beat until light and spreadable. Adjust cream or sugar to get desired consistency.
- Assemble Cake Layers: Level cakes with a serrated knife if domed. Place first layer on cake board or plate, spread an even layer of buttercream (about ½ cup). Top with second cake layer and cover entire cake with a thin crumb coat. Chill 30 minutes to set.
- Final Frosting: Apply a smooth, thicker layer of buttercream on chilled cake using an offset spatula. Use a bench scraper to smooth sides. Chill again for 15 minutes.
- Make Ganache Drip: Heat ½ cup (120 ml) heavy cream until simmering. Pour over 1 cup (170 g) chopped dark chocolate. Let sit 2 minutes, then stir gently until smooth. Add 1 tablespoon corn syrup for shine if desired. Cool slightly until thick but pourable.
- Create the Drip: Spoon ganache around the edges of the cake, letting it drip naturally down the sides. Pour a small amount on top and spread gently. Work quickly before ganache firms.
- Add Cascading Sprinkles: Immediately after dripping, sprinkle your colorful cascade on one side or all around the drip. Press gently into ganache to stick. Add edible glitter if you want a shimmer effect.
- Chill and Serve: Refrigerate cake for 30 minutes to set the drip and sprinkles. Bring to room temperature 20 minutes before serving for best texture and flavor.
Pro tip: If your ganache drips too fast, chill it a bit longer. If it’s too thick, warm gently to loosen. The right drip consistency is key to that perfect waterfall look. I’ve learned the hard way that patience here pays off big time!
Cooking Tips & Techniques
Getting the perfect waterfall drip cake with cascading sprinkles is all about mastering a few practical details — the kind you pick up after a few tries, like I did.
- Chilling is Your Best Friend: Always chill your crumb coat and final frosting before applying the ganache drip. It helps control the drip flow and prevents frosting from melting.
- Ganache Consistency: The ganache should be slightly thick but still pourable. If it’s too runny, your drips will slide all the way down and pool at the bottom. Too thick, and it won’t drip smoothly. Test on a spoon first.
- Applying the Drip: Use a spoon or small ladle to gently pour the ganache near the edge, nudging it over for controlled drips. Don’t rush; steady hands make a difference.
- Sprinkle Placement: Add sprinkles immediately after dripping so they stick well. For a dramatic waterfall effect, cluster them more densely at the top and let them thin out as they cascade.
- Room Temperature Ingredients: For smooth batter and frosting, bring eggs, milk, and butter to room temp before starting. It makes mixing easier and improves texture.
- Level Your Cakes: Trimming domed cakes helps layers stack evenly and prevents a tilted final cake.
- Don’t Overmix: When combining wet and dry ingredients, mix just until combined to avoid a dense cake.
One time, I accidentally left my ganache too hot and ended up with a messy drip disaster — lesson learned! Now I always cool it just right and keep extra sprinkles handy for touch-ups. It’s all part of the fun.
Variations & Adaptations
This waterfall drip cake is super versatile, so feel free to tweak it based on your taste or dietary needs.
- Flavor Variations: Swap vanilla extract for almond or lemon extract for a different twist. You can also add cocoa powder to the batter for a chocolate base.
- Frosting Alternatives: Use cream cheese frosting instead of buttercream for a tangy balance. Perfect if you want something less sweet.
- Dietary Adjustments: Use almond flour or gluten-free all-purpose flour for gluten-free cakes. Substitute dairy milk with oat or coconut milk and use vegan butter to make it dairy-free.
- Sprinkle Themes: Customize sprinkles to match school colors or party themes — metallic gold confetti or pastel hearts can change the vibe instantly.
- Different Drips: Instead of chocolate ganache, try a white chocolate or caramel drip for a unique look and flavor.
Personally, I once made a lemon blueberry version inspired by the lemon blueberry pound cake and swapped sprinkles for fresh edible flowers. It was a showstopper for a spring graduation brunch!
Serving & Storage Suggestions
Serve this cake at room temperature to enjoy the soft crumb and creamy frosting at their best. It pairs beautifully with fresh berries, a cup of coffee, or a sparkling lemonade for sunny-day celebrations.
For storage, keep the cake covered in the fridge for up to 3 days. Bring it out about 30 minutes before serving so the buttercream softens. The ganache drip firms nicely in the fridge but won’t get hard or crack if you follow the timing.
If you need to store it longer, wrap the whole cake tightly with plastic wrap and freeze for up to 2 weeks. Thaw overnight in the fridge before bringing to room temperature.
Fun fact: The flavors actually deepen after a day or two, so if you can resist, the next day’s cake slice tastes even better. Just don’t wait too long or the sprinkles lose their crisp charm.
Nutritional Information & Benefits
Here’s an estimated breakdown per slice (assuming 12 servings): approximately 350 calories, 18g fat, 45g carbohydrates, and 4g protein.
This cake provides a delightful treat rather than a health food, but using real butter and dark chocolate ganache adds some richness without too much processed sugar. Whole milk and eggs contribute protein and important nutrients.
If you swap in almond or coconut milk, it can be dairy-free and lower in lactose. Gluten-free flour options also make this accessible for gluten-sensitive guests.
From a wellness perspective, this cake is perfect for celebrating with balance — a little indulgence on a special day that’s just as much about joy as nutrition.
Conclusion
The Perfect Waterfall Drip Cake with Cascading Sprinkles is my go-to recipe whenever there’s a reason to celebrate big moments like graduations. It’s a balance of simple ingredients and thoughtful technique that makes impressive results feel totally achievable. I love how customizable it is, letting you add your own personality through flavors and decorations.
Whether you’re new to drip cakes or a seasoned baker, this recipe is friendly and forgiving — plus it looks stunning on the table. I hope it becomes your favorite way to mark achievements with something sweet and memorable. Feel free to experiment and make it your own; that’s the real fun!
If you’ve enjoyed this recipe, I’d love to hear how your cake turned out or what fun sprinkles you chose. Sharing these moments makes baking even better!
Frequently Asked Questions
How do I prevent my ganache from dripping too much?
Chill your cake and ganache to the right consistency before dripping. The ganache should be thick but pourable. If too runny, let it cool longer; if too thick, warm gently.
Can I make this cake ahead of time?
Yes! Bake and frost the cake a day ahead, then add the drip and sprinkles just before serving for the freshest look.
What if I don’t have an electric mixer?
You can hand-mix the batter and frosting, but it will take more effort to get the buttercream fluffy. A whisk and some patience work fine.
Can I use different types of sprinkles?
Absolutely! Mixing shapes and sizes adds dimension to the waterfall effect. Just avoid sprinkles that melt easily.
Is this recipe suitable for gluten-free diets?
You can substitute all-purpose flour with a gluten-free blend. Make sure your baking powder is gluten-free too.
This recipe pairs wonderfully with easy savory dishes like the honey mustard glazed chicken thighs for a full celebration menu, or a bright, fresh side like the creamy blueberry almond butter smoothie bowl for a brunch gathering. Both complement the joyful vibe of graduation festivities perfectly.
Pin This Recipe!
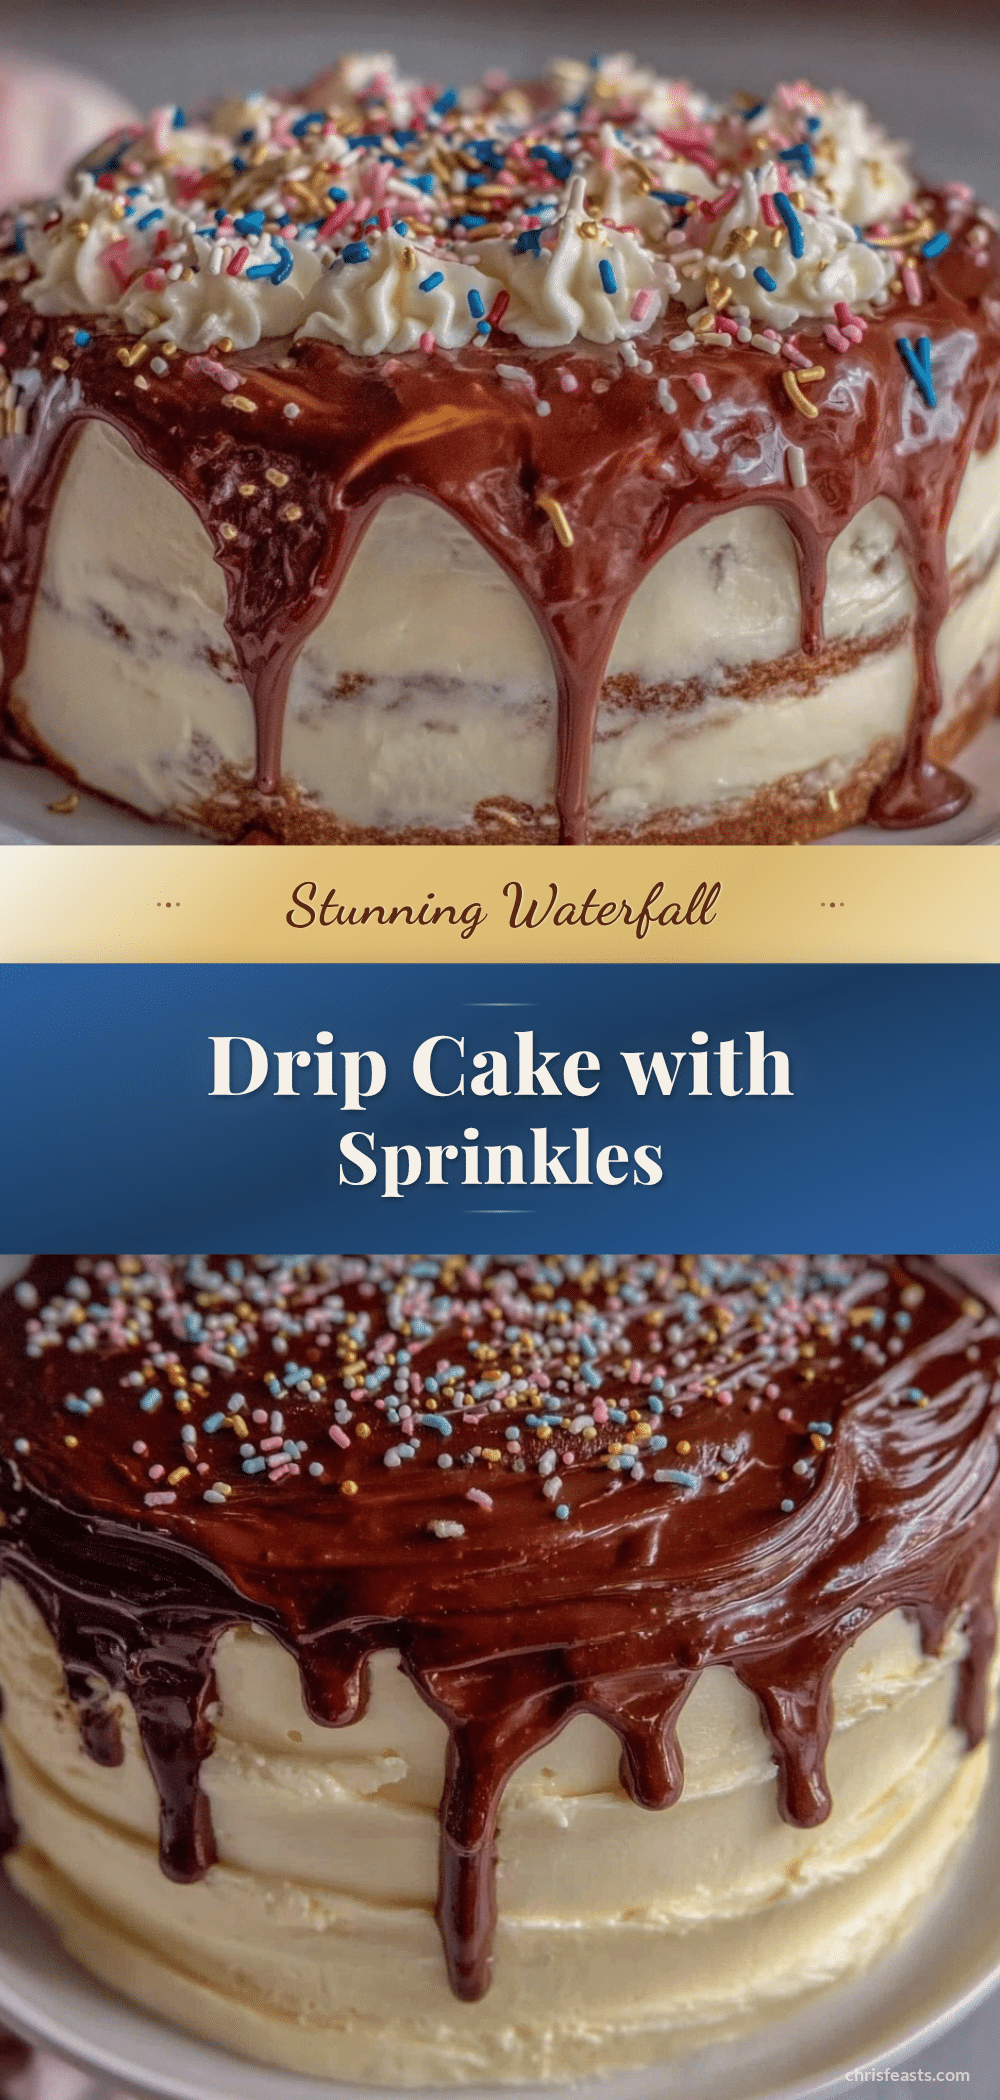
Perfect Waterfall Drip Cake Recipe with Cascading Sprinkles for Graduation Celebration

A moist and flavorful drip cake featuring a silky chocolate ganache and cascading colorful sprinkles, perfect for graduation parties and celebrations.
- Prep Time: 30 minutes
- Cook Time: 35 minutes
- Total Time: 90 minutes
- Yield: 12 servings 1x
- Category: Dessert
- Cuisine: American
Ingredients
- 2 ½ cups (320 g) all-purpose flour, sifted
- 2 cups (400 g) granulated sugar
- 2 ½ teaspoons baking powder
- ½ teaspoon baking soda
- ½ teaspoon salt
- ¾ cup (170 g) unsalted butter, softened
- 1 cup (240 ml) whole milk, room temperature (can substitute almond milk)
- 3 large eggs, room temperature
- 2 teaspoons vanilla extract
- 1 cup (225 g) unsalted butter, softened (for buttercream)
- 4 cups (480 g) powdered sugar, sifted
- 2–3 tablespoons (30–45 ml) heavy cream
- 1 teaspoon vanilla extract (for buttercream)
- Pinch of salt (for buttercream)
- 1 cup (170 g) dark chocolate chips or chopped dark chocolate
- ½ cup (120 ml) heavy cream (for ganache)
- 1 tablespoon light corn syrup (optional, for shine)
- About 1 cup assorted colorful sprinkles (jimmies, nonpareils, confetti shapes)
- Edible glitter or shimmer dust (optional)
Instructions
- Preheat oven to 350°F (175°C). Grease and flour two 8-inch round cake pans or line with parchment paper.
- In a large bowl, whisk together flour, sugar, baking powder, baking soda, and salt.
- Using an electric mixer, beat ¾ cup softened unsalted butter until creamy (about 2 minutes). Gradually add dry ingredients and mix on low speed.
- Slowly pour in milk, eggs, and vanilla extract. Beat on medium speed until smooth and well combined (2-3 minutes). Batter should be thick but pourable.
- Divide batter evenly between pans. Tap pans to release bubbles. Bake 30-35 minutes or until a toothpick inserted in center comes out clean.
- Cool cakes in pans for 10 minutes, then transfer to cooling racks. Cool completely (at least 1 hour).
- For buttercream, beat 1 cup softened butter until fluffy. Gradually add powdered sugar. Add heavy cream, vanilla, and salt. Beat until light and spreadable.
- Level cakes if domed. Place first layer on plate, spread about ½ cup buttercream evenly. Top with second layer and apply thin crumb coat. Chill 30 minutes.
- Apply a smooth, thicker layer of buttercream on chilled cake using offset spatula. Smooth sides with bench scraper. Chill 15 minutes.
- Heat heavy cream until simmering. Pour over chopped dark chocolate. Let sit 2 minutes, then stir until smooth. Add corn syrup if desired. Cool until thick but pourable.
- Spoon ganache around edges to create drips, then pour small amount on top and spread gently. Work quickly before ganache firms.
- Immediately sprinkle cascading sprinkles on one side or all around drip. Press gently to stick. Add edible glitter if desired.
- Refrigerate cake 30 minutes to set drip and sprinkles. Bring to room temperature 20 minutes before serving.
Notes
Chill crumb coat and final frosting before applying ganache drip to control flow. Ganache should be thick but pourable. Use a spoon or ladle for controlled drips. Add sprinkles immediately after dripping. Bring ingredients to room temperature before mixing. Level cakes for even stacking. Avoid overmixing batter.
Nutrition
- Serving Size: 1 slice (1/12 of cak
- Calories: 350
- Fat: 18
- Carbohydrates: 45
- Protein: 4
Keywords: waterfall drip cake, graduation cake, drip cake recipe, cascading sprinkles, chocolate ganache, buttercream frosting, celebration cake


