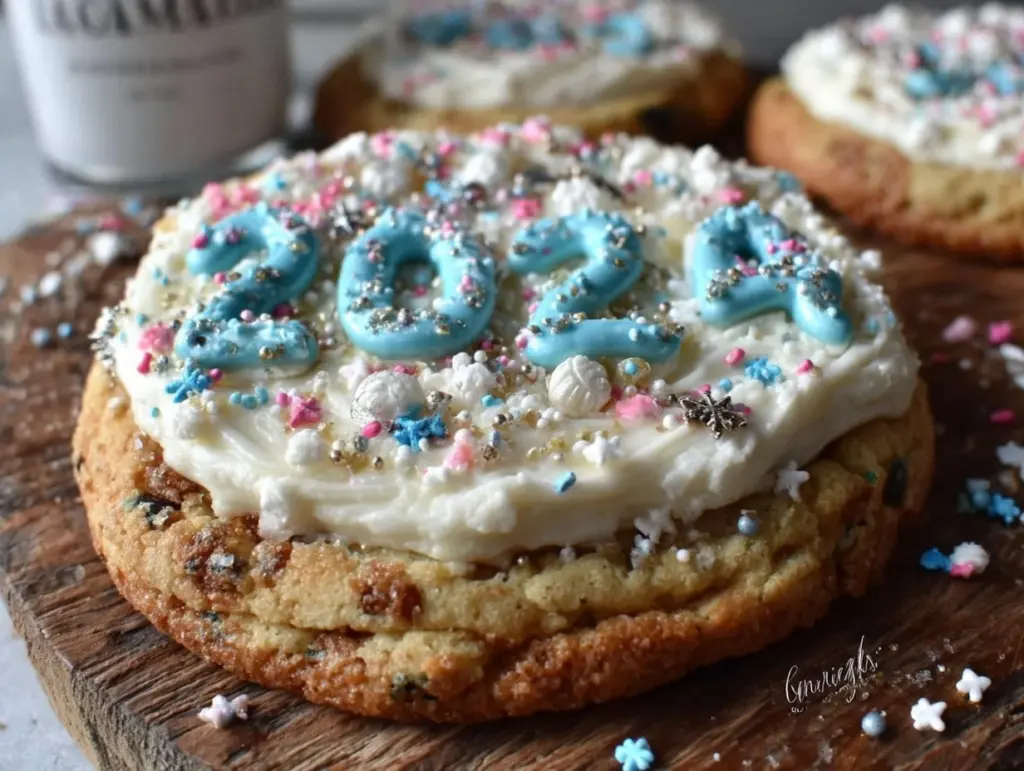
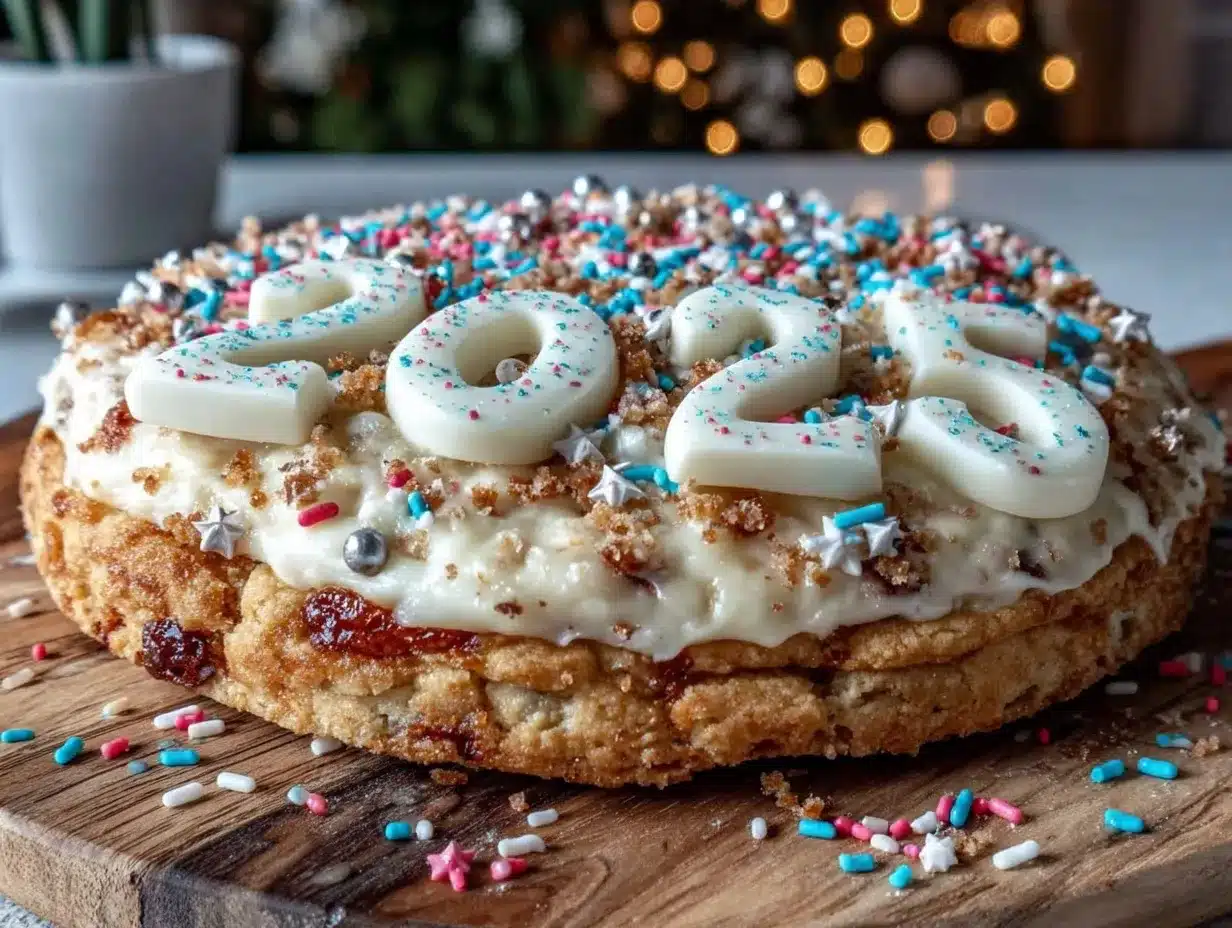
“Hey, did you see the cookie pizza from the Class of 2026 party?” That text popped up on my phone just as I was juggling dinner prep and emails. Honestly, I wasn’t expecting much—a cookie, some icing, maybe a few sprinkles thrown on top. But when I actually saw it, I was kind of floored. It wasn’t just a cookie; it was a full-on cookie pizza, decked out with royal icing decorations spelling out names and dates, colors popping like confetti. This wasn’t your run-of-the-mill sugar overload; it felt like a celebratory work of art.
It all started as a last-minute idea to make something special for a casual get-together celebrating the Class of 2026. I had zero plans to bake a giant cookie pizza that day—honestly, I was a little skeptical about whether royal icing would hold up or if the cookie base would be too hard. But after a few tweaks and some trial runs (okay, maybe three or four batches in one week), it turned into this crowd-pleaser that everyone kept asking about. There’s something about the smell of freshly baked sugar cookies mingling with that sweet, smooth royal icing that makes the whole kitchen feel like a mini party.
What stuck with me most wasn’t just the taste or the look, but how it brought everyone together—kids, parents, even the shyest guests were drawn in by the colors and the message on the cookie pizza. It reminded me that sometimes the simplest idea, when done with a little care and creativity, can turn into a shared moment worth savoring. So, here’s the recipe for the Perfect Class of 2026 Cookie Pizza with Royal Icing Decoration, crafted from those kitchen experiments and happy accidents.
Why You’ll Love This Recipe
This cookie pizza recipe isn’t just dessert—it’s a celebration on a plate, and here’s why I think you’ll want to try it:
- Quick & Easy: The cookie dough comes together in under 15 minutes, and baking takes just about 12-15 minutes more. Perfect for those last-minute party plans or sweet cravings.
- Simple Ingredients: No need for fancy or hard-to-find items. These are mostly pantry staples you probably already have—flour, sugar, butter, and eggs.
- Perfect for Celebrations: Whether it’s for a graduation, birthday, or just because, this cookie pizza makes any occasion feel special.
- Crowd-Pleaser: Kids and adults alike can’t get enough of the soft, chewy cookie base paired with smooth, colorful royal icing.
- Unbelievably Delicious: The balance of buttery cookie with the delicate sweetness of the icing makes it comfort food with a fun twist.
What sets this recipe apart is the royal icing decoration technique. Unlike other cookie pizzas that rely on messy frosting or store-bought icing, this royal icing dries firm, letting you create detailed designs and messages that won’t smudge or melt. Plus, I’ve included tips to get that perfect smooth finish without needing advanced piping skills.
This isn’t just a cookie pizza—it’s a project and a memory rolled into one. And if you’ve ever loved the idea of making something that looks impressive but feels totally doable, this recipe should be right up your alley. It’s the kind of treat that makes you pause and smile after the first bite, the kind that brings people around the table wanting to chat or just enjoy a quiet moment together.
What Ingredients You Will Need
This recipe uses simple, wholesome ingredients to deliver bold flavor and a satisfying texture without the fuss. You’ll find these mostly in your kitchen already, with a few notes on how to pick the best options.
- For the Cookie Base:
- All-purpose flour – 2 ¾ cups (345 g), sifted for a tender crumb
- Baking powder – 1 teaspoon (4 g), helps the cookie rise just right
- Salt – ½ teaspoon (3 g), to balance sweetness
- Unsalted butter – 1 cup (227 g), softened (I like Plugrá for its creamy texture)
- Granulated sugar – 1 cup (200 g), for that classic cookie sweetness
- Large egg – 1, room temperature (helps with dough consistency)
- Vanilla extract – 2 teaspoons (10 ml), pure vanilla makes a noticeable difference
- For the Royal Icing Decoration:
- Powdered sugar – 4 cups (480 g), sifted to avoid lumps
- Pasteurized egg whites or meringue powder – 3 tablespoons (21 g), for stability and smooth texture
- Fresh lemon juice or water – 4 tablespoons (60 ml), to thin the icing just enough
- Food coloring gels – assorted colors (choose brands like AmeriColor for vibrant, easy-to-control hues)
- Vanilla or almond extract – 1 teaspoon (5 ml), optional for flavor
You can swap all-purpose flour with a gluten-free blend if needed. For a dairy-free option, try a plant-based butter substitute that behaves like regular butter in baking. When it comes to royal icing, meringue powder is a lifesaver if you want to skip raw egg whites. Also, if fresh lemon isn’t your thing, just use water, but lemon adds a subtle brightness that complements the cookie.
Equipment Needed
- Mixing bowls – a couple of medium and large sizes for dough and icing
- Electric mixer – stand or hand mixer to cream butter and sugar and whisk royal icing to the right consistency
- Measuring cups and spoons – for exact ingredient amounts
- Rolling pin – to roll out the cookie dough evenly
- Large round baking pan or pizza pan (12-inch/30 cm) – to shape your cookie pizza perfectly
- Parchment paper or silicone baking mat – prevents sticking and helps with even baking
- Offset spatula or butter knife – for spreading royal icing smoothly
- Piping bags and tips (optional) – if you want to do detailed royal icing decorations (small round tips like #1 or #2 are great)
If you don’t have a rolling pin, a clean bottle works fine in a pinch. For piping, if you don’t own bag or tips, you can use a resealable plastic bag with a tiny corner snipped off. I’ve found that quality parchment paper really helps avoid any sticking or burning, and it’s reusable, which is a bonus.
Preparation Method
- Prep your workspace: Lightly grease your large round baking or pizza pan and line it with parchment paper. Preheat the oven to 350°F (175°C).
- Mix dry ingredients: In a medium bowl, whisk together 2 ¾ cups (345 g) sifted all-purpose flour, 1 teaspoon (4 g) baking powder, and ½ teaspoon (3 g) salt. Set aside.
- Cream butter and sugar: In a large bowl, use an electric mixer to beat 1 cup (227 g) softened unsalted butter and 1 cup (200 g) granulated sugar until light and fluffy, about 3-4 minutes. This step is key for a tender cookie base.
- Add egg and vanilla: Mix in 1 large room-temperature egg and 2 teaspoons (10 ml) pure vanilla extract until combined.
- Combine dry and wet: Gradually add the dry ingredients to the butter mixture, mixing on low speed until just combined. Avoid overmixing to keep the cookies soft.
- Form the cookie pizza base: Transfer the dough to the prepared pan. Using your hands or an offset spatula, press and spread the dough evenly to cover the pan, smoothing the surface.
- Bake: Place the pan in the oven and bake for 12-15 minutes, or until the edges are golden and the center is set but still soft to the touch. Let cool completely in the pan on a wire rack.
- Prepare royal icing: In a clean bowl, beat 4 cups (480 g) sifted powdered sugar with 3 tablespoons (21 g) meringue powder and 4 tablespoons (60 ml) lemon juice or water. Beat on high speed until stiff peaks form, about 5-7 minutes. Add 1 teaspoon (5 ml) vanilla or almond extract if desired.
- Color your icing: Divide the royal icing into smaller bowls and tint each with gel food coloring to your preferred shades. Keep covered with a damp cloth until ready to use to prevent drying.
- Decorate: Using an offset spatula or piping bags, spread a thin base layer of white icing on the cookie pizza. Allow it to crust for 15-20 minutes. Then pipe names, “Class of 2026,” and other decorations directly on top. For best results, work patiently and let each color set slightly before adding another.
- Dry and serve: Let the decorated cookie pizza dry at room temperature for several hours or overnight to fully set the royal icing. Then slice and enjoy!
Tip: If the edges brown too quickly while baking, loosely cover with foil halfway through. When piping, practice on parchment paper first if you’re new to royal icing—it really helps steady your hand.
Cooking Tips & Techniques
Royal icing can be intimidating, but a few tricks make it manageable. First, always sift your powdered sugar to avoid lumps—nobody wants bumpy icing. Use meringue powder if you’re worried about raw egg whites; it whips up just as stiff and safe.
When piping, keep your icing covered when not in use, or it will dry out fast. If it thickens, add a few drops of water to loosen it but be careful not to make it runny. For smooth coverage on the cookie pizza base, thin the icing slightly more than your piping consistency.
One mistake I made early on was rushing the drying time. Royal icing needs patience—letting it dry fully ensures the decorations stay crisp and won’t smudge or stick. Also, don’t overload the cookie with too many colors at once; give each layer time to set. This saves a ton of headaches and keeps your cookie pizza looking sharp.
Lastly, if you want cleaner edges on the cookie pizza, chill your dough before baking. It’s a little extra step but worth it if you’re aiming for pretty presentation. And if you ever need a savory side to balance the sweet, something like savory sausage and peppers skillet pairs surprisingly well for a party spread.
Variations & Adaptations
- Gluten-Free Version: Swap all-purpose flour for a 1:1 gluten-free baking blend. The texture will be slightly different but still delicious.
- Flavor Twists: Add citrus zest (lemon or orange) to the cookie dough for a fresh aroma, or a teaspoon of almond extract instead of vanilla for a nutty twist.
- Vegan Adaptation: Use dairy-free butter and a flax egg (1 tablespoon ground flaxseed + 3 tablespoons water) in place of the egg. For royal icing, use aquafaba (chickpea water) whipped to stiff peaks instead of egg whites.
- Creative Decorations: Try edible glitter, colored sanding sugar, or tiny candy pearls on top of the royal icing for extra sparkle and texture.
- Seasonal Themes: Adapt the decoration colors and designs to other occasions—think autumn leaves for fall or pastel flowers for spring graduations.
One time, I swapped out the royal icing for a cream cheese frosting on half the cookie pizza for a tangier option—definitely a crowd-pleaser but less durable for intricate decorations. For a fun twist, you might pair this cookie pizza alongside a savory meal like honey mustard glazed chicken thighs to balance sweet and savory flavors.
Serving & Storage Suggestions
Serve your Perfect Class of 2026 Cookie Pizza at room temperature for the best texture and flavor. Cutting it into wedges just like a pizza makes it fun and easy to share at parties or casual gatherings.
It pairs well with a simple glass of milk, iced tea, or coffee. For a themed party, try serving alongside fresh fruit or a light salad to balance the sugar.
Store leftovers covered tightly at room temperature for up to 3 days, or in an airtight container in the fridge for up to a week. If you want to keep it longer, wrap well and freeze for up to 2 months—thaw at room temperature before serving.
Royal icing flavors and texture actually mellow and firm up over time, so if you can wait a day before cutting, you’ll get cleaner slices and a better bite. Just don’t leave it in a humid spot; moisture can soften the icing.
Nutritional Information & Benefits
One slice (about 1/8 of the cookie pizza) roughly contains:
| Calories | 320 kcal |
|---|---|
| Fat | 15 g |
| Carbohydrates | 44 g |
| Protein | 3 g |
| Sugar | 28 g |
While this cookie pizza is definitely a treat, the use of real butter and fresh eggs brings in some quality ingredients you can feel good about compared to processed sweets. Plus, the lemon juice in the royal icing adds a little vitamin C zing.
This recipe is naturally gluten-containing but can be adapted to gluten-free diets. It’s not suitable for those with egg allergies unless you use vegan substitutes. Moderation is key, but honestly, it’s a fun way to celebrate without overdoing it on artificial ingredients or preservatives.
Conclusion
The Perfect Class of 2026 Cookie Pizza with Royal Icing Decoration is one of those recipes that feels special yet totally doable. It’s the kind of sweet that makes you want to gather friends or family, share stories, and make memories that stick just like the icing on the cookie.
Feel free to customize the colors, decorations, and flavors to fit your event or personal taste. I love how this recipe lets you get creative without needing years of baking experience—just a bit of patience and a willing hand.
So whenever you’re looking for a festive, impressive, and genuinely delicious treat, this cookie pizza has your back. And if you want a savory companion for your party table, dishes like the shredded beef burrito bowl add a fresh, hearty contrast that guests will talk about too.
I’d love to hear how your cookie pizza turns out—drop a comment or share your royal icing designs. Happy baking!
FAQs
Can I make the cookie pizza dough ahead of time?
Yes! You can prepare the dough, wrap it tightly, and refrigerate for up to 48 hours before rolling and baking. Just let it sit at room temperature for 10-15 minutes before spreading in the pan.
How long does royal icing take to dry completely?
Royal icing typically dries to the touch within 20-30 minutes but needs several hours or overnight to fully harden, especially for thicker decorations.
Can I use store-bought frosting instead of royal icing?
You can, but store-bought frosting won’t dry firm like royal icing. It may smudge and is softer, so it’s not ideal for detailed decorations or messages.
What if my cookie pizza cracks after baking?
Cracking usually means the dough was too dry or overbaked. Make sure not to overmix and watch your baking time closely. Slight cracks can be covered by icing—no big deal!
How do I store leftover cookie pizza with royal icing?
Keep it in an airtight container at room temperature for up to 3 days or refrigerate for up to a week. Avoid humid places to keep the icing crisp.
Pin This Recipe!

Perfect Class of 2026 Cookie Pizza Recipe with Easy Royal Icing Decoration Tutorial

A celebratory cookie pizza featuring a soft, chewy sugar cookie base decorated with smooth, colorful royal icing. Perfect for parties and special occasions.
- Prep Time: 15 minutes
- Cook Time: 15 minutes
- Total Time: 30 minutes
- Yield: 8 servings 1x
- Category: Dessert
- Cuisine: American
Ingredients
- 2 ¾ cups (345 g) all-purpose flour, sifted
- 1 teaspoon (4 g) baking powder
- ½ teaspoon (3 g) salt
- 1 cup (227 g) unsalted butter, softened
- 1 cup (200 g) granulated sugar
- 1 large egg, room temperature
- 2 teaspoons (10 ml) vanilla extract
- 4 cups (480 g) powdered sugar, sifted
- 3 tablespoons (21 g) pasteurized egg whites or meringue powder
- 4 tablespoons (60 ml) fresh lemon juice or water
- Food coloring gels, assorted colors
- 1 teaspoon (5 ml) vanilla or almond extract (optional)
Instructions
- Lightly grease a large round baking or pizza pan and line it with parchment paper. Preheat oven to 350°F (175°C).
- In a medium bowl, whisk together sifted all-purpose flour, baking powder, and salt. Set aside.
- In a large bowl, beat softened unsalted butter and granulated sugar with an electric mixer until light and fluffy, about 3-4 minutes.
- Mix in the large room-temperature egg and vanilla extract until combined.
- Gradually add the dry ingredients to the butter mixture, mixing on low speed until just combined. Avoid overmixing.
- Transfer the dough to the prepared pan. Press and spread the dough evenly to cover the pan, smoothing the surface.
- Bake for 12-15 minutes, or until edges are golden and center is set but still soft. Let cool completely in the pan on a wire rack.
- Prepare royal icing by beating powdered sugar with meringue powder and lemon juice or water on high speed until stiff peaks form, about 5-7 minutes. Add vanilla or almond extract if desired.
- Divide royal icing into smaller bowls and tint each with gel food coloring. Keep covered with a damp cloth until ready to use.
- Spread a thin base layer of white icing on the cookie pizza using an offset spatula or piping bags. Allow to crust for 15-20 minutes.
- Pipe names, ‘Class of 2026,’ and other decorations on top. Let each color set slightly before adding another.
- Let the decorated cookie pizza dry at room temperature for several hours or overnight to fully set the royal icing.
- Slice and serve.
Notes
If edges brown too quickly, cover loosely with foil halfway through baking. Practice piping on parchment paper if new to royal icing. Chill dough before baking for cleaner edges. Store leftovers in airtight container at room temperature up to 3 days or refrigerated up to a week. Freeze wrapped for up to 2 months.
Nutrition
- Serving Size: 1 slice (1/8 of cook
- Calories: 320
- Sugar: 28
- Fat: 15
- Carbohydrates: 44
- Protein: 3
Keywords: cookie pizza, royal icing, sugar cookie, celebration dessert, party treat, Class of 2026, easy cookie recipe