“Did you see these cakesicles?” my friend texted me halfway through a chaotic graduation party setup. Honestly, I was skeptical — how could these tiny cake pops, decorated like graduation caps and diplomas, steal the show? But as I watched guests, young and old, eagerly grab one after another, I realized these perfect graduation cakesicles weren’t just cute props; they were the sweetest success.
It started the night before, when I was scrambling for a last-minute dessert idea. I wanted something festive but fuss-free, something that could stand out among the usual cupcakes and cookies. I dug into my baking stash, dusted off my cake pop molds, and after a few trial runs (and a few cake crumbs on the floor), these cap and diploma cakesicles took shape. The best part? They were super easy to decorate, even for a “not really a baker” type like me.
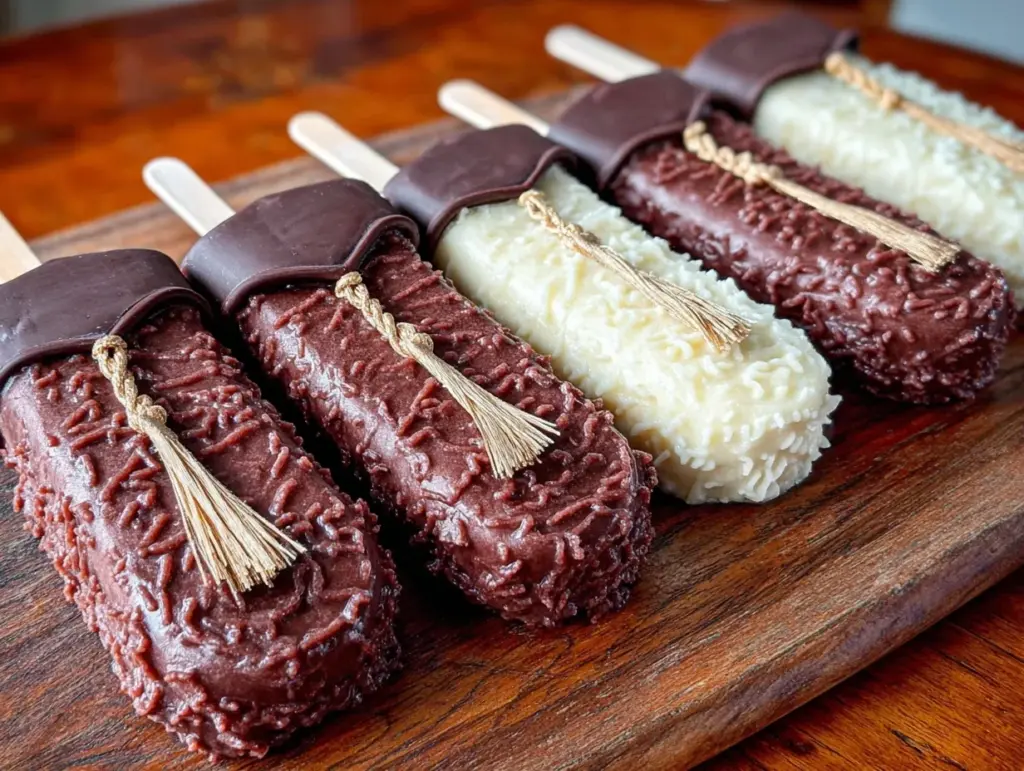
There’s something quietly satisfying about handing someone a tiny, edible graduation keepsake that feels personal and fun. They turned out to be a unique conversation starter, a sweet way to mark the day without the stress of a big cake or complicated dessert. And honestly, the way the chocolate coating crackled just right and the intricate little caps made me smile every time I reached for one.
Now, every graduation season, these cakesicles pop up on my table — it’s become my little tradition, a reminder that sometimes the smallest details bring the biggest joy. If you’re looking for a dessert that’s playful, festive, and surprisingly easy to pull off, these graduation cakesicles might just be your new secret weapon.
Why You’ll Love This Recipe
After several rounds of testing and tweaking, I can say with some certainty that these perfect graduation cakesicles with cap and diploma designs are a real crowd-pleaser. Here’s why they’ve earned a permanent spot in my celebration repertoire:
- Quick & Easy: You can have these ready in under 2 hours, including chill time — perfect for last-minute party prep or a weekend baking project.
- Simple Ingredients: No need for specialty stores. Most ingredients are pantry staples — cake mix, chocolate, candy melts, and a handful of decorative bits.
- Perfect for Graduations & Parties: Whether it’s a small family gathering or a big bash, these bite-sized treats bring festive cheer without fuss.
- Crowd-Pleaser: Kids love the fun shapes, adults appreciate the rich cake flavor, and everyone gets a little nostalgic over the diploma design.
- Unbelievably Delicious: The moist cake inside paired with the crisp chocolate shell is a texture combo you’ll want to make again and again.
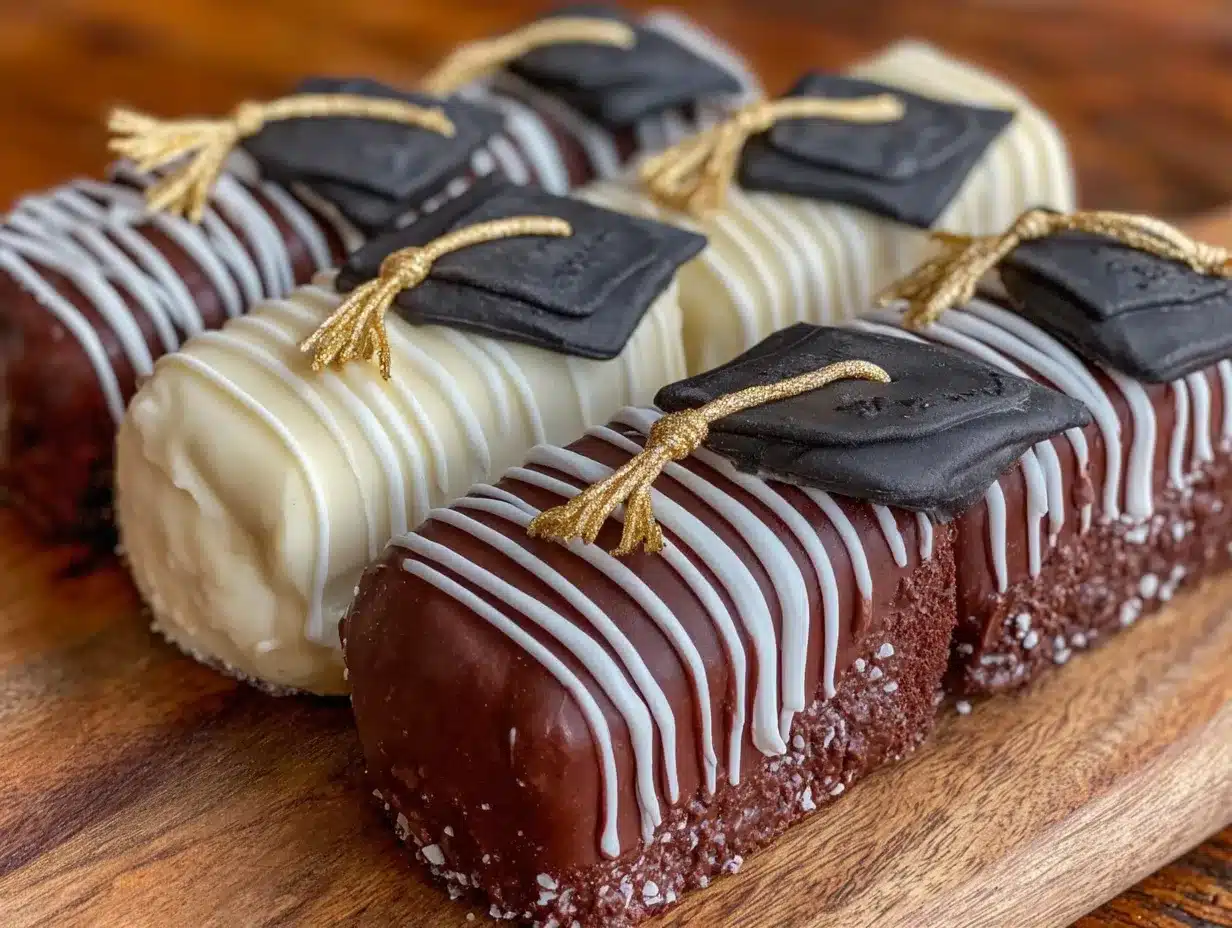
What sets this recipe apart is the attention to detail on the decorations — the edible caps have just the right size and shape, and the diplomas are tied with little chocolate ribbons that look professional but are surprisingly easy. Plus, I’ve included tips on using common brands like Wilton candy melts for best results. This isn’t just another cake pop recipe — it’s my best take on graduation cakesicles that combines charm and flavor with a fun, approachable technique.
Honestly, these cakesicles bring a little celebration to your kitchen before the big day, and that feeling of accomplishment? It’s contagious.
What Ingredients You Will Need
This recipe uses simple, wholesome ingredients to create bold flavor and those charming cap and diploma designs without the fuss. Most of these you probably already have on hand:
- For the Cake Base:
- Boxed yellow or chocolate cake mix (or homemade cake, crumbled) — I prefer Duncan Hines for consistent moisture
- Eggs (2 large, room temperature)
- Vegetable oil (½ cup / 120 ml)
- Water (1 cup / 240 ml)
- For the Frosting Binder:
- Buttercream frosting (½ cup / 115 g, store-bought or homemade) — this helps the cake crumbs stick without drying out
- For the Coating & Decoration:
- Wilton candy melts in black, white, and gold (or colored candy melts for variations)
- Dark or milk chocolate chips (½ cup / 90 g), for dipping
- Edible gold glitter or luster dust (optional, for cap shine)
- Mini pretzel sticks or black licorice strands (for diploma ties)
- Food-safe markers or edible paint pens (to add little diploma details)
- Additional Supplies:
- Lollipop sticks or sturdy wooden skewers
- Wax paper or silicone mats for drying
- Small piping bags or ziplock bags for decorating
- Mixing Bowls: For cake batter and frosting mix — medium size works best.
- Electric Mixer: Helpful for beating the cake and frosting mixture smoothly, but a sturdy spoon and some elbow grease can work too.
- Cake Pop Mold or Styrofoam Block: If you don’t have a mold, shaping the balls by hand and chilling them works fine.
- Lollipop Sticks: Essential for holding the cakesicles and dipping.
- Microwave-Safe Bowls: To melt candy melts and chocolate chips safely.
- Piping Bags or Ziplock Bags: For fine decorating with chocolate or edible paint.
- Bake the Cake: Prepare the cake mix according to package instructions (or your homemade recipe). For a 9×13 inch pan, bake at 350°F (175°C) for about 30-35 minutes. Let cool completely to room temperature.
- Crumble the Cake: Use your hands or a fork to break the cake into fine crumbs in a large bowl. No big chunks allowed here — you want an even texture for the cakesicles.
- Mix in Frosting: Add ½ cup (115 g) of buttercream frosting to the crumbs. Mix gently but thoroughly until the texture holds together when squeezed. It should feel like dense dough, not sticky or dry.
- Shape the Cakesicles: Roll the mixture into 1.5-inch (4 cm) balls, or press into cake pop molds if you have them. Insert lollipop sticks halfway into each. Place on a parchment-lined tray and chill for 30 minutes to firm up.
- Melt the Coating: In microwave-safe bowls, melt black candy melts and dark chocolate chips separately in 30-second intervals, stirring in between until smooth. Avoid overheating.
- Dip the Cakesicles: Holding the stick, dip each cake ball into the melted chocolate, tapping gently to remove excess. Place upright on wax paper or a Styrofoam block to set. Chill again for 15 minutes.
- Decorate Caps and Diplomas: Use black candy melts to form the square caps on top of cakesicles. For diplomas, roll white candy melts into thin strips or pipe chocolate to mimic scroll shapes. Tie mini pretzel sticks or black licorice strands around diplomas. Add edible gold dust for shimmer. Use edible markers to write small details if desired.
- Final Chill: Let the decorated cakesicles rest in the fridge for at least 30 minutes before serving to set decorations fully.
- Don’t Skip the Chill Time: Chilling the cake balls before dipping helps keep them firm and prevents them from falling off the sticks. Trust me, it’s worth the wait.
- Use Candy Melts, Not Just Chocolate: Candy melts have a smoother finish and set up faster, which is perfect for detailed decorations like caps and diplomas.
- Keep Your Tools Dry: Moisture ruins the melt’s texture and causes clumping—keep bowls and utensils dry and avoid steam.
- Work in Small Batches: Melt candy melts in small amounts to avoid overheating and wastage. Re-melting too often can make them grainy.
- Practice Piping on Parchment: Decorate a few test shapes before working on the cakesicles themselves to get comfortable with pressure and flow.
- Multitasking Tip: While the cake bakes or chills, prep your decorations or melt candy melts. Maximize your downtime.
- Flavor Variations: Swap yellow cake for chocolate or red velvet for a colorful twist. I once made a lemon poppy seed base that added a nice zing.
- Dietary Adaptations: Use gluten-free cake mix and dairy-free frosting to make these cakesicles allergy-friendly. Vegan candy melts are also available for a plant-based option.
- Seasonal Designs: Instead of caps and diplomas, try decorating with school colors or mascot symbols using colored candy melts. This works great for sports team celebrations or other milestones.
- Cooking Method Adjustments: If you don’t have a microwave, melt candy melts gently over a double boiler to avoid burning.
- Personal Touch: I like adding a tiny edible pearl or sprinkle on the cap button for a bit of extra sparkle — this little detail always sparks compliments.
- Serving Temperature: Serve chilled or at room temperature. If served too warm, the chocolate coating softens; too cold, and the flavors aren’t as pronounced.
- Presentation: Arrange them upright in a decorated styrofoam block or in a festive box with tissue paper for gifting. Adding small graduation-themed picks or ribbons adds charm.
- Complementary Pairings: These pair well with sparkling cider, coffee, or even a light fruit punch for celebrations.
- Storage: Keep in an airtight container in the refrigerator for up to 5 days. For longer storage, freeze individually wrapped cakesicles for up to 2 months.
- Reheating Tips: Thaw frozen cakesicles in the fridge overnight. Avoid microwaving or directly warming to preserve texture.
- Flavor Development: The flavors meld nicely if made a day ahead, but decorations might soften slightly over time — best to decorate close to serving.
- Key Ingredients: Using real buttercream and quality chocolate adds richness but also calories. Opting for light frosting or sugar-free candy melts can reduce sugar.
- Dietary Notes: Gluten-free and dairy-free versions are easy to make with the right substitutions, accommodating many dietary needs.
- Health Benefits: While not a health food, sharing these bite-sized portions helps with moderation — a little treat that satisfies without overindulgence.
Substitution tips: You can swap boxed cake mix for a gluten-free mix if needed, or use dairy-free frosting and candy melts to accommodate dietary preferences. For a dairy-free option, I like Enjoy Life brand for chocolate chips.
Equipment Needed
Here’s what I used to make these graduation cakesicles, but don’t worry — most are pretty common kitchen tools:
If you’re on a budget, reusable silicone mats or parchment paper can replace specialty drying stands. And I learned the hard way to keep candy melts dry — moisture ruins the smooth finish, so storing them in a sealed container helps a lot.
Preparation Method
Pro tip: If a cakesicle starts to wobble on the stick, remelt a little chocolate and “glue” it back in place before chilling again. Patience here pays off in presentation.
Cooking Tips & Techniques
Making these graduation cakesicles turned into a bit of an obsession for me — and here are some lessons I picked up:
One of my early mistakes was trying to dip too many at once — it got messy fast. Now, I do about 5-6 at a time to keep control and prevent the chocolate from cooling too quickly. Also, using a styrofoam block to let the cakesicles dry upright made a big difference in presentation. If you’re interested in more easy dinner ideas to celebrate special days, my honey mustard glazed chicken thighs recipe is a reliable crowd-pleaser with minimal effort.
Variations & Adaptations
This recipe is flexible, so you can tweak it to fit your style or dietary needs:
And if you’re planning a full party menu, pairing these little cakesicles with something hearty like my shredded beef burrito bowls can balance sweet and savory perfectly for any graduation feast.
Serving & Storage Suggestions
Serving these cakesicles is as fun as making them — here are some pointers:
Nutritional Information & Benefits
Each cakesicle contains roughly 150-180 calories, depending on the cake and coating used. The recipe is more about celebration than dieting, but you can make tweaks for health-conscious eaters:
Personally, I see these cakesicles as a joyful way to celebrate milestones with loved ones without the stress of a big dessert — a small indulgence that marks a big moment.
Conclusion
Perfect graduation cakesicles with cap and diploma designs are more than just cute treats — they’re tiny tokens of celebration that bring people together. They’re simple enough for a beginner baker but polished enough to impress guests. Whether you’re hosting a party, gifting a graduate, or just want a fun baking project, these cakesicles offer a sweet slice of accomplishment.
I love how customizable they are and how making them has become a quiet tradition in my circle. Baking these cakesicles reminds me that the little details matter — and that joy can come in the smallest, most delicious bites.
If you give this recipe a try, I’d love to hear how your designs turn out or any creative twists you add. Sharing these moments and stories is what makes baking truly special, so don’t be shy to leave a comment or share your photos!
Here’s to many more celebrations filled with sweet memories and perfect bites.
FAQs About Perfect Graduation Cakesicles
How long do graduation cakesicles stay fresh?
Stored in an airtight container in the refrigerator, they stay fresh for up to 5 days. You can freeze them for up to 2 months if wrapped well.
Can I make these cakesicles without a cake pop mold?
Absolutely! You can roll the cake mixture into balls by hand and chill them before dipping. The mold just helps with uniform shapes.
What’s the best way to decorate the caps and diplomas?
Use candy melts for smooth coating and edible markers or piping bags for details. Mini pretzels or licorice strands make great diploma ties.
Can I prepare these cakesicles in advance?
Yes, you can make them a day or two ahead. Just store them chilled and decorate close to serving for the best appearance.
Are there any allergy-friendly alternatives?
Use gluten-free cake mix and dairy-free frosting and candy melts to accommodate common allergies. Vegan candy melts are also available for plant-based diets.
Pin This Recipe!
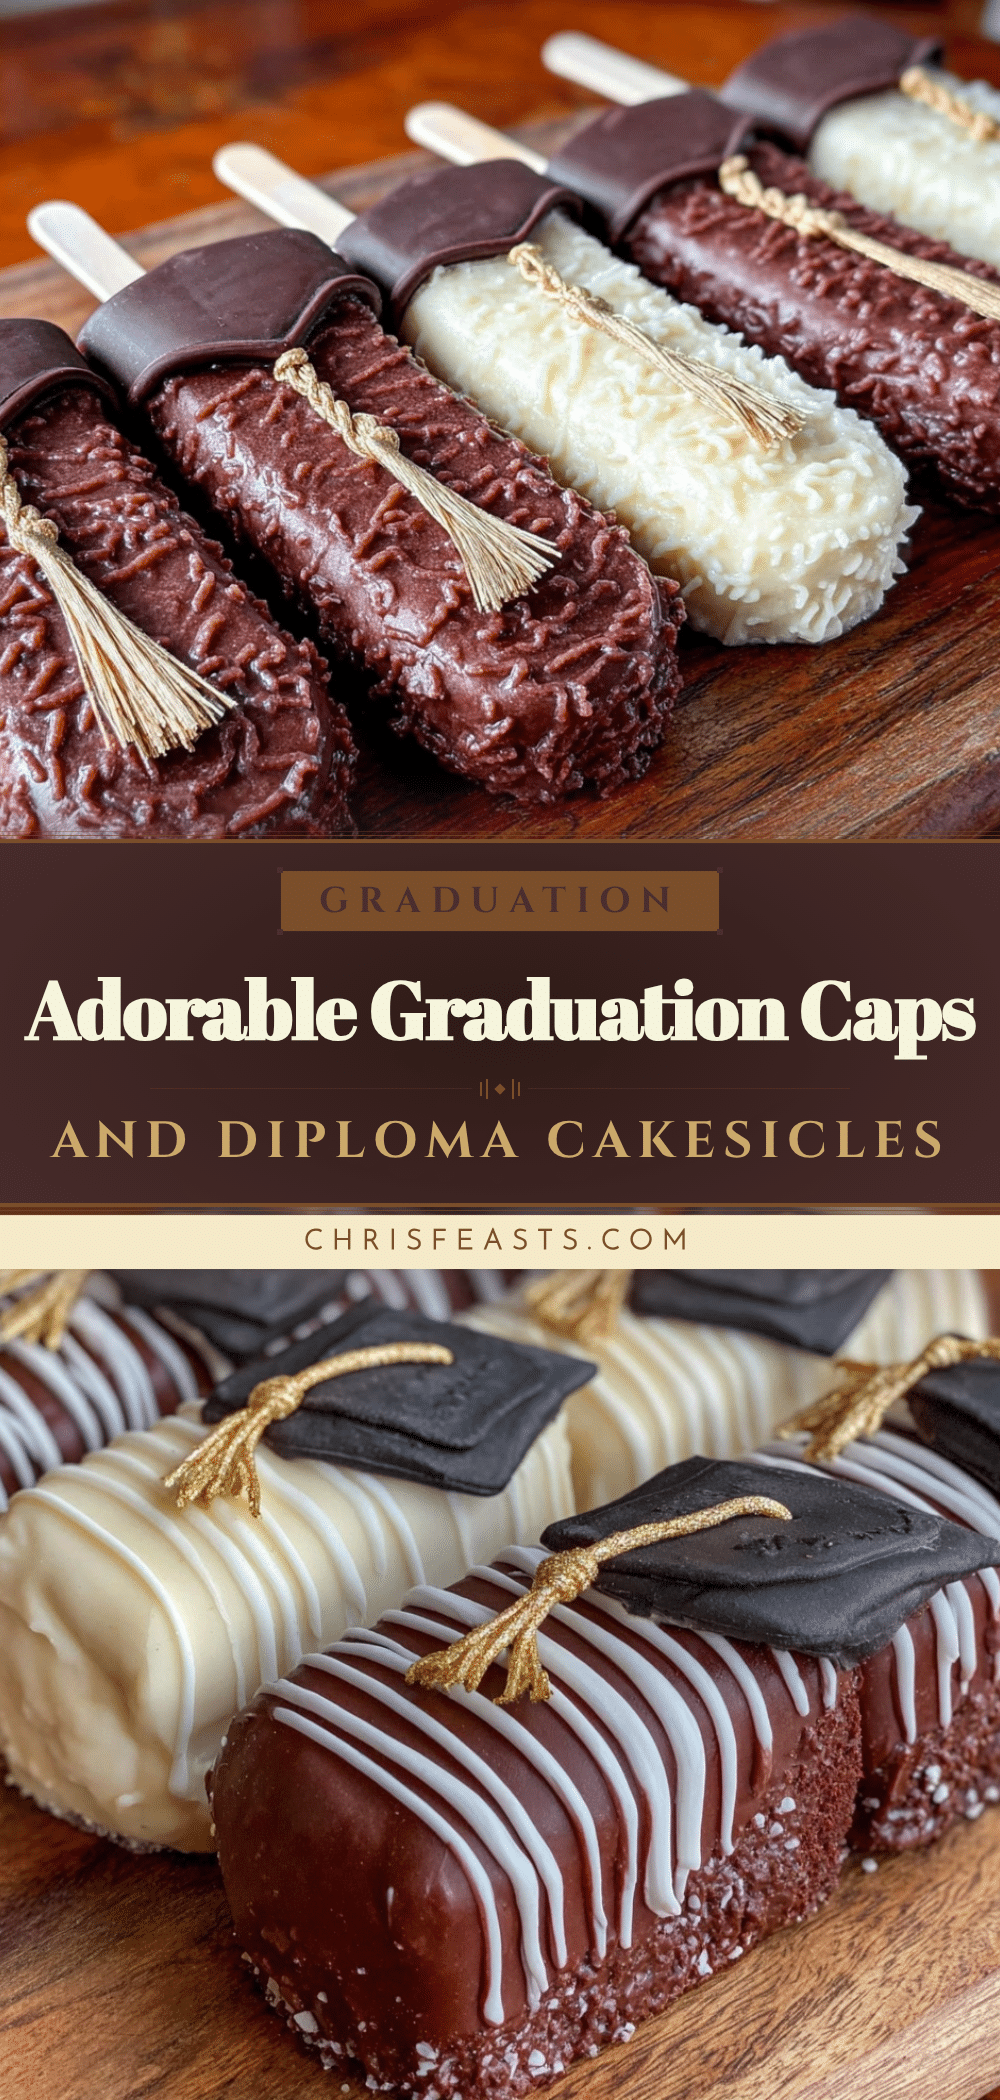
Perfect Graduation Cakesicles 5 Easy Cap and Diploma Design Ideas

These graduation cakesicles are festive, easy-to-make bite-sized treats decorated like graduation caps and diplomas, perfect for celebrations and parties.
- Prep Time: 30 minutes
- Cook Time: 35 minutes
- Total Time: 2 hours
- Yield: 24 cakesicles 1x
- Category: Dessert
- Cuisine: American
Ingredients
- Boxed yellow or chocolate cake mix (or homemade cake, crumbled) – Duncan Hines preferred
- 2 large eggs, room temperature
- ½ cup (120 ml) vegetable oil
- 1 cup (240 ml) water
- ½ cup (115 g) buttercream frosting (store-bought or homemade)
- Wilton candy melts in black, white, and gold (or colored candy melts for variations)
- ½ cup (90 g) dark or milk chocolate chips
- Edible gold glitter or luster dust (optional)
- Mini pretzel sticks or black licorice strands (for diploma ties)
- Food-safe markers or edible paint pens
- Lollipop sticks or sturdy wooden skewers
- Wax paper or silicone mats
- Small piping bags or ziplock bags
Instructions
- Prepare the cake mix according to package instructions and bake in a 9×13 inch pan at 350°F (175°C) for 30-35 minutes. Let cool completely.
- Crumble the cooled cake into fine crumbs in a large bowl.
- Mix in ½ cup (115 g) buttercream frosting until the mixture holds together like dense dough.
- Shape the mixture into 1.5-inch (4 cm) balls or press into cake pop molds. Insert lollipop sticks halfway into each. Chill on a parchment-lined tray for 30 minutes.
- Melt black candy melts and dark chocolate chips separately in microwave-safe bowls in 30-second intervals, stirring until smooth.
- Dip each cake ball into melted chocolate, tap off excess, and place upright on wax paper or Styrofoam block. Chill for 15 minutes.
- Decorate caps using black candy melts to form squares on top. For diplomas, roll white candy melts into strips or pipe chocolate scroll shapes. Tie with mini pretzels or licorice strands. Add edible gold dust and use edible markers for details.
- Chill decorated cakesicles in the fridge for at least 30 minutes before serving.
Notes
Chill cake balls before dipping to prevent falling off sticks. Use candy melts for smoother finish and faster setting. Keep tools dry to avoid clumping. Work in small batches when melting candy melts. Practice piping on parchment before decorating cakesicles. If a cakesicle wobbles on the stick, remelt chocolate to glue it back.
Nutrition
- Serving Size: 1 cakesicle
- Calories: 165
- Sugar: 15
- Sodium: 110
- Fat: 9
- Saturated Fat: 5
- Carbohydrates: 20
- Fiber: 1
- Protein: 2
Keywords: graduation cakesicles, cake pops, graduation dessert, easy cakesicles, cap and diploma cakesicles, party treats, bite-sized desserts


