“Hey, can you make those number cookies again for the party?” That text popped up just when I was thinking about what to bake for my niece’s big milestone. Honestly, I wasn’t sure at first—number-shaped sugar cookies always looked a bit intimidating with their fancy shapes and delicate icing. But, you know, sometimes the simplest things turn into the best memories.
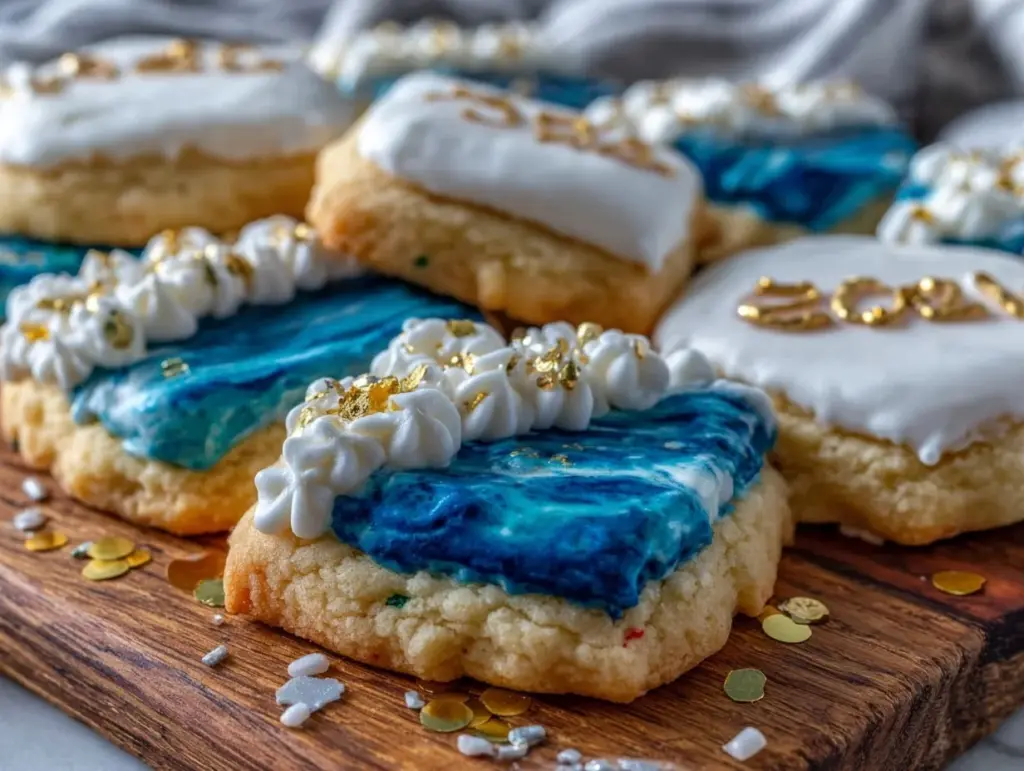
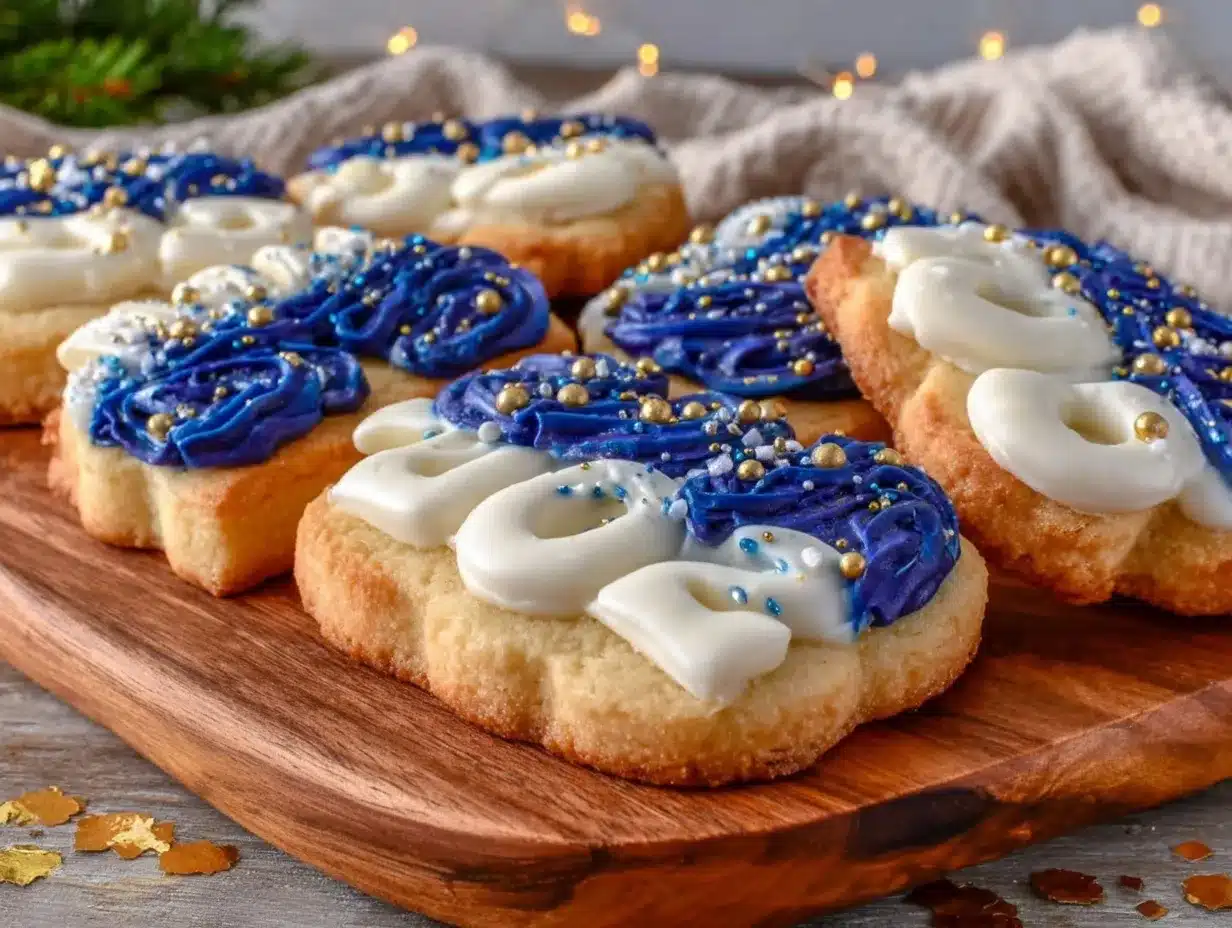
Last spring, during a quiet afternoon at home, I found myself rummaging through my cookie cutters and stumbled upon the numbers set I’d forgotten I had. The idea clicked instantly: why not make some perfect Class of 2026 number-shaped sugar cookies for the upcoming graduation bash? I was skeptical about getting the shapes just right and the icing smooth enough, but the result was surprisingly satisfying.
The smell of freshly baked sugar cookies filled the kitchen while I carefully piped each number with colorful frosting. It was a peaceful moment, really—kind of grounding amid the usual whirlwind of party prep. A few bites later, my niece’s smile told me everything: these cookies weren’t just treats; they were little edible trophies, a sweet nod to achievement and celebration.
What stuck with me most was how this recipe felt approachable, even for someone like me who’s “not really a baker.” It’s the kind of recipe that invites you to slow down, enjoy the process, and share something special without fuss. So, whether it’s your kid’s graduation, a milestone birthday, or just a reason to make something cheerful, these Class of 2026 number-shaped sugar cookies might just become your new go-to. They’re a little bit fun, a little bit fancy, and totally worth the floury mess.
Why You’ll Love This Recipe
After making these number-shaped sugar cookies several times, I can tell you what sets this recipe apart from the usual sugar cookie fare. It’s been tested in my kitchen more times than I can count—and each batch has turned out just right.
- Quick & Easy: You can have these cookies baked and decorated in under 2 hours, perfect when you need a sweet treat on short notice.
- Simple Ingredients: No need for fancy baking supplies—just pantry staples like flour, sugar, butter, and eggs.
- Perfect for Celebrations: Ideal for graduation parties, end-of-school-year treats, or just marking the Class of 2026 milestones with a tasty twist.
- Crowd-Pleaser: Kids, teens, and adults all love these—especially with the fun number shapes and colorful frosting.
- Unbelievably Delicious: The cookies have a tender bite with just the right sweetness, and the frosting adds that festive pop.
What really makes this recipe stand out is the balance between a buttery, slightly crisp cookie and the vibrant, smooth icing that holds its shape well but melts softly on your tongue. Instead of just rolling out dough and cutting random shapes, the number cutters give it that personal, celebratory edge. Plus, I’ve found that chilling the dough before baking helps keep the numbers sharp and clean—no more worrying about misshapen digits!
Honestly, this recipe feels like a little celebration in itself. It’s comforting, approachable, and makes you feel like you pulled off something special, even if you’re juggling a busy schedule. If you’ve tried my creamy blueberry almond butter smoothie bowl or the honey mustard glazed chicken thighs, you know I like recipes that come together without a lot of fuss but still impress. These sugar cookies fit that bill perfectly.
What Ingredients You Will Need
This sugar cookie recipe uses simple, wholesome ingredients to deliver bold flavor and a satisfying texture without the fuss. Most of these are pantry staples, which means you can whip up a batch anytime without running to the store.
- All-purpose flour: 3 cups (360 g) – The base of your cookies, providing structure.
- Baking powder: 1 teaspoon – Helps the cookies rise just enough for a light texture.
- Salt: ½ teaspoon – Balances sweetness and enhances flavor.
- Unsalted butter: 1 cup (226 g), softened – Use a good-quality brand like Kerrygold for rich flavor.
- Granulated sugar: 1 cup (200 g) – Sweetens the dough perfectly without overpowering.
- Large eggs: 2, room temperature – Binds ingredients together and adds moisture.
- Pure vanilla extract: 2 teaspoons – For that warm, inviting flavor.
- Milk: 2 tablespoons (30 ml), optional – Adds slight tenderness if dough feels dry.
For the frosting and decorating:
- Powdered sugar: 4 cups (480 g) – The base for smooth, sweet icing.
- Unsalted butter: ½ cup (113 g), softened – Keeps frosting creamy and spreadable.
- Milk or heavy cream: 2-3 tablespoons (30-45 ml) – Adjust for desired frosting consistency.
- Vanilla extract: 1 teaspoon – Adds depth to the frosting.
- Food coloring: Assorted colors – Use gel colors for vibrant, easy-to-control hues.
If you want to switch things up, you can use almond flour for a gluten-free option (though texture will vary), or swap in dairy-free butter and coconut milk for a vegan-friendly batch. For frosting, I’ve had good results with store-bought royal icing mixes if you’re pressed for time, but homemade really wins on taste and texture.
Equipment Needed
- Mixing bowls: A large bowl for dough and a medium one for frosting.
- Electric mixer or stand mixer: For creaming butter and sugar smoothly (a hand mixer works too).
- Measuring cups and spoons: Accurate measurements make all the difference.
- Rolling pin: For rolling out dough evenly—if you don’t have one, a clean wine bottle can do the trick.
- Number-shaped cookie cutters: Essential for the Class of 2026 theme, available in most baking stores or online.
- Baking sheets: Preferably heavy gauge, lined with parchment paper or silicone mats.
- Cooling racks: To let cookies cool completely before decorating.
- Piping bags and tips: For icing the numbers neatly—zip-top bags with a snipped corner also work fine.
Personally, I’ve found that investing in a set of quality number cookie cutters makes this project less frustrating. Cheap sets tend to bend or lose shape, which drives me nuts when I’m aiming for clean edges. Also, silicone mats for baking sheets keep cookies from sticking and help with even baking. If you don’t have a stand mixer, no worries—a sturdy hand mixer or even vigorous hand mixing can get you there, it just takes a bit more elbow grease.
Preparation Method
- Mix dry ingredients: In a medium bowl, whisk together 3 cups (360 g) of all-purpose flour, 1 teaspoon baking powder, and ½ teaspoon salt. Set aside. This keeps the rising agents and salt evenly distributed.
- Cream butter and sugar: In a large bowl, beat 1 cup (226 g) softened unsalted butter and 1 cup (200 g) granulated sugar with an electric mixer on medium speed until light and fluffy, about 3-4 minutes. You’ll notice the mixture turning pale and smooth—that’s your cue.
- Add eggs and vanilla: Beat in 2 large eggs, one at a time, ensuring each is incorporated before adding the next. Stir in 2 teaspoons pure vanilla extract.
- Combine wet and dry: Gradually add the flour mixture to the wet ingredients, mixing on low speed until just combined. If the dough feels dry or crumbly, add 1-2 tablespoons (15-30 ml) milk to bring it together. Avoid overmixing to keep cookies tender.
- Chill the dough: Shape dough into two discs, wrap tightly in plastic wrap, and refrigerate for at least 1 hour (or up to 24 hours). Chilling firms the dough, making it easier to roll and cut clean shapes.
- Preheat oven to 350°F (175°C): Line baking sheets with parchment paper or silicone mats.
- Roll and cut: On a lightly floured surface, roll out one disc of dough to about ¼ inch (6 mm) thickness. Use number cutters to stamp out shapes, pressing firmly and lifting carefully. Place cookies 1 inch (2.5 cm) apart on baking sheets.
- Bake: Bake for 8-10 minutes, or until edges just begin to turn golden. The centers may look slightly soft but will firm up as they cool.
- Cool: Transfer cookies to wire racks immediately after baking to cool completely before decorating.
- Prepare frosting: Beat ½ cup (113 g) softened unsalted butter until creamy. Gradually add 4 cups (480 g) powdered sugar, alternating with 2-3 tablespoons (30-45 ml) milk or cream, until smooth and spreadable. Mix in 1 teaspoon vanilla extract. Divide frosting and tint with gel food colors as desired.
- Decorate: Use piping bags or zip-top bags with small cut corners to outline and flood each number cookie with colored frosting. Let dry for at least 1 hour at room temperature.
If you find the dough too sticky at any point, sprinkle a bit more flour—but don’t go overboard, or cookies may turn tough. For neat edges, I like to dip the cookie cutters in flour before each cut. When piping frosting, a steady hand helps, but if you mess up, just scrape the frosting off with a toothpick and try again. Patience is key, especially when it comes to the intricate number shapes.
Cooking Tips & Techniques
Getting these number-shaped sugar cookies just right can feel like a small art form, but a few tricks make the process smoother.
- Chill the dough well: This is non-negotiable. Cold dough rolls out cleaner and holds shape better. I usually chill mine overnight if I can.
- Roll evenly: Use rolling pin guides or thickness rings to keep dough at a consistent ¼ inch. Uneven cookies bake unevenly, leading to some burnt edges or undercooked centers.
- Flour cutters lightly: Dust cookie cutters with flour before pressing to avoid dough sticking and misshapen numbers.
- Don’t overbake: Cookies firm up as they cool, so pull them out once edges are just golden. Overbaking leads to dry, crumbly treats.
- Use gel food coloring: It gives vibrant color without thinning your frosting, unlike liquid dyes.
- Practice piping on parchment: If you’re new to decorating, try a few practice strokes on parchment paper before frosting the cookies.
- Let frosting set fully: This prevents smudging and keeps your numbers looking crisp for presentation.
I once skipped chilling the dough because I was in a rush—big mistake. The cookies spread too much and lost their shape entirely. Trust me, it’s worth the wait! Also, I’ve learned the hard way that rushing frosting dries leads to cracks or messy edges, so giving it time to set is crucial, especially if you want those sharp number outlines. Multitasking during baking? Prepare your frosting while cookies bake to save time without stress.
Variations & Adaptations
This recipe is pretty flexible, letting you tweak it for different diets or flavor profiles without losing that classic sugar cookie charm.
- Gluten-Free Version: Swap all-purpose flour with a 1-to-1 gluten-free baking flour blend. The texture will be a bit softer but still delicious.
- Vegan Adaptation: Use vegan butter and a flax egg (1 tablespoon ground flaxseed + 3 tablespoons water) instead of eggs. Coconut milk works well for the frosting liquid.
- Flavored Frosting: Add a few drops of almond, lemon, or peppermint extract to the frosting for a twist on the classic vanilla.
- Seasonal Colors: For spring graduations, pastel colors work beautifully. For winter, go with metallic gold or silver (edible glitter optional).
- Alternative Shapes: If numbers aren’t your thing, switch it up with letters for names or shapes like stars and caps to match the graduation theme.
Personally, I once made a batch using lemon zest in the dough and blueberry frosting for a fresh, summery vibe—it was a hit at a backyard party! If you want to incorporate a savory touch into your celebrations, pairing these sweet cookies with a hearty meal like sausage and peppers skillet can balance your menu nicely.
Serving & Storage Suggestions
Serve these number-shaped sugar cookies at room temperature for the best flavor and texture. They look fantastic arranged on a platter spelling out the graduating year or the graduate’s name.
Pair them with cold milk, hot cocoa, or even a lightly brewed tea to complement the sweetness. If you’re hosting a party, these cookies make a charming centerpiece alongside homemade snacks or comforting dinners.
To store, keep cookies in an airtight container at room temperature for up to 5 days. For longer storage, freeze undecorated cookies in a single layer on baking sheets until solid, then transfer to freezer bags. Decorated cookies freeze better after the frosting has completely set; wrap individually in plastic wrap to protect the icing.
When reheating, avoid the microwave as it can soften the frosting. Instead, let frozen cookies thaw at room temperature. Flavors actually mellow and deepen after a day, so making these a day ahead can be a real time saver.
Nutritional Information & Benefits
Each cookie (depending on size) contains roughly 150-180 calories, with about 7 grams of fat and 20 grams of carbohydrates. They are a treat, so moderation is key!
The recipe uses real butter and eggs, providing some protein and fat that help keep you full a bit longer than store-bought sugary snacks. Vanilla extract adds flavor without added sugar, and the powdered sugar frosting lets you control sweetness more than pre-packaged icings.
For those monitoring allergens, this recipe contains gluten, dairy, and eggs, but it’s easy to adapt as mentioned. These cookies are a fun way to celebrate while keeping ingredients straightforward and transparent—something I always appreciate when sharing with family and friends.
Conclusion
Making the perfect Class of 2026 number-shaped sugar cookies isn’t just about baking; it’s about marking a moment with something sweet and handmade. Whether you’re a pro baker or just someone who loves a good kitchen project, this recipe invites you in with simple ingredients and clear steps.
Feel free to tweak the colors, flavors, or shapes to match your celebration style. For me, these cookies are a little reminder that sometimes the best celebrations come with flour-dusted hands and a warm kitchen.
If you try this recipe, I’d love to hear how your cookies turned out or what personal touches you added. Sharing in those small joys is what makes cooking so rewarding.
Here’s to sweet moments and happy celebrations!
Frequently Asked Questions
How do I keep my number-shaped cookies from spreading too much?
Chilling your dough for at least an hour before rolling and cutting is key. Also, avoid using too much butter or sugar and bake at the right temperature (350°F / 175°C) to keep shapes crisp.
Can I prepare the dough ahead of time?
Absolutely! You can refrigerate the dough for up to 24 hours or freeze it for longer storage. Just thaw in the fridge before rolling out.
What’s the best way to get smooth, vibrant frosting colors?
Use gel food coloring, which won’t thin your frosting. Add color a little at a time until you get the shade you want.
Can I make these cookies gluten-free or vegan?
Yes. Use a gluten-free flour blend and substitute eggs with flax eggs and butter with vegan alternatives. Adjust liquid amounts as needed.
How do I store decorated sugar cookies without ruining the icing?
Let the frosting dry completely, then store cookies in a single layer in an airtight container. If stacking, place parchment paper between layers to protect the icing.
Pin This Recipe!
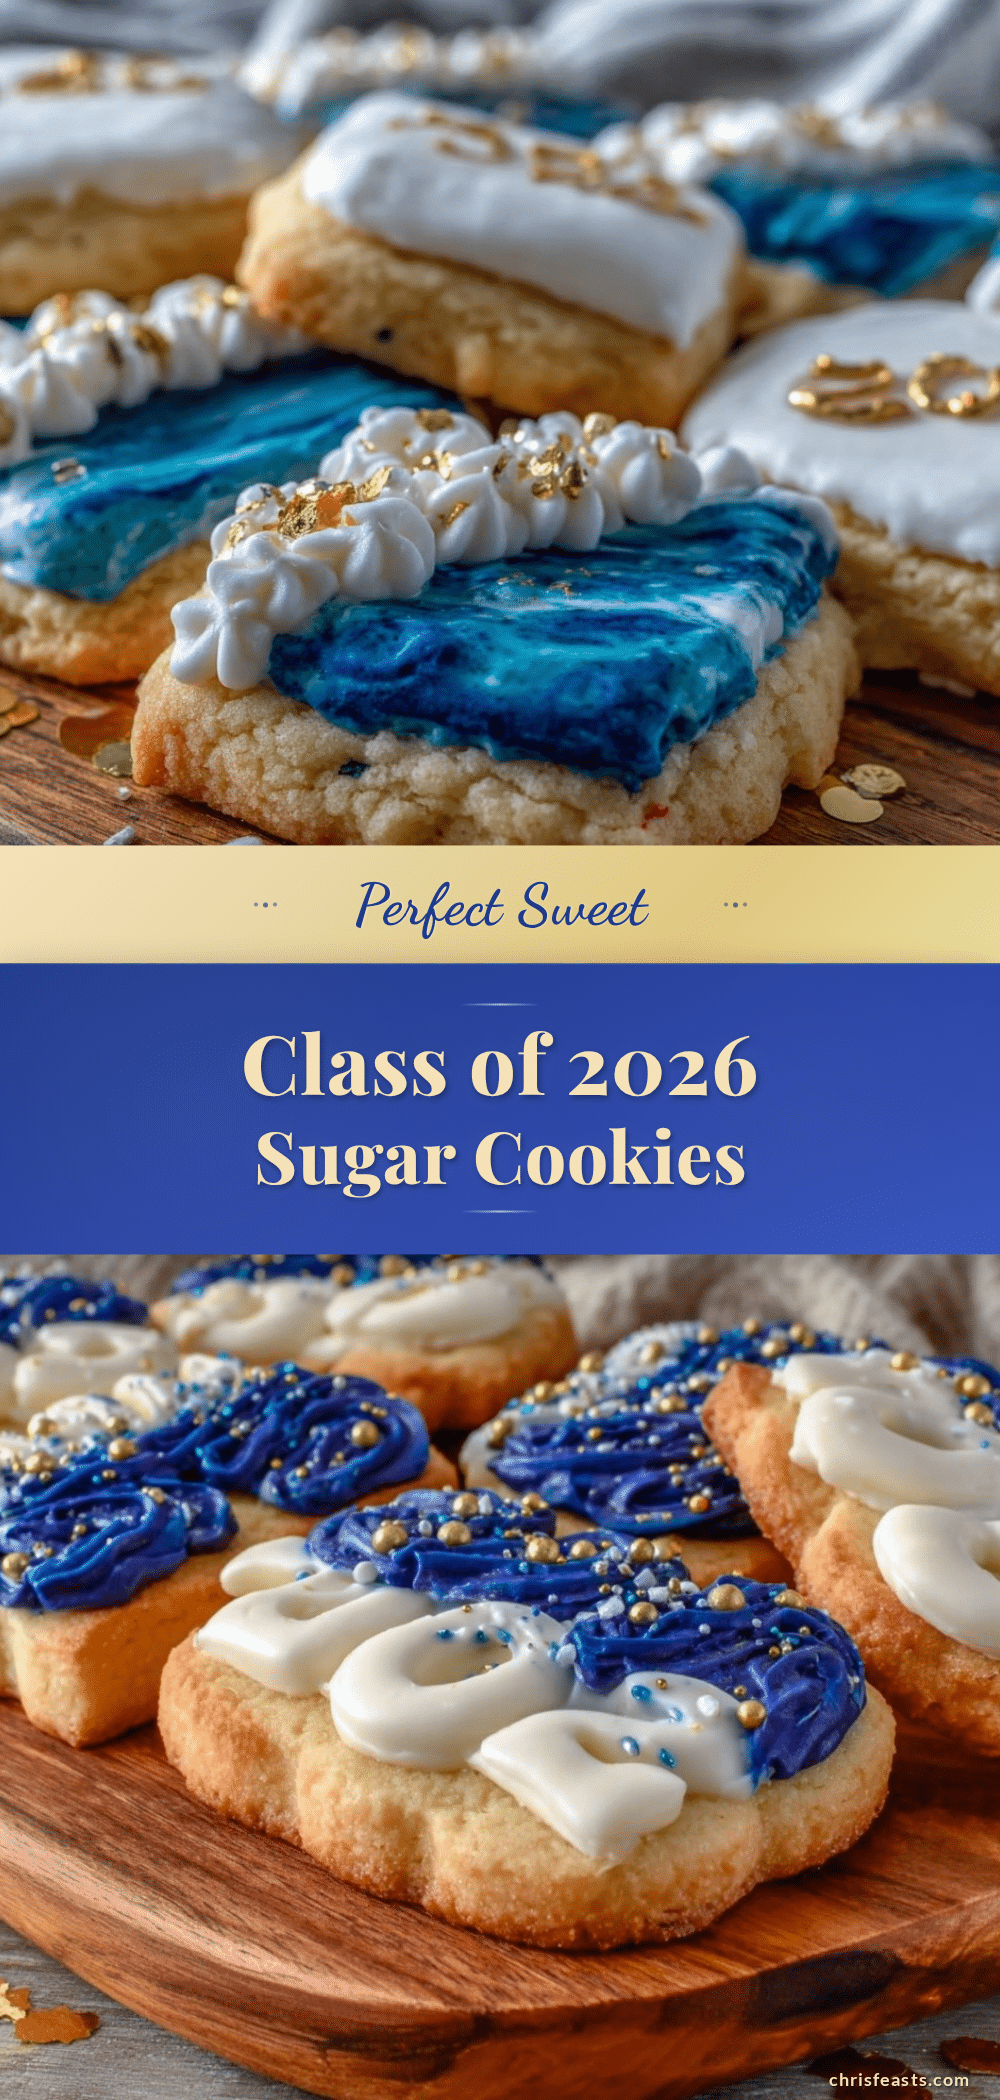
Perfect Class of 2026 Number-Shaped Sugar Cookies

These number-shaped sugar cookies are perfect for celebrating milestones like graduations. They feature a tender, buttery cookie base with smooth, vibrant frosting that holds its shape beautifully.
- Prep Time: 20 minutes
- Cook Time: 10 minutes
- Total Time: 1 hour 30 minutes
- Yield: 24 cookies 1x
- Category: Dessert
- Cuisine: American
Ingredients
- 3 cups (360 g) all-purpose flour
- 1 teaspoon baking powder
- ½ teaspoon salt
- 1 cup (226 g) unsalted butter, softened
- 1 cup (200 g) granulated sugar
- 2 large eggs, room temperature
- 2 teaspoons pure vanilla extract
- 2 tablespoons (30 ml) milk, optional
- 4 cups (480 g) powdered sugar (for frosting)
- ½ cup (113 g) unsalted butter, softened (for frosting)
- 2–3 tablespoons (30–45 ml) milk or heavy cream (for frosting)
- 1 teaspoon vanilla extract (for frosting)
- Assorted gel food coloring
Instructions
- In a medium bowl, whisk together flour, baking powder, and salt. Set aside.
- In a large bowl, beat softened butter and granulated sugar with an electric mixer on medium speed until light and fluffy, about 3-4 minutes.
- Beat in eggs one at a time, then stir in vanilla extract.
- Gradually add the flour mixture to the wet ingredients, mixing on low speed until just combined. Add 1-2 tablespoons milk if dough feels dry.
- Shape dough into two discs, wrap in plastic wrap, and refrigerate for at least 1 hour.
- Preheat oven to 350°F (175°C). Line baking sheets with parchment paper or silicone mats.
- Roll out one disc of dough on a lightly floured surface to about ¼ inch (6 mm) thickness.
- Use number-shaped cookie cutters to cut shapes and place cookies 1 inch apart on baking sheets.
- Bake for 8-10 minutes until edges begin to turn golden. Cool on wire racks.
- For frosting, beat softened butter until creamy. Gradually add powdered sugar alternating with milk or cream until smooth. Mix in vanilla extract and tint with gel food coloring.
- Decorate cookies using piping bags or zip-top bags with small cut corners. Let frosting dry for at least 1 hour at room temperature.
Notes
Chill dough for at least 1 hour to prevent spreading and maintain sharp shapes. Use gel food coloring for vibrant frosting without thinning. Practice piping on parchment paper before decorating cookies. Let frosting dry completely before storing to avoid smudging.
Nutrition
- Serving Size: 1 cookie
- Calories: 165
- Sugar: 12
- Sodium: 90
- Fat: 7
- Saturated Fat: 4
- Carbohydrates: 20
- Fiber: 0.5
- Protein: 2
Keywords: sugar cookies, number-shaped cookies, graduation cookies, Class of 2026, homemade sugar cookies, easy sugar cookies, decorated cookies


