“I didn’t think I’d pull it off,” I whispered to myself, clutching a handful of crushed Oreos and cream cheese. It was late afternoon, and the graduation party was just hours away. The idea of making homemade treats that looked like graduation caps felt ambitious—honestly, a bit over my head. But you know how it goes: when you want to impress without spending all day in the kitchen, you get creative fast.
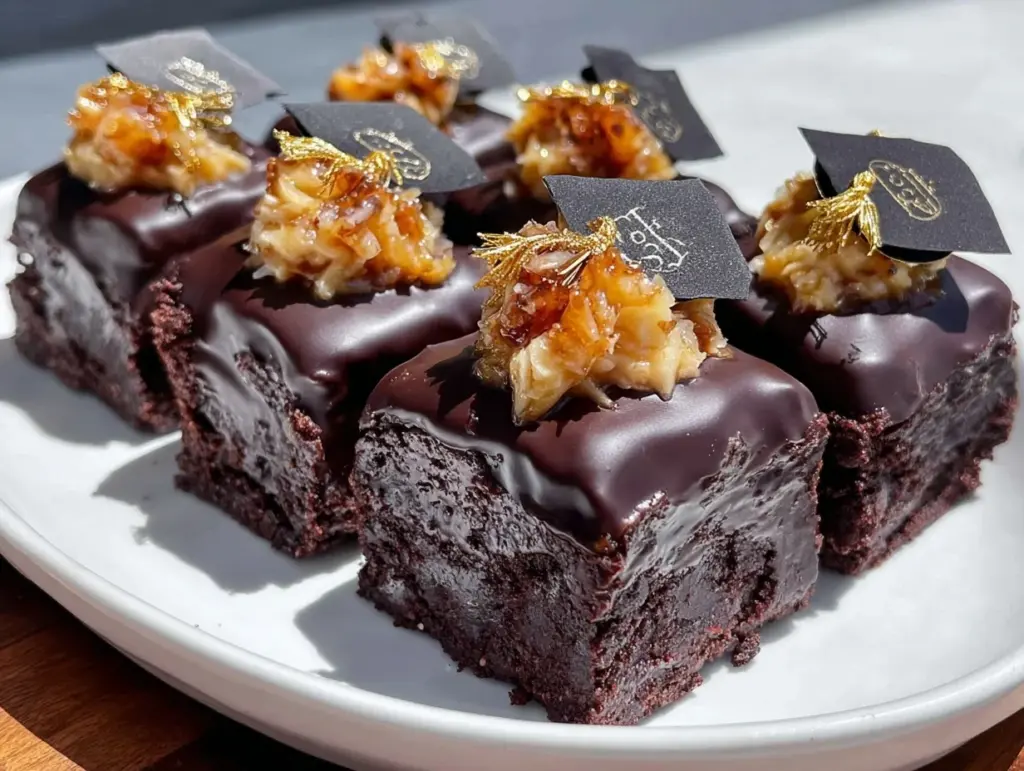
That’s how the Perfect Graduation Cap Oreo Truffles with Gold Tassel came to be. I stumbled into this recipe by mixing leftover Oreos with cream cheese because I needed a quick dessert. What started as a simple experiment turned into a sweet, crowd-stopping hit. The best part? The gold tassel detail made these truffles feel like tiny edible diplomas, perfect for celebrating milestones.
Late that evening, while wrapping the last tassels and lining them up on the platter, I realized these truffles weren’t just about dessert. They carried the excitement of accomplishment and the joy of sharing something special. It’s those little moments—biting into a rich, creamy Oreo truffle adorned with a shiny gold tassel—that make celebrations unforgettable.
Why You’ll Love This Recipe
After making these Perfect Graduation Cap Oreo Truffles a handful of times (okay, maybe more than a handful), I can say they strike the right balance between fun and fuss-free. Here’s what makes them a winner:
- Quick & Easy: Ready to serve in about 45 minutes, including chilling time. Perfect for last-minute party prep or spontaneous celebrations.
- Simple Ingredients: No fancy or hard-to-find items. Just Oreos, cream cheese, chocolate, and a few craft touches like gold edible paint or sprinkles.
- Perfect for Graduation Parties: These truffles bring a festive vibe to any graduation spread, whether it’s a casual backyard bash or a formal family gathering.
- Crowd-Pleaser: Kids and adults alike can’t resist the creamy, crunchy texture combined with a touch of chocolate.
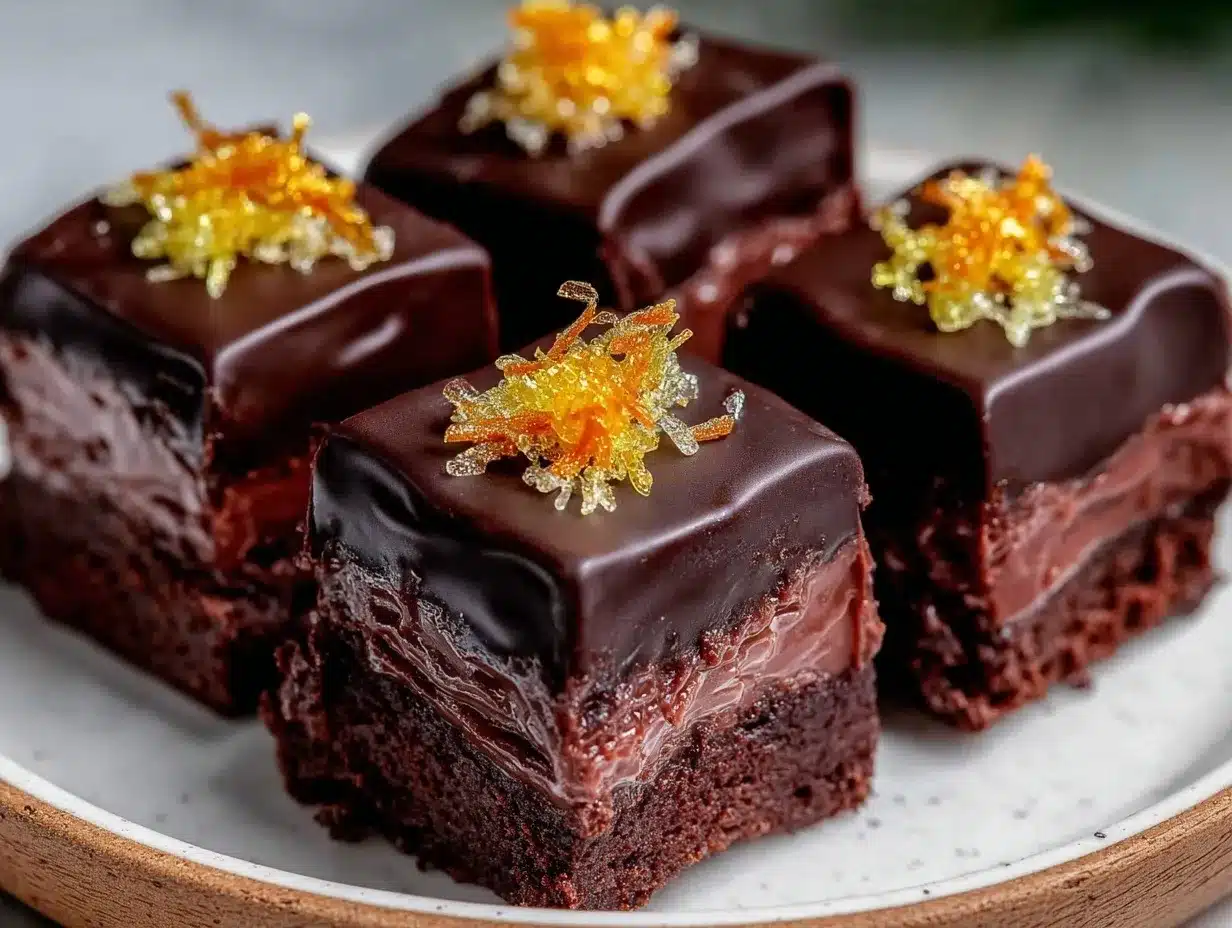
- Unbelievably Delicious: The cream cheese softens the crushed Oreos into a luscious filling, while the chocolate coating adds that satisfying snap.
What sets this recipe apart? The little details, honestly. The perfectly shaped cap, the gold tassel painted on by hand, and the balance of sweet and creamy textures make these truffles feel special. They’re not just cookie balls with a decoration slapped on—they’re mini edible achievements. If you’ve ever tried to make Oreo truffles before and found them too dense or plain, this recipe’s subtle tweaks make all the difference.
What Ingredients You Will Need
This recipe uses simple, wholesome ingredients to create a festive treat that’s as fun to make as it is to eat. Most are pantry staples, and substitutions are easy if you want to customize.
- Oreos: About 36 cookies (1 package), crushed finely. Classic Oreos work best for that perfect chocolate flavor.
- Cream Cheese: 8 oz (225 g), softened to room temperature. This binds the crumbs and adds creamy richness.
- Chocolate Melts or Candy Coating: 12 oz (340 g), for dipping and coating the truffles. Semi-sweet or dark chocolate blends well here.
- Gold Edible Paint or Luster Dust: For painting the tassels (a little goes a long way). Available at specialty baking stores or online.
- Black Fondant or Modeling Chocolate: Optional, for crafting the cap tops if you want a more defined look.
- Toothpicks or Small Paintbrush: For applying the gold tassel details precisely.
- Sprinkles (Optional): Black or gold sugar crystals to add extra sparkle.
Ingredient tips: For the best texture, I recommend using a brand of cream cheese without stabilizers or additives, like Philadelphia. If you prefer a dairy-free version, substitute with vegan cream cheese and use dairy-free chocolate. If Oreos aren’t your thing, try chocolate wafer cookies crushed fine for a slightly different flavor profile.
Equipment Needed
- Mixing Bowls: One large for combining Oreo crumbs and cream cheese, and one for melting chocolate.
- Food Processor or Plastic Bag & Rolling Pin: For crushing Oreos finely. I’ve tried both; food processors give a more even crumb, but a rolling pin works well with a bit of elbow grease.
- Baking Sheet & Parchment Paper: To chill and set the truffles without sticking.
- Double Boiler or Microwave-Safe Bowl: For melting chocolate gently without scorching.
- Small Paintbrush or Toothpicks: Essential for painting the gold tassel detail accurately.
- Cooling Rack: Optional but helpful for draining excess chocolate after dipping.
Personally, using a food processor saved me tons of time and effort crushing the Oreos evenly. For budget-friendly tools, a sturdy zip-top bag and rolling pin work great if you don’t want to invest in a processor. Also, keep your chocolate melting tools clean and dry—water can cause chocolate to seize, trust me, I’ve learned that the hard way!
Preparation Method
- Crush the Oreos: Place the Oreos in a food processor and pulse until crumbs are fine and uniform (about 20 seconds). Alternatively, put the cookies in a sealed plastic bag and crush with a rolling pin until fine. Aim for a sandy texture without large chunks.
- Mix with Cream Cheese: Transfer crumbs to a large bowl and add the softened cream cheese. Stir with a spatula or mix with your hands until fully combined. The mixture should be moist but hold together well when pressed (about 3-5 minutes mixing).
- Shape the Truffles: Scoop about 1 tablespoon (15 g) of the mixture and roll into tight balls between your palms. Place them on a parchment-lined baking sheet. Chill in the fridge for at least 30 minutes to firm up.
- Prepare Chocolate Coating: Melt the chocolate in a microwave in 20-second bursts, stirring between each, until smooth. Alternatively, melt over a double boiler. Keep warm but not hot.
- Dip the Truffles: Using a fork or dipping tool, dip each chilled ball into the chocolate to coat fully. Let excess drip off, then return to parchment paper. Work quickly before chocolate hardens (about 1-2 minutes per truffle).
- Shape the Graduation Caps: For each truffle, create a flat square “cap” on top using black fondant or modeling chocolate, about 1.5 inches (4 cm) square. Press gently so it sticks but doesn’t flatten the truffle.
- Paint the Gold Tassel: Using a fine paintbrush or toothpick dipped in edible gold paint or luster dust mixed with a tiny bit of clear vanilla extract, paint a tassel detail on each cap. Let dry completely (about 20 minutes).
- Final Chill and Serve: Place the decorated truffles back in the fridge for 10 minutes to set the paint and coating before serving.
Pro tips: If your chocolate starts to thicken, gently rewarm it but avoid overheating. When shaping, if the mixture feels too soft, chill it longer. The texture should be firm enough to hold shape but still smooth inside. I like to assemble the caps on a cooling rack to avoid smudges.
Cooking Tips & Techniques
Making Perfect Graduation Cap Oreo Truffles is more than just mixing and dipping—here are some lessons I’ve picked up along the way:
- Get the Right Oreo Texture: Crushing the Oreos finely is key. Large chunks can make the truffles crumble or uneven. I always pulse in short bursts in the food processor to avoid powdery crumbs.
- Softened Cream Cheese is a Must: Cold cream cheese makes mixing a nightmare. Let it sit out for at least 30 minutes or zap it for 10 seconds in the microwave if you’re in a hurry.
- Chilling Time is Essential: Don’t skip chilling before dipping. It helps the truffles hold their shape and prevents cracking during chocolate coating.
- Use a Cooling Rack for Draining: After dipping, place truffles on a cooling rack over parchment paper to catch drips. This prevents pooling and keeps the coating smooth.
- Edible Gold Paint Application: Use a fine brush and steady hand. If you’re nervous, practice on parchment paper first. The gold paint dries fast but be gentle when handling painted truffles to avoid smudging.
- Storage Tip: Store truffles in a single layer in an airtight container in the fridge to keep them fresh and prevent smudging the gold tassels.
Honestly, the first time I made these, I rushed the chocolate melting step and ended up with clumpy coating. Now, I always take my time, and it makes all the difference in smooth, glossy shells. It’s little things like that that make these truffles feel truly special.
Variations & Adaptations
Want to switch things up or cater to different dietary needs? Here are some ideas I’ve tried and loved:
- Flavor Twists: Add a teaspoon of espresso powder to the Oreo mixture for a mocha kick. Or mix in a handful of mini chocolate chips for extra texture.
- Dietary Swaps: Use gluten-free sandwich cookies to make the truffles gluten-free. Vegan cream cheese and dairy-free chocolate melts can make this treat fully plant-based.
- Alternative Decorations: Instead of fondant caps, try shaping the caps from dark chocolate squares or royal icing. You can also swap the gold tassel for silver or school colors using colored edible dust.
- Seasonal Adaptations: For spring or summer graduations, add edible flower petals or pastel sprinkles for a fresh look.
One of my favorite variations was adding a hint of peppermint extract during the holidays—it gave the truffles a festive twist without sacrificing that signature Oreo creaminess. Feel free to experiment with what fits your celebration best!
Serving & Storage Suggestions
These truffles are best served slightly chilled or at room temperature. Chilling keeps the truffles firm, but letting them sit for 10 minutes before serving softens the cream cheese filling just right.
For presentation, line them up on a decorative platter or place in mini cupcake liners for an elegant touch. Pairing them with other finger foods, like the creamy buffalo chicken dip or crispy Caesar salad, can round out your graduation party spread beautifully.
Store leftovers in an airtight container in the refrigerator for up to 5 days. If you want to keep them longer, freeze the truffles on a baking sheet first, then transfer them to a freezer-safe container. Thaw in the fridge overnight before serving.
Flavors tend to meld and deepen after a day or two in the fridge, making these truffles even more indulgent with time.
Nutritional Information & Benefits
Each Perfect Graduation Cap Oreo Truffle contains approximately:
| Calories | 90-110 |
|---|---|
| Fat | 6-7 g |
| Carbohydrates | 10-12 g |
| Protein | 1 g |
This treat is an indulgence, but the addition of cream cheese adds a bit of protein and calcium. Using quality dark chocolate can also provide antioxidants. For those mindful of allergens, note that Oreos contain wheat and soy, and the recipe includes dairy unless substituted.
Personally, I see these truffles as a fun celebration treat—perfect for marking milestones while keeping portion sizes reasonable. If you’re after a lighter option, try pairing a truffle with fresh fruit or a cup of unsweetened tea to balance the sweetness.
Conclusion
These Perfect Graduation Cap Oreo Truffles with Gold Tassel are more than just a dessert—they’re a tiny celebration in every bite. Whether you’re hosting a big party or just want to surprise your graduate with a homemade treat, they bring joy without the stress. I love how making them feels like crafting a sweet keepsake, and every time I see that shiny gold tassel, it reminds me of accomplishment and pride.
Feel free to tweak the decorations or ingredients to match your tastes or theme. And hey, if you try these out, let me know how they turned out or what fun variations you came up with. Making memories with food is what it’s all about.
Happy celebrating!
FAQs
Can I make these Oreo truffles ahead of time?
Absolutely! You can make them up to 2 days in advance and keep them refrigerated. Just add the gold tassel decoration right before serving for the best look.
What if I don’t have edible gold paint?
You can use gold-colored sprinkles or edible gold dust mixed with a little clear vanilla extract as a substitute. Even a gold edible marker works for drawing tassels.
How do I prevent the chocolate coating from cracking?
Make sure the truffles are fully chilled before dipping and avoid rapid temperature changes. Also, melt the chocolate gently and dip quickly to create a smooth shell.
Can I use another type of cookie instead of Oreos?
Yes, chocolate wafer cookies or sandwich cookies with similar flavor and texture work well. Just crush them finely like the Oreos.
Are these truffles gluten-free?
Traditional Oreos contain wheat, so no. But you can use gluten-free sandwich cookies to make the recipe safe for gluten-free diets.
Pin This Recipe!
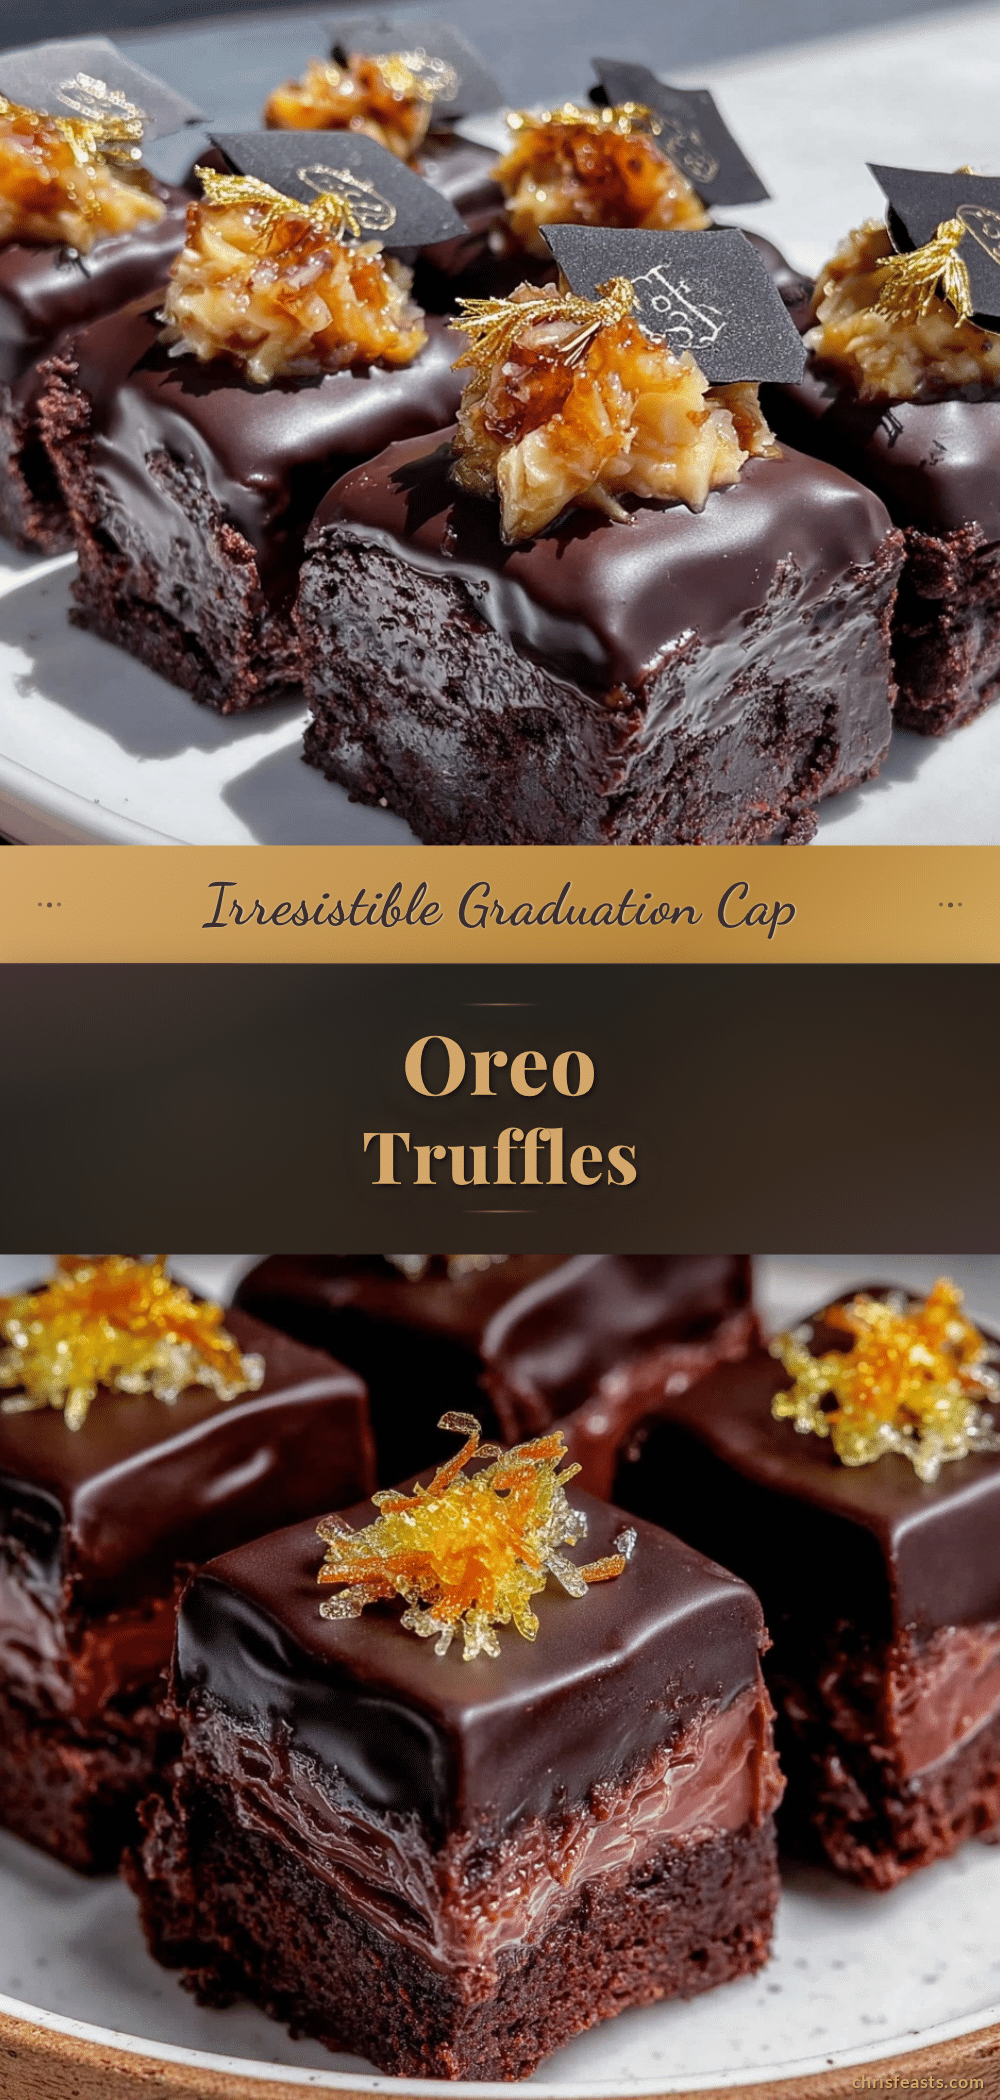
Perfect Graduation Cap Oreo Truffles Easy Homemade Gold Tassel Treats

These Oreo truffles are a quick and easy homemade treat perfect for graduation parties, featuring a creamy Oreo and cream cheese filling coated in chocolate and decorated with a gold tassel.
- Prep Time: 15 minutes
- Cook Time: 30 minutes
- Total Time: 45 minutes
- Yield: 36 truffles 1x
- Category: Dessert
- Cuisine: American
Ingredients
- 36 Oreos (1 package), crushed finely
- 8 oz (225 g) cream cheese, softened to room temperature
- 12 oz (340 g) chocolate melts or candy coating (semi-sweet or dark chocolate)
- Gold edible paint or luster dust
- Black fondant or modeling chocolate (optional)
- Toothpicks or small paintbrush for applying gold tassel
- Black or gold sugar crystals (optional sprinkles)
Instructions
- Crush the Oreos in a food processor until fine and uniform, or place in a sealed plastic bag and crush with a rolling pin until sandy texture without large chunks.
- Transfer Oreo crumbs to a large bowl and add softened cream cheese. Mix until fully combined and moist but holds together well (3-5 minutes).
- Scoop about 1 tablespoon (15 g) of mixture and roll into tight balls. Place on parchment-lined baking sheet and chill in fridge for at least 30 minutes.
- Melt chocolate in microwave in 20-second bursts or over a double boiler until smooth. Keep warm but not hot.
- Dip chilled truffles into melted chocolate using a fork or dipping tool. Let excess drip off and place back on parchment paper. Work quickly before chocolate hardens.
- Create flat square caps (~1.5 inches / 4 cm) on top of each truffle using black fondant or modeling chocolate, pressing gently to stick.
- Paint gold tassel detail on each cap using a fine paintbrush or toothpick dipped in edible gold paint or luster dust mixed with a tiny bit of clear vanilla extract. Let dry completely (~20 minutes).
- Place decorated truffles back in fridge for 10 minutes to set paint and coating before serving.
Notes
Use softened cream cheese for best mixing. Chill truffles before dipping to prevent cracking. Use a cooling rack to drain excess chocolate for smooth coating. Store in airtight container in fridge up to 5 days or freeze for longer storage. For vegan or gluten-free versions, substitute ingredients accordingly. Practice painting tassels on parchment paper first to avoid smudging.
Nutrition
- Serving Size: 1 truffle
- Calories: 90110
- Fat: 67
- Carbohydrates: 1012
- Protein: 1
Keywords: Oreo truffles, graduation treats, easy dessert, homemade truffles, gold tassel, party snacks, chocolate truffles


