“You won’t believe how these tiny sandwiches stole the spotlight at my cousin’s graduation party,” my friend Jenna whispered as she handed me a plate stacked high with perfectly cut little bites. It was a warm Saturday afternoon, and the backyard buzzed with laughter, clinking glasses, and the occasional pop of a champagne cork. Honestly, I hadn’t expected much from finger sandwiches—just the usual dull, dry bread with some bland filling. But those sandwiches? They were something else. The way the soft bread cradled the fresh, flavorful fillings was downright addictive.
That day, I learned that easy finger sandwiches could transform a simple gathering into a vibrant celebration. I remember fumbling with the knife, accidentally squishing a sandwich mid-cut, while my niece giggled nearby. It was chaotic, sure, but those little bites were worth every crumb on the floor. Maybe you’ve been there—scrambling for last-minute party food that looks impressive without the fuss. Well, this recipe is exactly that kind of lifesaver.
Since then, easy finger sandwiches have become my go-to for celebrations, especially graduations. They’re light, fresh, and inviting—perfect for mingling guests who want to nibble while catching up. And honestly, who can resist those dainty, colorful stacks packed with flavors? These sandwiches aren’t just food; they’re conversation starters, nostalgia triggers, and crowd-pleasers all in one.
Why You’ll Love This Recipe
After testing dozens of finger sandwich ideas, I can confidently say this easy finger sandwiches recipe is a winner. Here’s why it keeps making repeat appearances at my parties:
- Quick & Easy: You can whip these up in under 30 minutes, which is perfect when you’re juggling last-minute party prep.
- Simple Ingredients: No need for fancy or hard-to-find items. Most are pantry and fridge staples.
- Perfect for Graduation Parties: Light, fresh, and elegant—it fits the celebratory vibe without weighing down your guests.
- Crowd-Pleaser: These sandwiches always disappear fast, loved by kids and adults alike.
- Unbelievably Delicious: The balance of creamy, crunchy, and herby elements makes every bite memorable.
What sets this recipe apart is the little tweaks I’ve added over time: a hint of lemon zest in the cream cheese spread, the use of fresh herbs from my own garden, and a gentle toast to the bread for just a whisper of crunch. It’s not just another finger sandwich recipe—it’s the one that makes you pause, smile, and say, “Wow, these are good!”
Whether you’re hosting a casual backyard party or an elegant indoor gathering, these sandwiches bring a sense of ease and charm to the table. I mean, who doesn’t want simple food that feels special? Give it a try, and you might find yourself making these little bites a regular party essential.
What Ingredients You Will Need
This easy finger sandwiches recipe uses straightforward ingredients that come together to deliver freshness and flavor without fuss. Most are pantry staples or easily sourced from your local market.
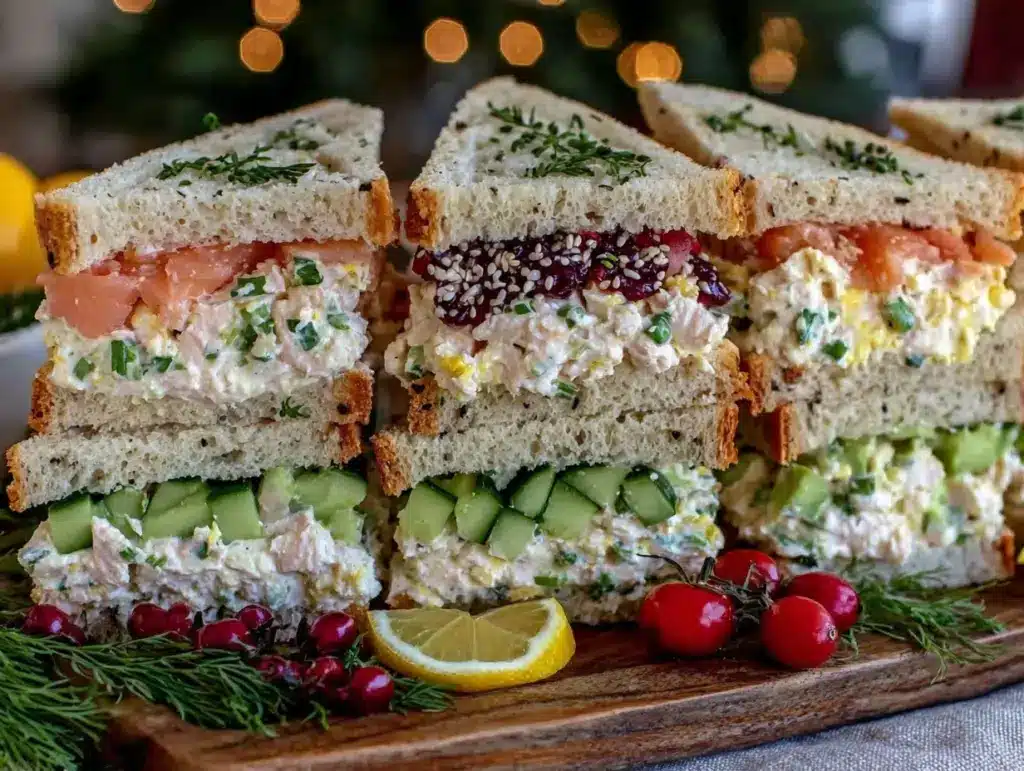
- White Sandwich Bread – crusts removed for that classic soft texture (I prefer Arnold’s for its sturdy yet tender crumb)
- Whole Wheat Sandwich Bread – optional for variety and a nuttier flavor
- Cream Cheese, softened – the base spread that adds richness and smoothness
- Fresh Dill, finely chopped – adds a bright, herbal note
- Thinly Sliced Cucumber – peeled for gentle crunch and subtle freshness
- Smoked Salmon – adds a savory, smoky depth (substitute with turkey slices for a milder option)
- Hard-Boiled Eggs, sliced thin – a creamy, protein-rich filling
- Mayonnaise – mixed with mustard for a tangy kick in the egg filling
- Honey Mustard – just a teaspoon for a slight sweetness in the mayo mixture
- Fresh Chives, chopped – for garnish and subtle onion flavor
- Salt and Pepper – to taste, enhancing the flavors
If you want to swap ingredients, you can use gluten-free bread or dairy-free cream cheese to accommodate dietary needs. In summer, adding thinly sliced radishes or fresh mint can lift the flavors even more. I once made a batch with avocado spread instead of cream cheese for a creamier texture—totally delicious!
Equipment Needed
- Sharp Serrated Knife – essential for clean, even sandwich cuts without squashing the bread. I’ve tried using a regular chef’s knife but it tends to tear the bread.
- Cutting Board – a sturdy surface helps with precision and safety.
- Mixing Bowl – for combining egg filling and spreads.
- Spoon or Small Spatula – to spread cream cheese evenly.
- Egg Slicer (optional) – speeds up slicing and makes uniform egg pieces.
- Measuring Spoons – for consistent seasoning.
If you don’t have an egg slicer, a small sharp knife works fine—just takes a bit more patience. For budget-friendly options, any basic kitchen knife with a serrated edge will do wonders here. Keeping your knife sharp is key; dull blades are the enemy of neat finger sandwiches (trust me, I’ve learned the hard way).
Preparation Method

- Prepare the Egg Filling: Peel and slice 4 hard-boiled eggs. In a bowl, combine the eggs with 2 tablespoons of mayonnaise, 1 teaspoon honey mustard, salt, and pepper to taste. Mix gently until well combined but still slightly chunky. (About 5 minutes)
- Mix the Herb Cream Cheese Spread: In a separate small bowl, stir 8 ounces (225 grams) of softened cream cheese with 2 tablespoons of finely chopped fresh dill and a pinch of salt. This will be your base spread for cucumber sandwiches. (3 minutes)
- Prepare the Bread: Lay out your white and whole wheat sandwich bread slices on a clean cutting board. Remove the crusts carefully with a sharp knife. (5 minutes) Tip: Keep the bread covered with a damp towel to prevent drying while you work.
- Assemble Cucumber & Dill Sandwiches: Spread a thin, even layer of the herb cream cheese on one slice of bread. Layer thin cucumber slices evenly over the spread. Top with another slice of bread, pressing gently but firmly. (5 minutes)
- Assemble Smoked Salmon Sandwiches: Spread plain cream cheese on a slice of bread. Layer smoked salmon evenly on top, then sprinkle with fresh chives. Cover with another slice of bread. (5 minutes)
- Assemble Egg Salad Sandwiches: Spread the egg mixture evenly on one slice of bread, then top with another slice. (5 minutes)
- Cut the Sandwiches: Using your serrated knife, cut each sandwich into triangles or finger-sized rectangles. Aim for uniform sizes so they look neat and inviting on the platter. (10 minutes) Careful not to compress the fillings; a gentle sawing motion works best.
- Plate and Garnish: Arrange the sandwiches on a serving tray, mixing the varieties for a colorful presentation. Garnish with sprigs of dill or chives for a fresh look. (5 minutes)
Quick tip: If you have time, chill the sandwiches for 30 minutes before serving so the flavors marry and the bread firms slightly. Just cover tightly with plastic wrap to keep them fresh.
Cooking Tips & Techniques
Making easy finger sandwiches might sound simple, but there are a few tricks that make all the difference. First, always use a serrated knife. It’s amazing how much neater your sandwiches look when the bread isn’t squished or torn. I learned this after a disastrous attempt that left me with a pile of sad, squashed bread.
Don’t overstuff your sandwiches. Too much filling can make them soggy and hard to eat. A thin, even layer is key. When spreading cream cheese or mayo, use a small spatula or the back of a spoon to avoid ripping the bread.
For the cucumber sandwiches, peeling the cucumber prevents excess moisture from soaking into the bread. Also, pat the slices dry if they seem watery—this little step keeps your sandwiches fresh and firm.
Timing matters too. Assemble close to serving time to keep the bread from drying out. If you must prepare them early, wrap tightly in plastic wrap and refrigerate. Just remember to remove from the fridge about 10 minutes before serving so they’re not too cold to enjoy.
Lastly, don’t stress about perfect shapes. I once had a kid accidentally smash half the tray, but those sandwiches vanished just as fast! Imperfection can be charming when the flavors do the talking.
Variations & Adaptations
Want to switch things up? Here are some ideas to customize your easy finger sandwiches:
- Vegetarian Option: Swap smoked salmon for thinly sliced roasted red peppers or marinated artichoke hearts. Add a sprinkle of feta for extra tang.
- Gluten-Free Version: Use gluten-free sandwich bread or crispbread for a crunchy twist. Just be mindful of the bread’s sturdiness when slicing.
- Spicy Kick: Add a dash of hot sauce or a sprinkle of cayenne to the egg salad spread for a subtle heat that wakes up the palate.
- Seasonal Freshness: In warmer months, add fresh mint or basil to the cucumber sandwiches for an herbaceous lift.
- Dairy-Free Twist: Use dairy-free cream cheese alternatives like almond or cashew-based spreads to accommodate allergies or preferences.
Once, I tried a curry-spiced egg salad with mango chutney—it was a wild experiment but ended up being a hit at a friend’s brunch. Feel free to get creative and make this recipe your own!
Serving & Storage Suggestions
Serve these easy finger sandwiches chilled or at room temperature for the best taste. I like arranging them on a large platter with fresh herbs scattered around for a pretty presentation that invites guests to help themselves.
Pair them with light sides like a crisp green salad, chilled fruit salad, or sparkling lemonade for a refreshing combo. For a grown-up crowd, a dry white wine or a crisp rosé complements the delicate flavors beautifully.
Store leftover sandwiches in an airtight container in the refrigerator for up to 24 hours. Avoid making them too far ahead, as the bread can become soggy over time. To reheat, it’s best to enjoy them cold or bring them to room temperature—they’re not suited for warming.
Interestingly, the flavors often deepen after a few hours, especially the dill and cucumber combo. So, if you prepare them a bit early, you might find the taste even better once they’ve rested.
Nutritional Information & Benefits
These easy finger sandwiches offer a nice balance of protein, healthy fats, and carbs. Each sandwich contains approximately 150-180 calories, depending on the filling.
Key benefits include:
- Protein: Eggs and smoked salmon provide a good source of quality protein.
- Healthy Fats: Cream cheese and salmon contribute beneficial fats that support satiety.
- Vitamins & Minerals: Fresh herbs and cucumber add antioxidants and hydration.
This recipe can be adapted for gluten-free or dairy-free diets, making it a friendly option for many guests. Plus, it’s a lighter alternative to heavy party fare, so you can enjoy the celebration without feeling weighed down.
Conclusion
Easy finger sandwiches are a simple yet delightful addition to any fresh graduation party spread. They bring together fresh ingredients, bright flavors, and a touch of elegance without the stress. I love how they invite conversation and casual nibbling, making the event feel warm and welcoming.
Feel free to adjust the fillings to suit your taste or dietary needs—this recipe is a flexible canvas. I encourage you to try it out, maybe with a twist or two, and watch how these little sandwiches become a highlight of your celebration.
Don’t forget to share your own versions or questions—I’d love to hear how your party goes! Remember, great food doesn’t have to be complicated, and sometimes the easiest recipes make the best memories.
FAQs
Can I make these finger sandwiches in advance?
Yes, you can prepare them a few hours ahead and store them in the refrigerator wrapped tightly. Just avoid making them more than a day before serving to prevent soggy bread.
What’s the best bread to use for finger sandwiches?
Soft sandwich breads like white or whole wheat with the crusts removed work best. You want bread that’s tender but sturdy enough to hold the fillings.
How do I keep cucumber sandwiches from getting soggy?
Peel and thinly slice cucumbers, then pat dry with a paper towel before assembling. This reduces moisture that can soak into the bread.
Can I freeze finger sandwiches?
It’s not recommended to freeze because the bread usually becomes soggy when thawed. They’re best fresh or refrigerated for short-term storage.
What can I use instead of smoked salmon?
Try thin slices of turkey, chicken, or roasted veggies like bell peppers for a different but tasty alternative.
Pin This Recipe!
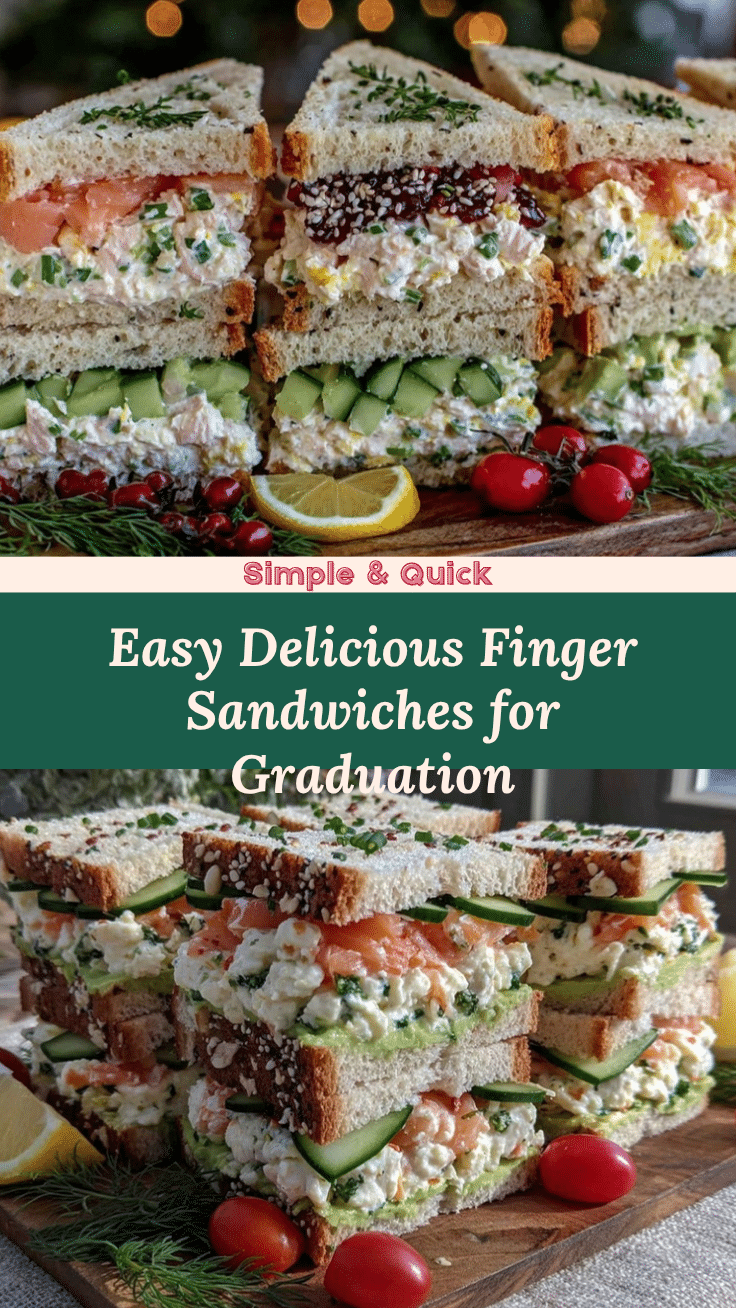
Easy Finger Sandwiches Recipe for the Best Fresh Graduation Party Spread

These easy finger sandwiches are light, fresh, and perfect for graduation parties or any celebration. Featuring simple ingredients and quick assembly, they offer a delicious balance of creamy, crunchy, and herby flavors.
- Prep Time: 20 minutes
- Cook Time: 0 minutes
- Total Time: 30 minutes
- Yield: 24 finger sandwiches 1x
- Category: Appetizer
- Cuisine: American
Ingredients
- White sandwich bread, crusts removed
- Whole wheat sandwich bread, crusts removed (optional)
- 8 ounces softened cream cheese
- 2 tablespoons finely chopped fresh dill
- Thinly sliced cucumber, peeled
- Smoked salmon (or turkey slices as substitute)
- 4 hard-boiled eggs, sliced thin
- 2 tablespoons mayonnaise
- 1 teaspoon honey mustard
- Fresh chives, chopped
- Salt and pepper to taste
Instructions
- Prepare the egg filling: Peel and slice 4 hard-boiled eggs. In a bowl, combine the eggs with 2 tablespoons of mayonnaise, 1 teaspoon honey mustard, salt, and pepper to taste. Mix gently until well combined but still slightly chunky. (About 5 minutes)
- Mix the herb cream cheese spread: In a separate small bowl, stir 8 ounces of softened cream cheese with 2 tablespoons of finely chopped fresh dill and a pinch of salt. (3 minutes)
- Prepare the bread: Lay out white and whole wheat sandwich bread slices on a cutting board. Remove the crusts carefully with a sharp serrated knife. Keep the bread covered with a damp towel to prevent drying. (5 minutes)
- Assemble cucumber & dill sandwiches: Spread a thin, even layer of the herb cream cheese on one slice of bread. Layer thin cucumber slices evenly over the spread. Top with another slice of bread, pressing gently but firmly. (5 minutes)
- Assemble smoked salmon sandwiches: Spread plain cream cheese on a slice of bread. Layer smoked salmon evenly on top, then sprinkle with fresh chives. Cover with another slice of bread. (5 minutes)
- Assemble egg salad sandwiches: Spread the egg mixture evenly on one slice of bread, then top with another slice. (5 minutes)
- Cut the sandwiches: Using a serrated knife, cut each sandwich into triangles or finger-sized rectangles. Aim for uniform sizes so they look neat and inviting. Use a gentle sawing motion to avoid compressing the fillings. (10 minutes)
- Plate and garnish: Arrange the sandwiches on a serving tray, mixing the varieties for a colorful presentation. Garnish with sprigs of dill or chives. (5 minutes)
- Optional: Chill the sandwiches for 30 minutes before serving to let flavors marry and bread firm slightly. Cover tightly with plastic wrap.
Notes
Use a serrated knife to avoid squishing the bread. Peel and pat dry cucumbers to prevent soggy sandwiches. Assemble close to serving time or refrigerate tightly wrapped and remove from fridge 10 minutes before serving. Variations include vegetarian, gluten-free, dairy-free, and spicy options.
Nutrition
- Serving Size: 1 finger sandwich
- Calories: 150180
- Sugar: 2
- Sodium: 220
- Fat: 10
- Saturated Fat: 4
- Carbohydrates: 12
- Fiber: 1
- Protein: 6
Keywords: finger sandwiches, graduation party food, easy appetizers, smoked salmon sandwiches, egg salad sandwiches, cucumber sandwiches, party finger foods


