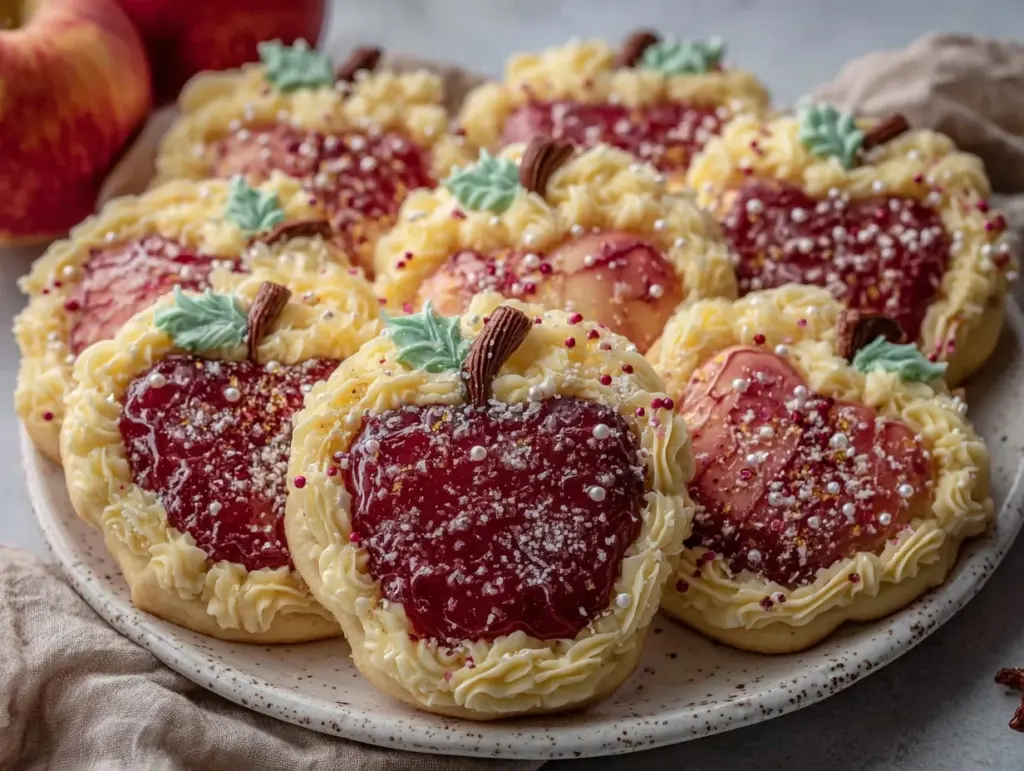
“You wouldn’t believe it,” my neighbor chuckled, handing me a slightly crumpled recipe card taped on the back of an old grocery list. It was her grandmother’s secret for apple shaped sugar cookies with royal icing, and honestly, I wasn’t expecting much beyond a sweet treat. But as I rolled out that dough in my tiny kitchen last Saturday afternoon—while my cat decided the flour was his new playground—I realized these cookies were something special. The crisp edges, the soft crumb, and that smooth, glossy icing? It took me right back to the corner bakery I used to visit as a kid.
Maybe you’ve been there, standing in the kitchen wondering if you can pull off those perfect decorated cookies you see on Pinterest. Well, this recipe isn’t just about making a cookie; it’s about capturing a little bit of magic and nostalgia in every bite. I forgot the cinnamon the first time, made a mess with the icing, and almost gave up halfway through. But those apple shaped sugar cookies with royal icing turned out to be one of my favorite weekend projects—and a crowd favorite at my book club, too.
Let me tell you, these cookies don’t just look adorable—they taste like the kind of treat that makes you close your eyes and smile. And the best part? You don’t have to be a pro baker to get them right. So if you’ve got a sweet tooth and a bit of patience, this easy step-by-step guide will have you baking perfect apple shaped sugar cookies with royal icing that everyone will love.
Why You’ll Love This Recipe
Honestly, these apple shaped sugar cookies with royal icing have been tested, tweaked, and approved through many kitchen experiments (and a few friendly taste tests). Here’s why this recipe stands out:
- Quick & Easy: Comes together in under 2 hours, including baking and decorating, making it great for last-minute parties or cozy afternoons.
- Simple Ingredients: No need for specialty shops—most items are pantry staples you probably already have on hand.
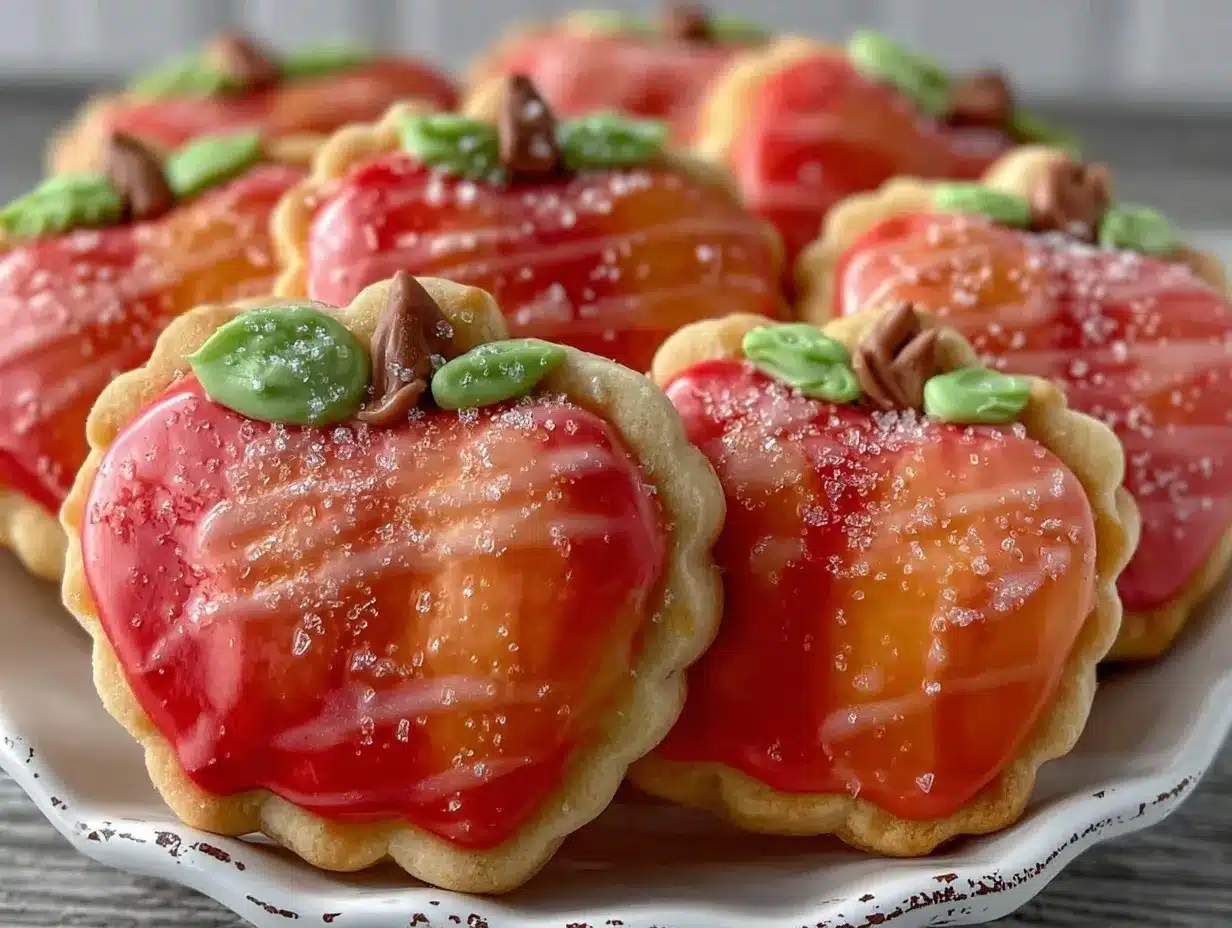
- Perfect for Gifting: With their charming apple shape and bright icing, these cookies make a delightful gift or party favor.
- Crowd-Pleaser: Kids and adults alike rave about the tender texture combined with the sweet, smooth royal icing.
- Unbelievably Delicious: The buttery cookie base paired with a perfectly balanced sweet icing creates a flavor combo that’s pure comfort.
What really makes this recipe different? It’s the attention to texture—you know how some sugar cookies can be either too hard or just meh? This one strikes the perfect balance, thanks to the right ratio of butter and sugar. The royal icing recipe is just the right consistency for detailed decorating without cracking or getting too sticky. So whether you’re making these for a teacher’s gift, a fall-themed party, or just because you love a good cookie, you’ll find these apple shaped sugar cookies with royal icing hard to beat.
What Ingredients You Will Need
This recipe uses simple, wholesome ingredients to deliver bold flavor and a satisfying texture without any fuss. Most are pantry staples, but quality counts here—so choose the best you can find!
- For the Sugar Cookie Dough:
- 2 ¾ cups (345g) all-purpose flour, sifted (I prefer King Arthur for consistent texture)
- 1 teaspoon baking powder
- ½ teaspoon salt
- 1 cup (226g) unsalted butter, softened (room temperature but not melted)
- 1 ½ cups (300g) granulated sugar
- 1 large egg, at room temperature
- 1 teaspoon pure vanilla extract
- 2 tablespoons whole milk (adds tenderness)
- For the Royal Icing:
- 4 cups (480g) powdered sugar, sifted (to avoid lumps)
- 3 tablespoons meringue powder
- 5–6 tablespoons warm water
- Gel food coloring (red, green, and brown for apple details)
- Optional: ½ teaspoon vanilla or almond extract for flavor
Ingredient tips: Look for firm and fresh butter—older butter can affect the dough’s texture. I use meringue powder instead of egg whites for safety and stability. If you want to swap all-purpose flour for a gluten-free blend, make sure it’s one designed for baking cookies.
Equipment Needed
- Mixing bowls (at least two, one for dough, one for icing)
- Electric mixer (stand or hand mixer works fine)
- Rolling pin (a smooth wooden one or silicone-coated for easy rolling)
- Apple-shaped cookie cutters (various sizes if you want variety)
- Baking sheets lined with parchment paper or silicone baking mats
- Cooling racks (to let cookies cool evenly)
- Piping bags and small round piping tips (sizes 1 or 2) for icing details
- Toothpicks or scribe tools (for smoothing icing and fixing mistakes)
If you don’t have apple-shaped cutters, a sharp knife and a printed template work just as well—I’ve done it more than once in a pinch! Parchment paper is a great budget-friendly alternative to silicone mats, and I always recommend using a stand mixer if you have one—it makes the dough come together faster and easier.
Preparation Method
- Mix Dry Ingredients: In a medium bowl, whisk together 2 ¾ cups flour, 1 teaspoon baking powder, and ½ teaspoon salt. Set aside. (This takes about 5 minutes.)
- Cream Butter and Sugar: In a large bowl, beat 1 cup softened unsalted butter and 1 ½ cups granulated sugar with an electric mixer on medium speed until fluffy and light—about 3-4 minutes. The mixture should look pale and smooth.
- Add Egg and Vanilla: Beat in 1 large egg and 1 teaspoon vanilla extract until fully combined, scraping down the bowl as needed.
- Combine Wet and Dry: Gradually add the flour mixture to the butter mixture in three additions, alternating with 2 tablespoons milk. Mix on low speed just until dough forms. Avoid overmixing to keep cookies tender.
- Chill the Dough: Divide dough into two discs, wrap in plastic wrap, and refrigerate for at least 1 hour (or up to overnight). Chilling firms the dough, making it easier to roll and cut.
- Preheat Oven: Set oven to 350°F (175°C). Line baking sheets with parchment paper.
- Roll and Cut: On a lightly floured surface, roll one disc of dough to about ¼-inch (6mm) thickness. Use apple-shaped cookie cutters to cut out shapes, transfer gently to prepared baking sheets.
- Bake: Bake for 8-10 minutes, until edges are just starting to turn golden. Keep a close eye—cookies can overbake quickly.
- Cool: Let cookies cool on the sheet for 5 minutes, then transfer to wire racks to cool completely before icing.
- Prepare Royal Icing: In a clean bowl, combine 4 cups sifted powdered sugar and 3 tablespoons meringue powder. Add 5 tablespoons warm water and beat on high for 5-7 minutes until stiff peaks form. Adjust water by teaspoon if needed for desired consistency.
- Color the Icing: Divide icing into small bowls and tint with gel food coloring—red for apples, green for leaves, brown for stems.
- Decorate: Use piping bags fitted with small round tips to outline and flood the cookies. Start with the base red, then add leaf and stem details once dry. Use toothpicks to smooth edges and fix mistakes.
- Dry Completely: Allow decorated cookies to dry at room temperature for at least 4 hours or overnight for best results.
Pro tip: If your icing is too runny, add a little more powdered sugar. Too thick? Add a tiny bit of water, but add slowly. Patience here pays off. Also, don’t rush decorating or your icing can crack or bleed. And hey, I once spilled a whole bowl of icing at step 11—so keep a damp cloth handy!
Cooking Tips & Techniques
Royal icing can be intimidating, but here are a few things I’ve learned that make a huge difference:
- Consistency Matters: For outlining, you want a thicker icing that holds its shape. For flooding (filling in), thin it slightly so it spreads smoothly but doesn’t run off the cookie.
- Use Gel Colors: Gel food coloring won’t change icing consistency like liquid colors can.
- Practice Piping: If you’re new, practice piping on parchment before decorating cookies to get a feel for pressure and flow.
- Don’t Skip Chilling: Chilling dough helps prevent cookies from spreading too much, keeping that perfect apple shape.
- Watch Baking Time: Cookies can go from soft to overdone in a blink. Pull them out when edges just start to turn golden.
One mistake I made early on was rushing drying time, which caused my icing to crack. Lesson learned: patience is key! Also, multitasking comes in handy—you can mix the dough while the oven preheats or prep icing while cookies bake. This keeps the flow smooth and the kitchen less chaotic.
Variations & Adaptations
Want to mix things up? Here are some fun ideas to put your own spin on these apple shaped sugar cookies with royal icing:
- Gluten-Free Option: Swap all-purpose flour with a 1:1 gluten-free baking blend. Add a little xanthan gum if your blend doesn’t include it.
- Flavor Twist: Add a teaspoon of cinnamon or apple pie spice to the cookie dough for a warm, seasonal note.
- Alternative Icing: If royal icing isn’t your thing, try cream cheese frosting piped on after cookies cool for a tangy contrast.
- Chocolate-Dipped: Dip half the cookie in melted dark or white chocolate after icing dries for extra indulgence.
Personally, I once added finely chopped dried cranberries to the dough for a festive touch that surprised everyone. It’s fun to experiment without straying too far from the original charm!
Serving & Storage Suggestions
These apple shaped sugar cookies with royal icing are best served at room temperature once the icing is fully set. Arrange them on a pretty platter or stack gently in a tin lined with parchment paper for gifting.
They pair wonderfully with a warm cup of apple cider, chai tea, or a simple glass of milk to balance the sweetness.
To store, keep cookies in an airtight container at room temperature for up to 5 days. If you want to keep them longer, you can freeze undecorated cookies wrapped well for up to 3 months. Decorated cookies freeze best after the icing has completely hardened—wrap individually to avoid damage.
Reheat gently in a low oven (about 300°F/150°C) for 5 minutes to refresh the texture, but honestly, they taste great straight from the container too! Over time, the flavors mellow and the cookie softens slightly, which some folks prefer.
Nutritional Information & Benefits
Each cookie (depending on size) roughly contains around 150-180 calories, with about 7 grams of fat and 20 grams of carbs. While these are definitely a treat, the recipe uses real butter and natural vanilla, avoiding artificial additives common in store-bought cookies.
The use of simple ingredients like eggs and butter provides a good source of protein and fat for sustained energy, while the powdered sugar in icing adds sweetness without complexity.
If you’re watching allergens, note that this recipe contains gluten, dairy, and eggs. For allergen-friendly swaps, consider gluten-free flour blends and dairy-free butter alternatives.
From a wellness perspective, I find baking these cookies a comforting activity that connects me to friends and family, which is just as nourishing as the ingredients themselves.
Conclusion
These apple shaped sugar cookies with royal icing are more than just a sweet snack—they’re a little project that brings joy to the kitchen and smiles to the table. Whether you’re a beginner or a seasoned baker, this recipe’s straightforward steps and approachable ingredients make it easy to get those picture-perfect cookies every time.
Feel free to tweak the colors, flavors, or icing styles to fit your mood or occasion. I love making these cookies because they remind me of lazy Sunday afternoons and sharing treats with neighbors—simple pleasures that mean the most.
If you try this recipe, I’d love to hear how it went! Drop a comment, share your decorating wins (or hilarious fails), and don’t forget to pass along the sweetness by sharing this guide with your fellow cookie lovers. Happy baking!
Frequently Asked Questions (FAQs)
How do I prevent my sugar cookies from spreading too much?
Make sure your dough is well chilled before rolling and cutting. Also, avoid over-mixing the dough and don’t use melted butter. Baking at 350°F (175°C) and watching the cookies closely helps maintain their shape.
Can I use regular egg whites instead of meringue powder in royal icing?
Yes, but fresh egg whites carry a risk of salmonella and can affect shelf life. Meringue powder is a safer and more stable alternative, especially if you want to store decorated cookies.
How long does royal icing take to dry?
Royal icing typically dries to the touch within 2 hours, but to fully harden (especially for stacking or packaging), allow 4-8 hours or overnight.
Can I make the dough ahead of time?
Absolutely! You can prepare the dough, wrap it tightly, and refrigerate for up to 2 days or freeze for up to 3 months. Thaw before rolling out.
What if I don’t have apple-shaped cookie cutters?
No worries! Print out an apple template, place it under parchment paper, and cut around it with a knife. It takes a bit more time but works just as well.
Pin This Recipe!
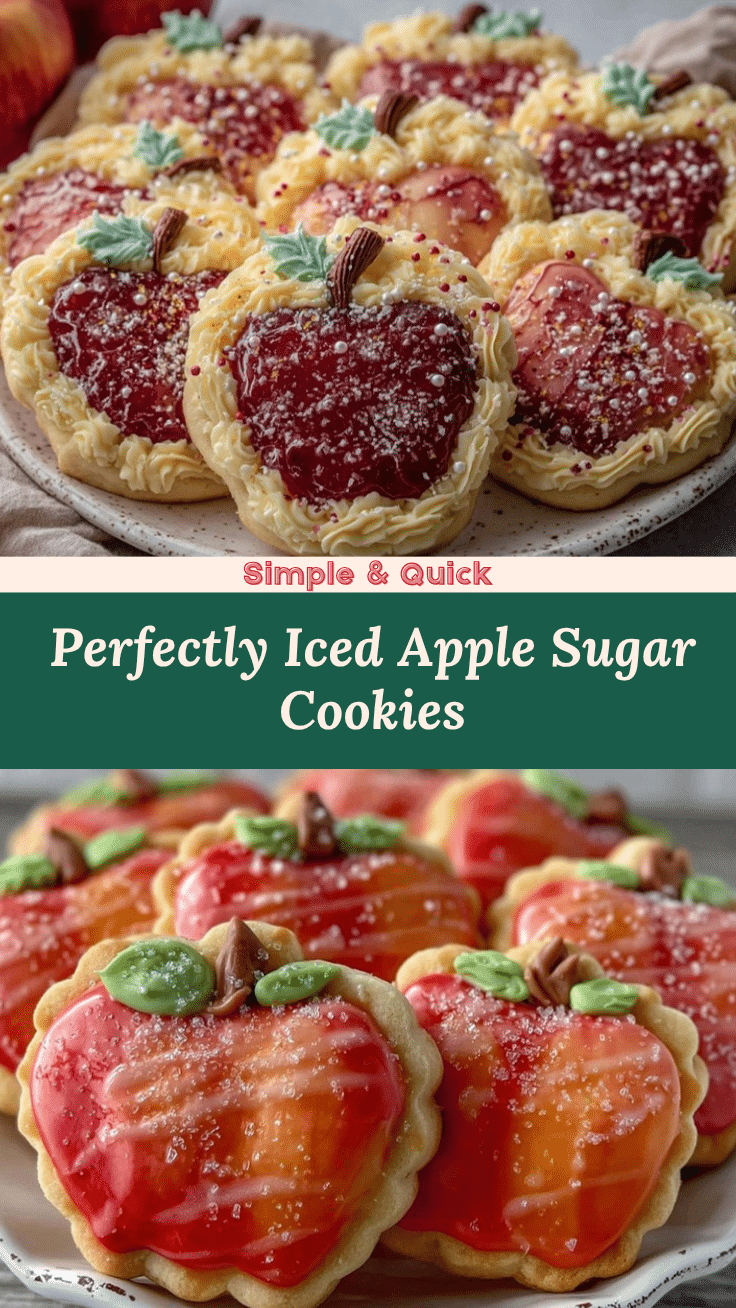
Perfect Apple Shaped Sugar Cookies Recipe Easy Step-by-Step Guide

These apple shaped sugar cookies with royal icing are a nostalgic, crowd-pleasing treat with a tender texture and smooth, glossy icing. Perfect for gifting, parties, or cozy afternoons, this easy recipe delivers charming, delicious cookies anyone can bake.
- Prep Time: 20 minutes
- Cook Time: 10 minutes
- Total Time: 1 hour 40 minutes
- Yield: 24 cookies 1x
- Category: Dessert
- Cuisine: American
Ingredients
- 2 ¾ cups (345g) all-purpose flour, sifted
- 1 teaspoon baking powder
- ½ teaspoon salt
- 1 cup (226g) unsalted butter, softened (room temperature but not melted)
- 1 ½ cups (300g) granulated sugar
- 1 large egg, at room temperature
- 1 teaspoon pure vanilla extract
- 2 tablespoons whole milk
- 4 cups (480g) powdered sugar, sifted
- 3 tablespoons meringue powder
- 5–6 tablespoons warm water
- Gel food coloring (red, green, and brown)
- Optional: ½ teaspoon vanilla or almond extract
Instructions
- Mix dry ingredients: whisk together flour, baking powder, and salt in a medium bowl; set aside.
- Cream butter and sugar: beat softened butter and granulated sugar with an electric mixer on medium speed until fluffy and light, about 3-4 minutes.
- Add egg and vanilla: beat in egg and vanilla extract until fully combined, scraping down the bowl as needed.
- Combine wet and dry: gradually add flour mixture to butter mixture in three additions, alternating with milk; mix on low speed just until dough forms, avoiding overmixing.
- Chill dough: divide dough into two discs, wrap in plastic wrap, and refrigerate for at least 1 hour or up to overnight.
- Preheat oven to 350°F (175°C) and line baking sheets with parchment paper.
- Roll and cut: roll one disc of dough on a lightly floured surface to about ¼-inch thickness; cut apple shapes with cookie cutters and transfer to baking sheets.
- Bake for 8-10 minutes until edges just start to turn golden; watch closely to avoid overbaking.
- Cool cookies on the sheet for 5 minutes, then transfer to wire racks to cool completely before icing.
- Prepare royal icing: combine powdered sugar and meringue powder in a clean bowl; add warm water and beat on high for 5-7 minutes until stiff peaks form; adjust water as needed for consistency.
- Color the icing: divide icing into small bowls and tint with gel food coloring (red for apples, green for leaves, brown for stems).
- Decorate: use piping bags with small round tips to outline and flood cookies; start with red base, then add leaf and stem details once dry; use toothpicks to smooth edges and fix mistakes.
- Dry completely: allow decorated cookies to dry at room temperature for at least 4 hours or overnight for best results.
Notes
Chill dough well to prevent spreading and maintain shape. Adjust royal icing consistency carefully for outlining and flooding. Use gel food coloring to avoid changing icing texture. Allow icing to dry fully (4+ hours or overnight) for best results. Practice piping on parchment before decorating. Store cookies in airtight container at room temperature up to 5 days or freeze undecorated dough up to 3 months.
Nutrition
- Serving Size: 1 cookie
- Calories: 165
- Sugar: 14
- Sodium: 90
- Fat: 7
- Saturated Fat: 4
- Carbohydrates: 20
- Protein: 2
Keywords: apple shaped sugar cookies, royal icing cookies, decorated sugar cookies, easy sugar cookies, holiday cookies, baking, cookie decorating


